Quick Start Guides for DAWs » QuickStart for DAWs using VST3 plugins » ARA Processing
- Instantiating RePitch Standard
- Adding RePitch to a Clip or Region
- Adding RePitch to a Track
- Removing RePitch
- User Interface
- Resizing the RePitch window
- Select a Scale
- Applying a Macro
- Snap Notes to Measured Scale
- How to choose Manual Editing
- Switching Macros
- Rendering Your Audio
Overview
In this Quick Start Guide, we will discuss a basic workflow for VST3 DAWs using the ARA version of RePitch Standard. This includes Studio One, Cubase and Nuendo, and Reaper.
To use this section, make sure that:
- Your DAW is up to date.
- Your version of RePitch is up to date.
- You DAW version is ARA compatible.
- This section assumes you already understand the basic functions of your DAW and it's user interface.
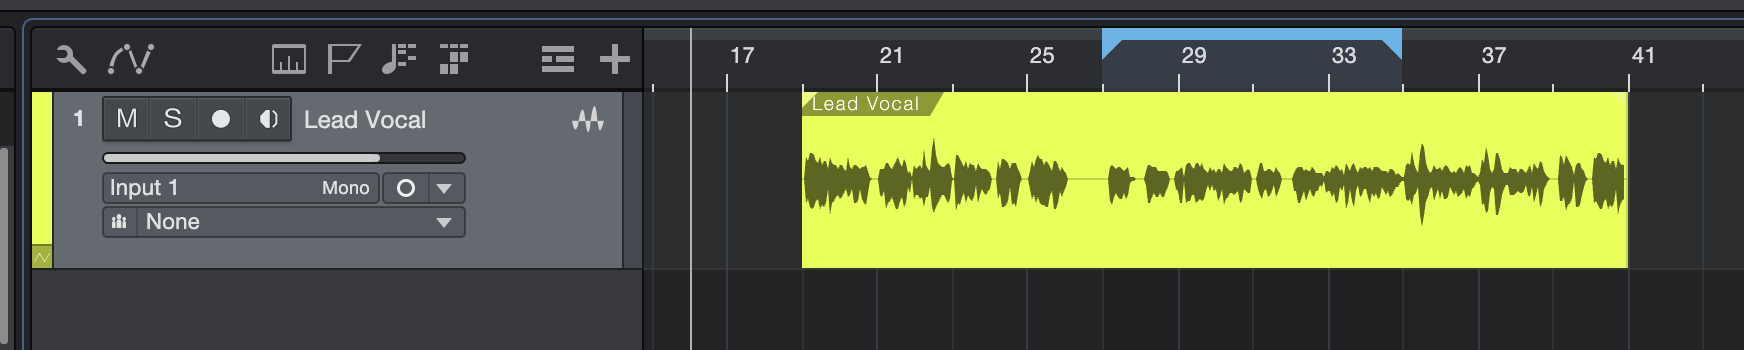
We will work with a generic track called 'Lead Vocal', but this workflow can be followed with any track in your DAW containing audio that you would like to process.
Instantiating RePitch Standard
When using RePitch as an ARA plugin, it will be available in the same way as any other ARA plugin in your DAW. Different DAWs integrate ARA plugins in slightly different ways, so we suggest searching your DAWs manual or website to understand how this works within your DAW.
When using the ARA version of RePitch, adding the plugin will automatically import and synchronise your audio so that it is immediately available for processing within RePitch.
Depending on your DAW, you can add RePitch to either an audio Clip or Region, or onto an entire Track. An overview of each method is provided below.
Adding RePitch to a Clip or Region
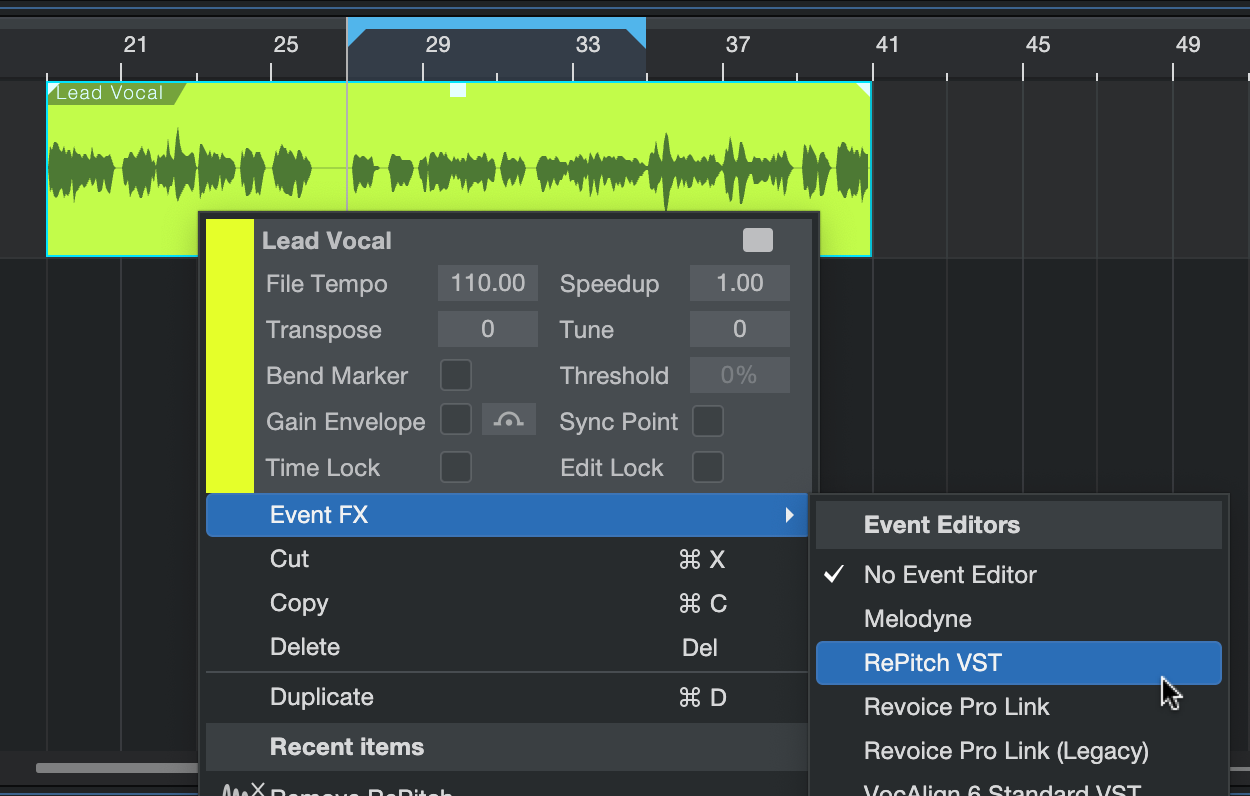
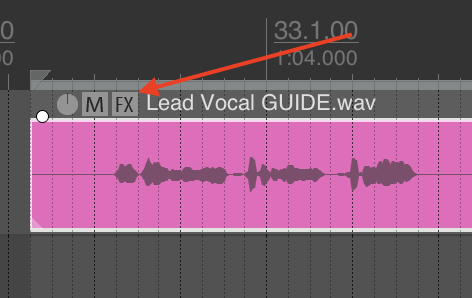
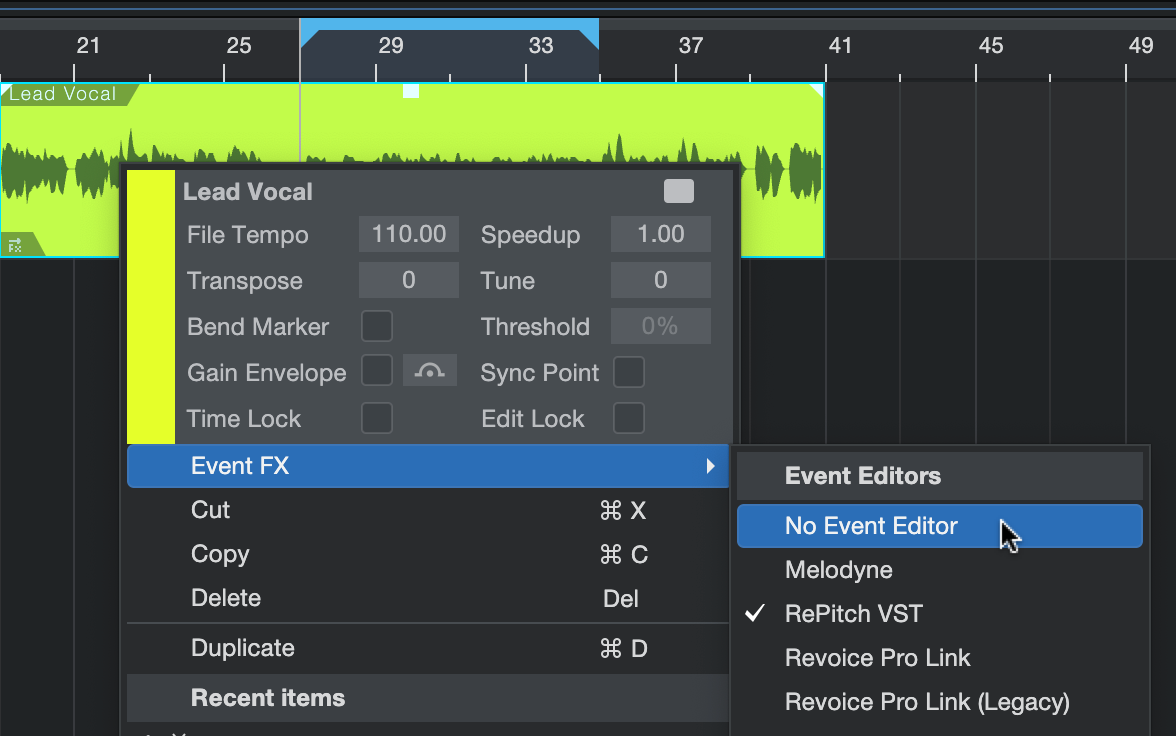
To add RePitch to a Clip or Region of audio, right-click or CTRL click the region you would like to work with and select the menu corresponding to ARA plugins in your DAW.
In Studio One, ARA plugins are added as 'Event FX'. For more information, see Studio One's documentation on Event FX.
'Event FX -> RePitch VST' from the menu that appears, as shown below.
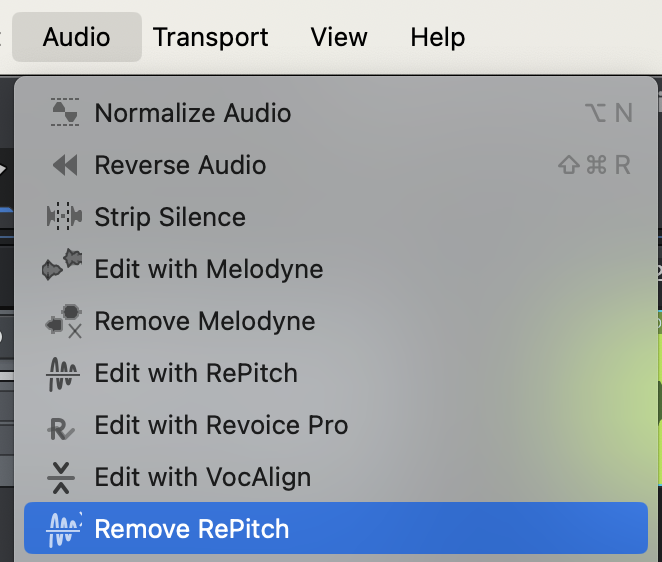
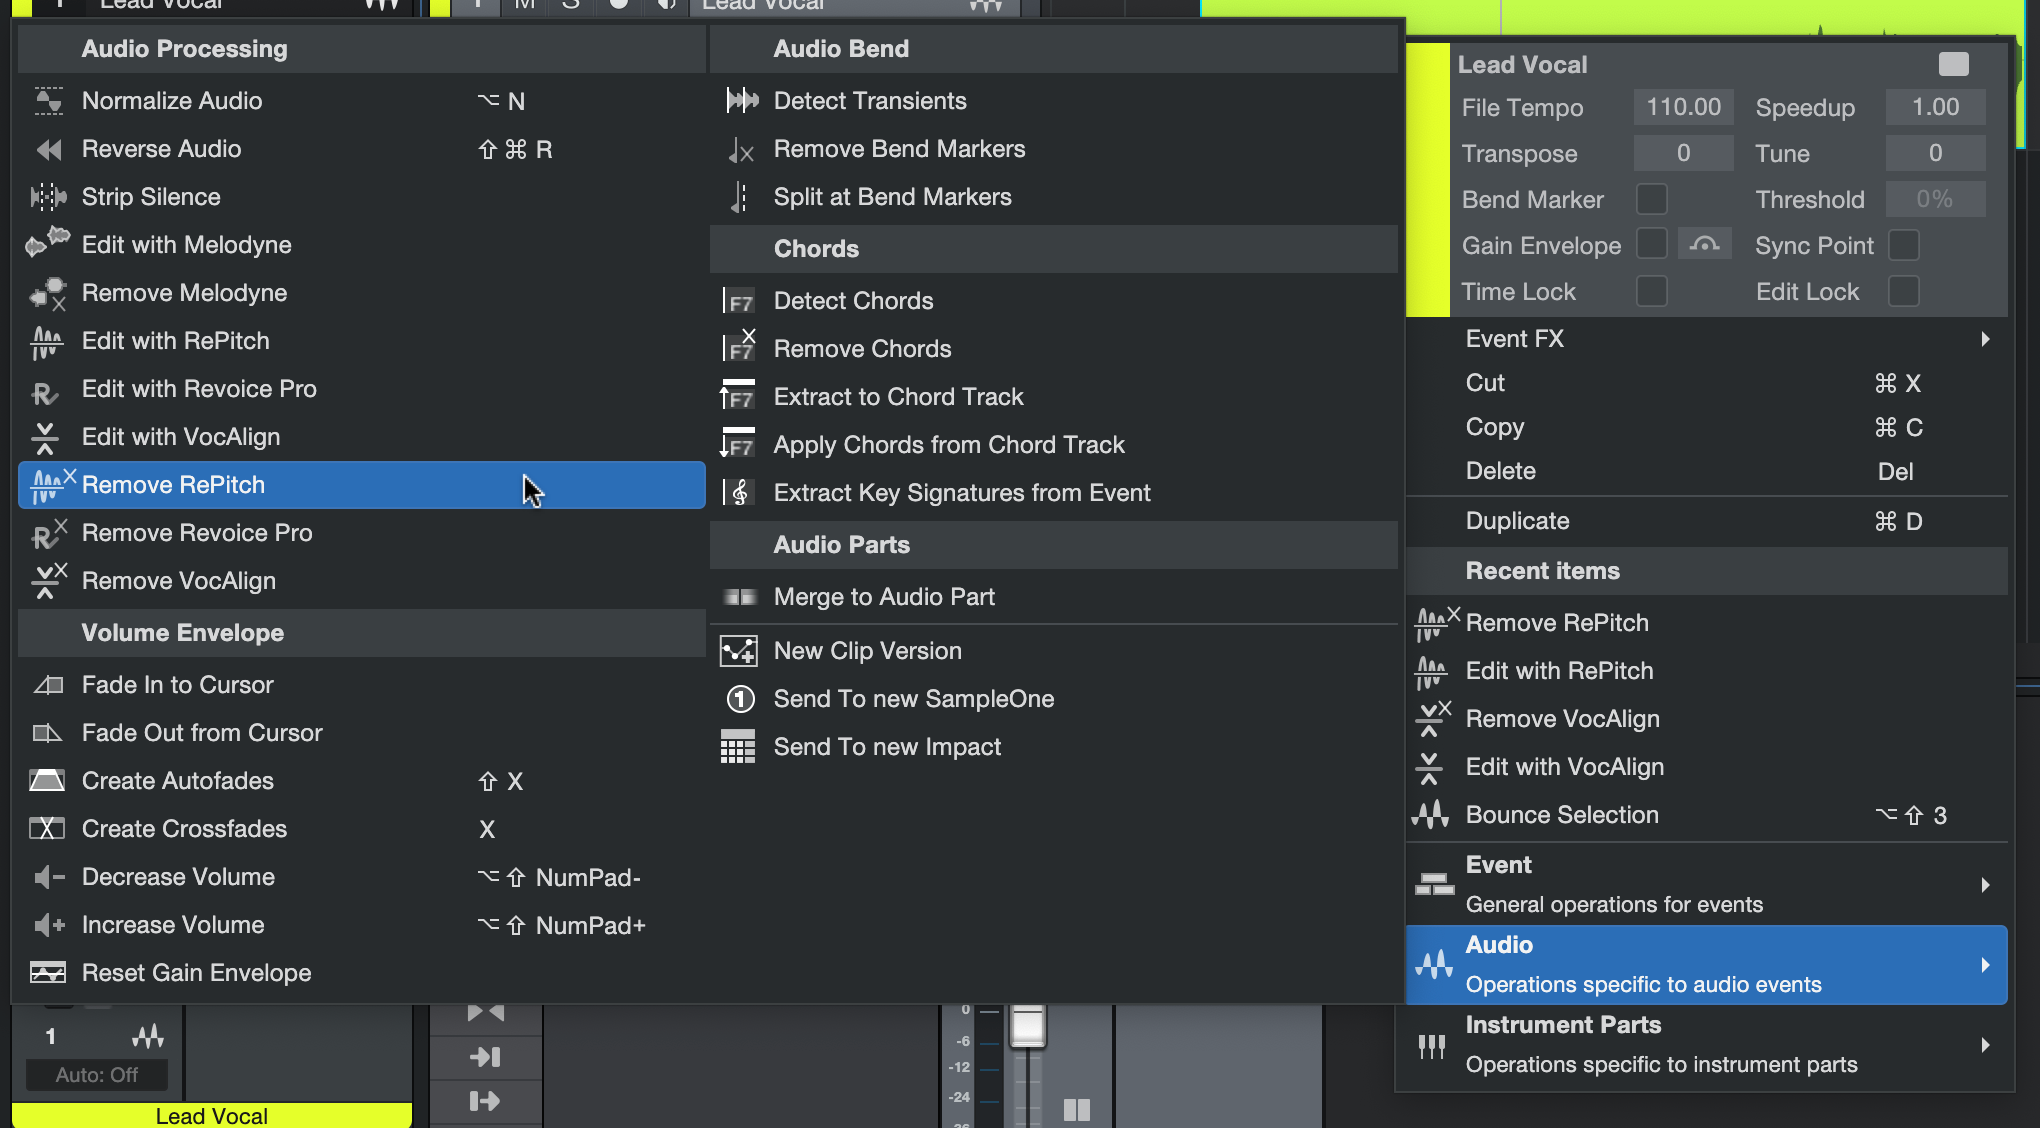
Also available from the Audio menu in the top bar under 'Edit with RePitch' and in the Audio section of the right click menu. The region/event must be selected for the top bar method to work.
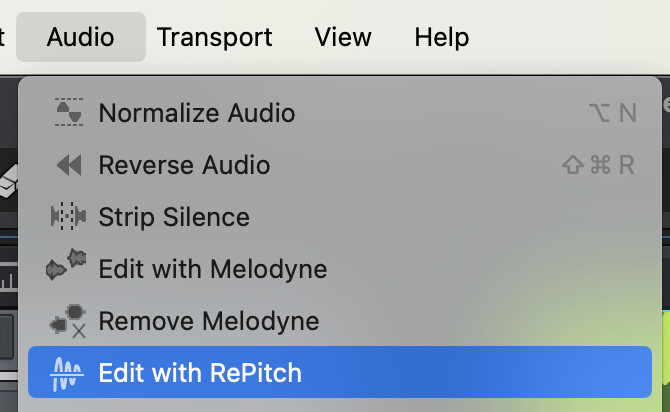
The below image shows the right-click menu 'Audio -> Edit with RePitch'
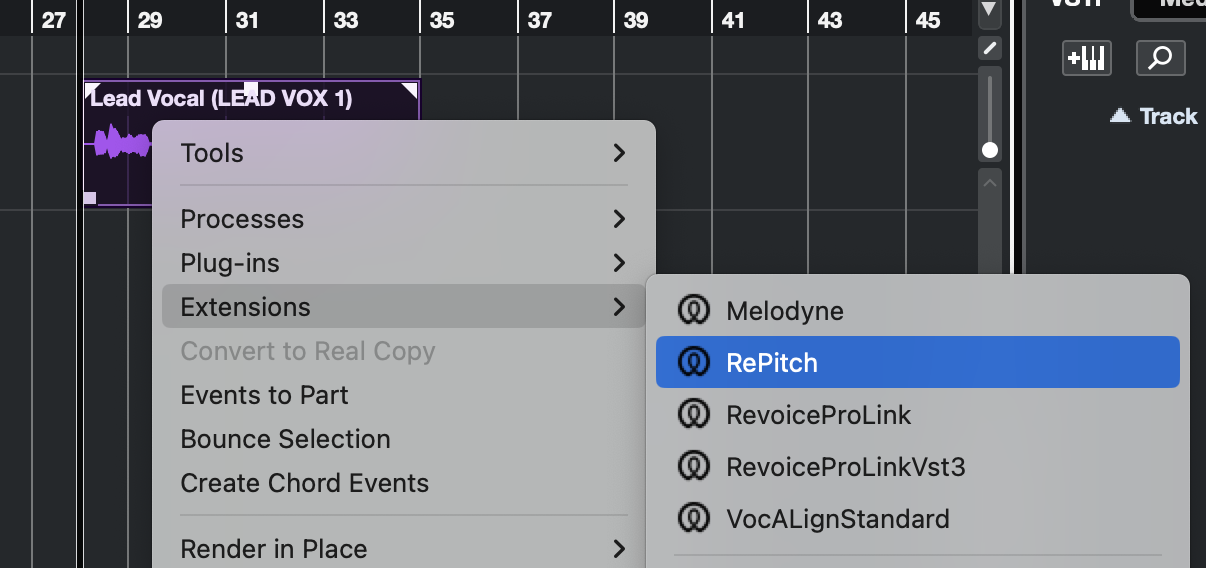

Adding RePitch to a Track
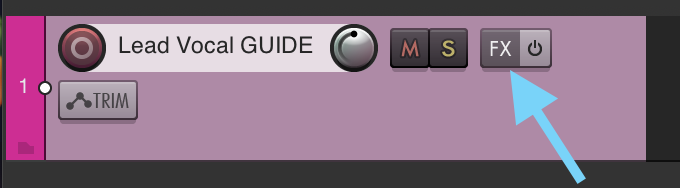
Adding RePitch to a track is generally done from your DAWs Track Info panel, where you will find things like your Track Name and Mute/Solo buttons.
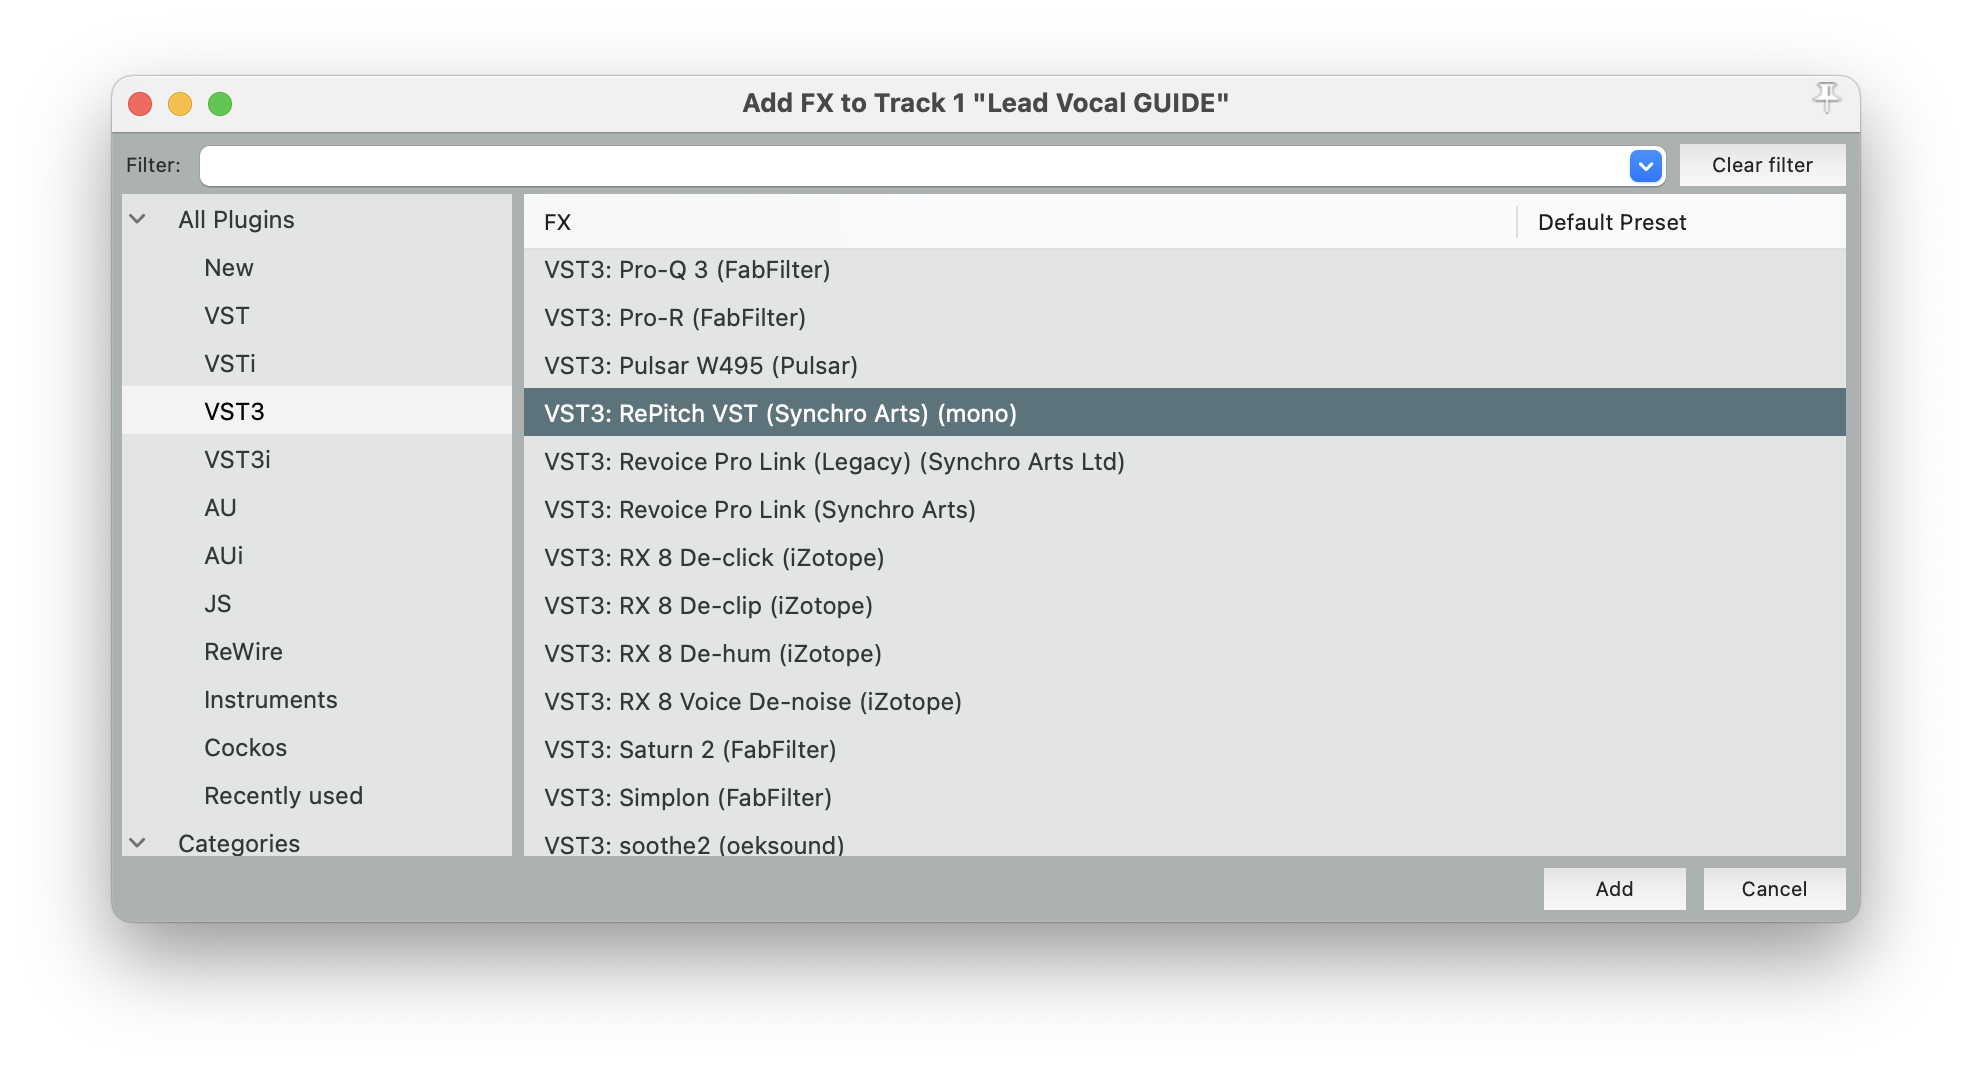
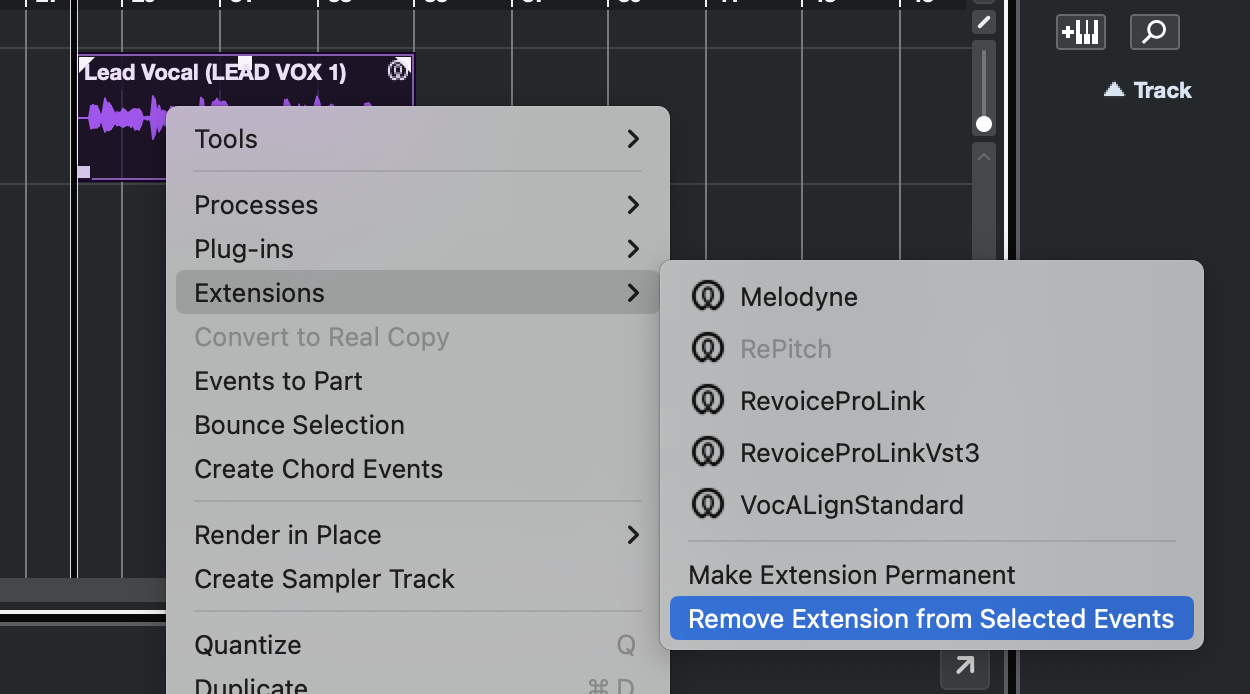
To add RePitch to a track, select the track in the Inspector as shown below. In the Inspector pane, click the 'No Extension' dropdown menu circled in red below.

This will open the below menu, where you can select 'RePitch' to add RePitch to the track.

Removing RePitch
To remove RePitch, check your DAWs documentation on removing ARA plugins. Generally, you can repeat the above steps for instantiating the plugin, but select the option similar to 'None', 'Remove', or 'No extension'
To remove RePitch from a region or clip, right click the clip, and select 'Event FX -> No Event Editor' from the menu.
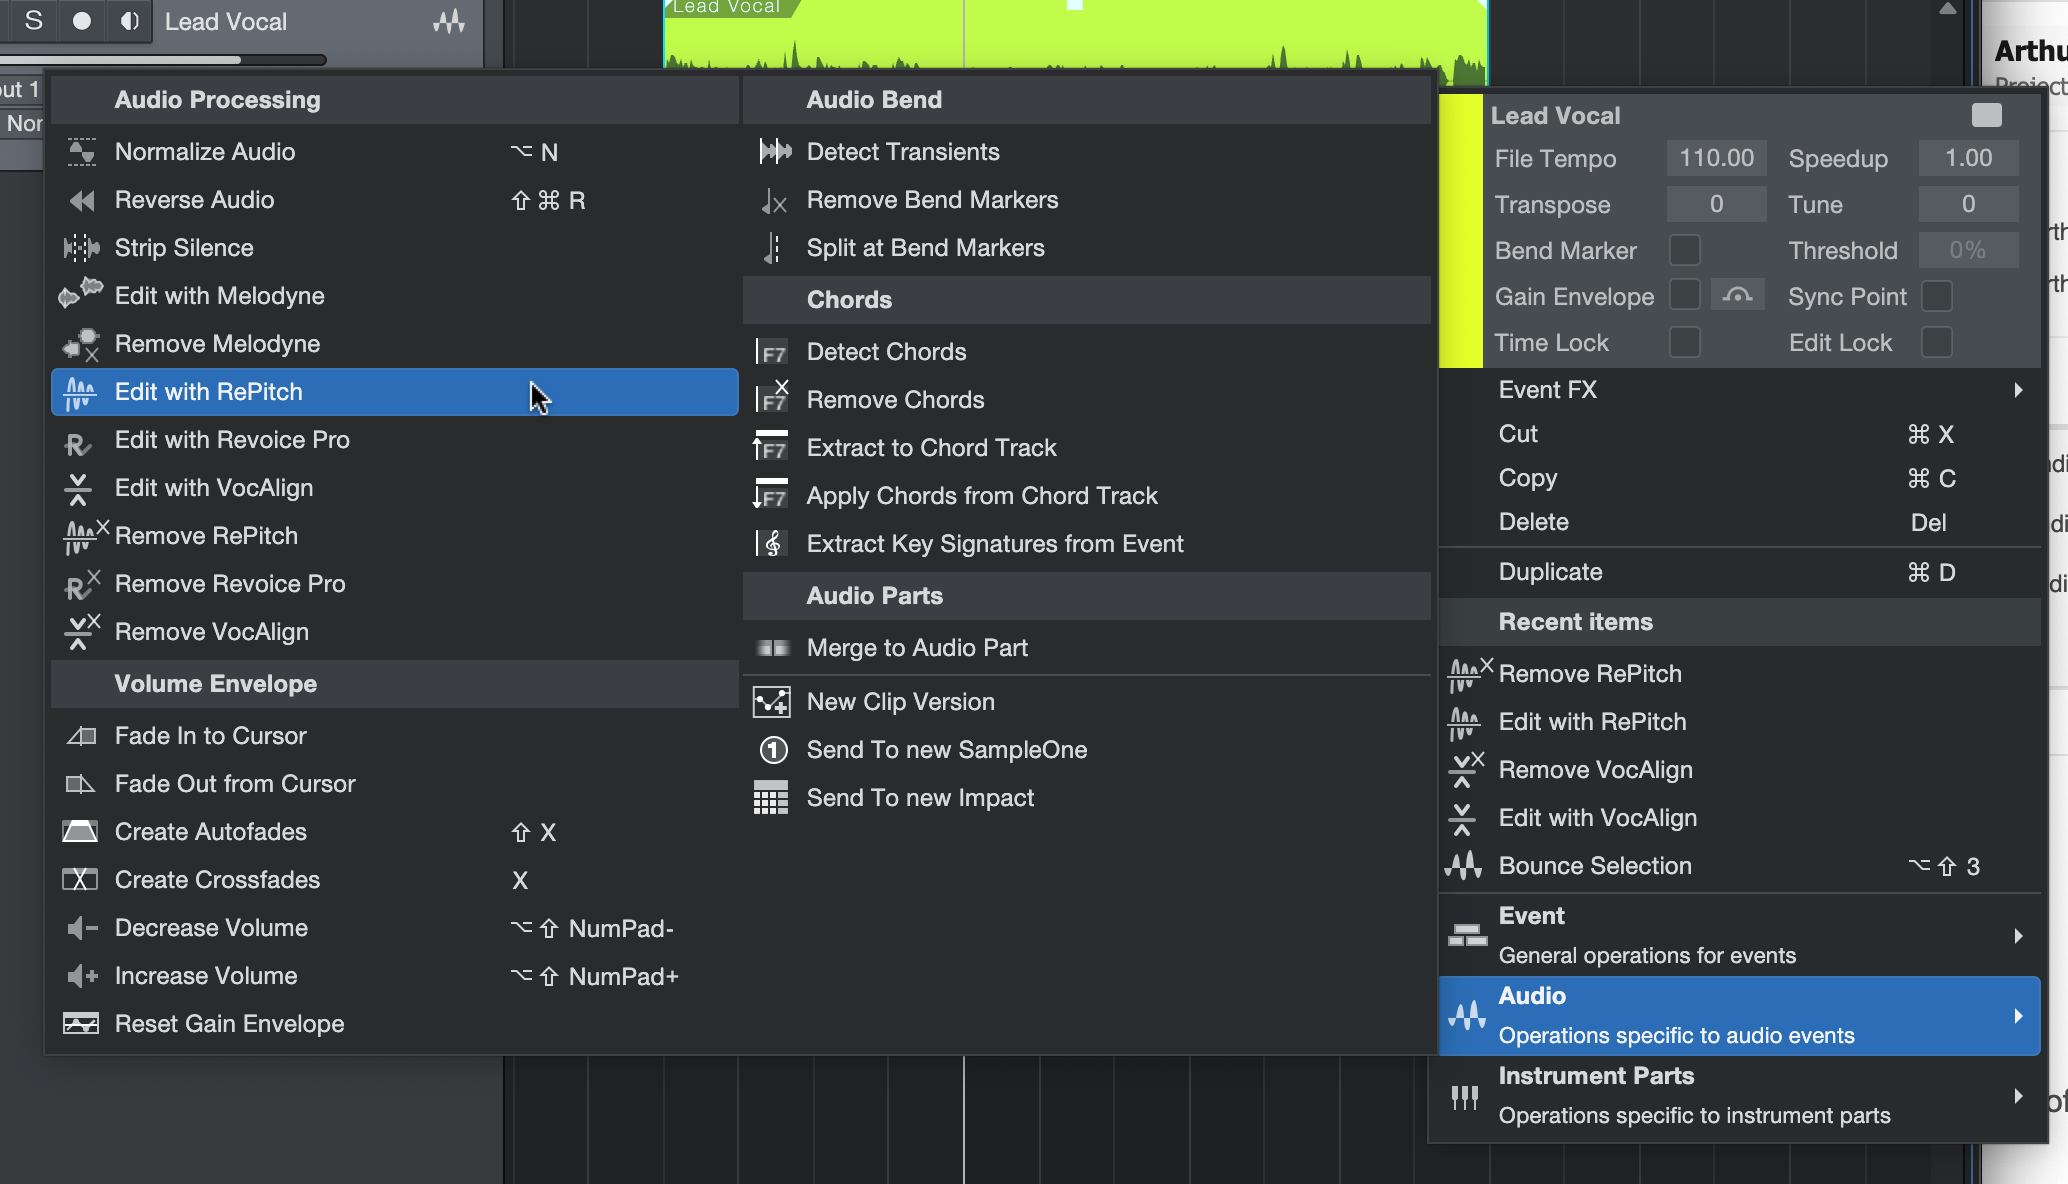
You can also select 'Remove RePitch' from the Audio topbar menu or the Audio right-click sub-menu as shown below.
 ... then ...
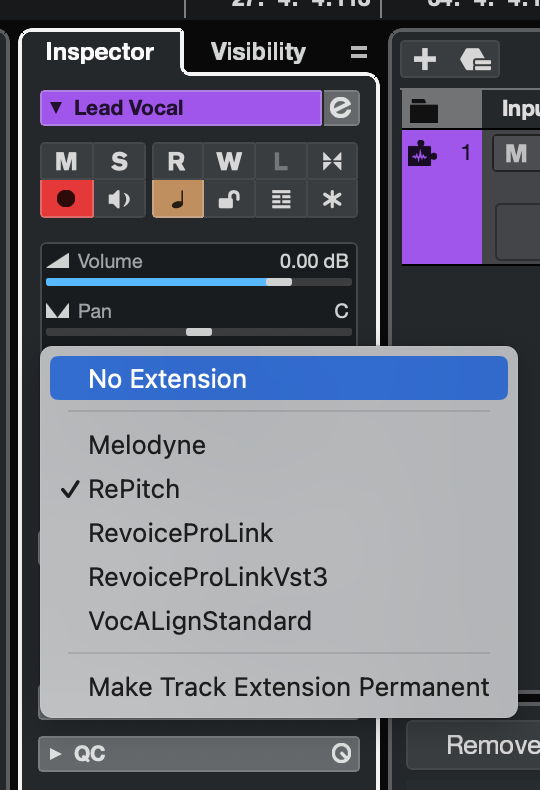
User Interface
Once RePitch has been added via any of the above methods, the plugin window will automatically open. Depending on your DAW, it may be a standard plugin window, or it may appear docked in the 'Edit' window that is generally at the bottom of your DAWs user interface.
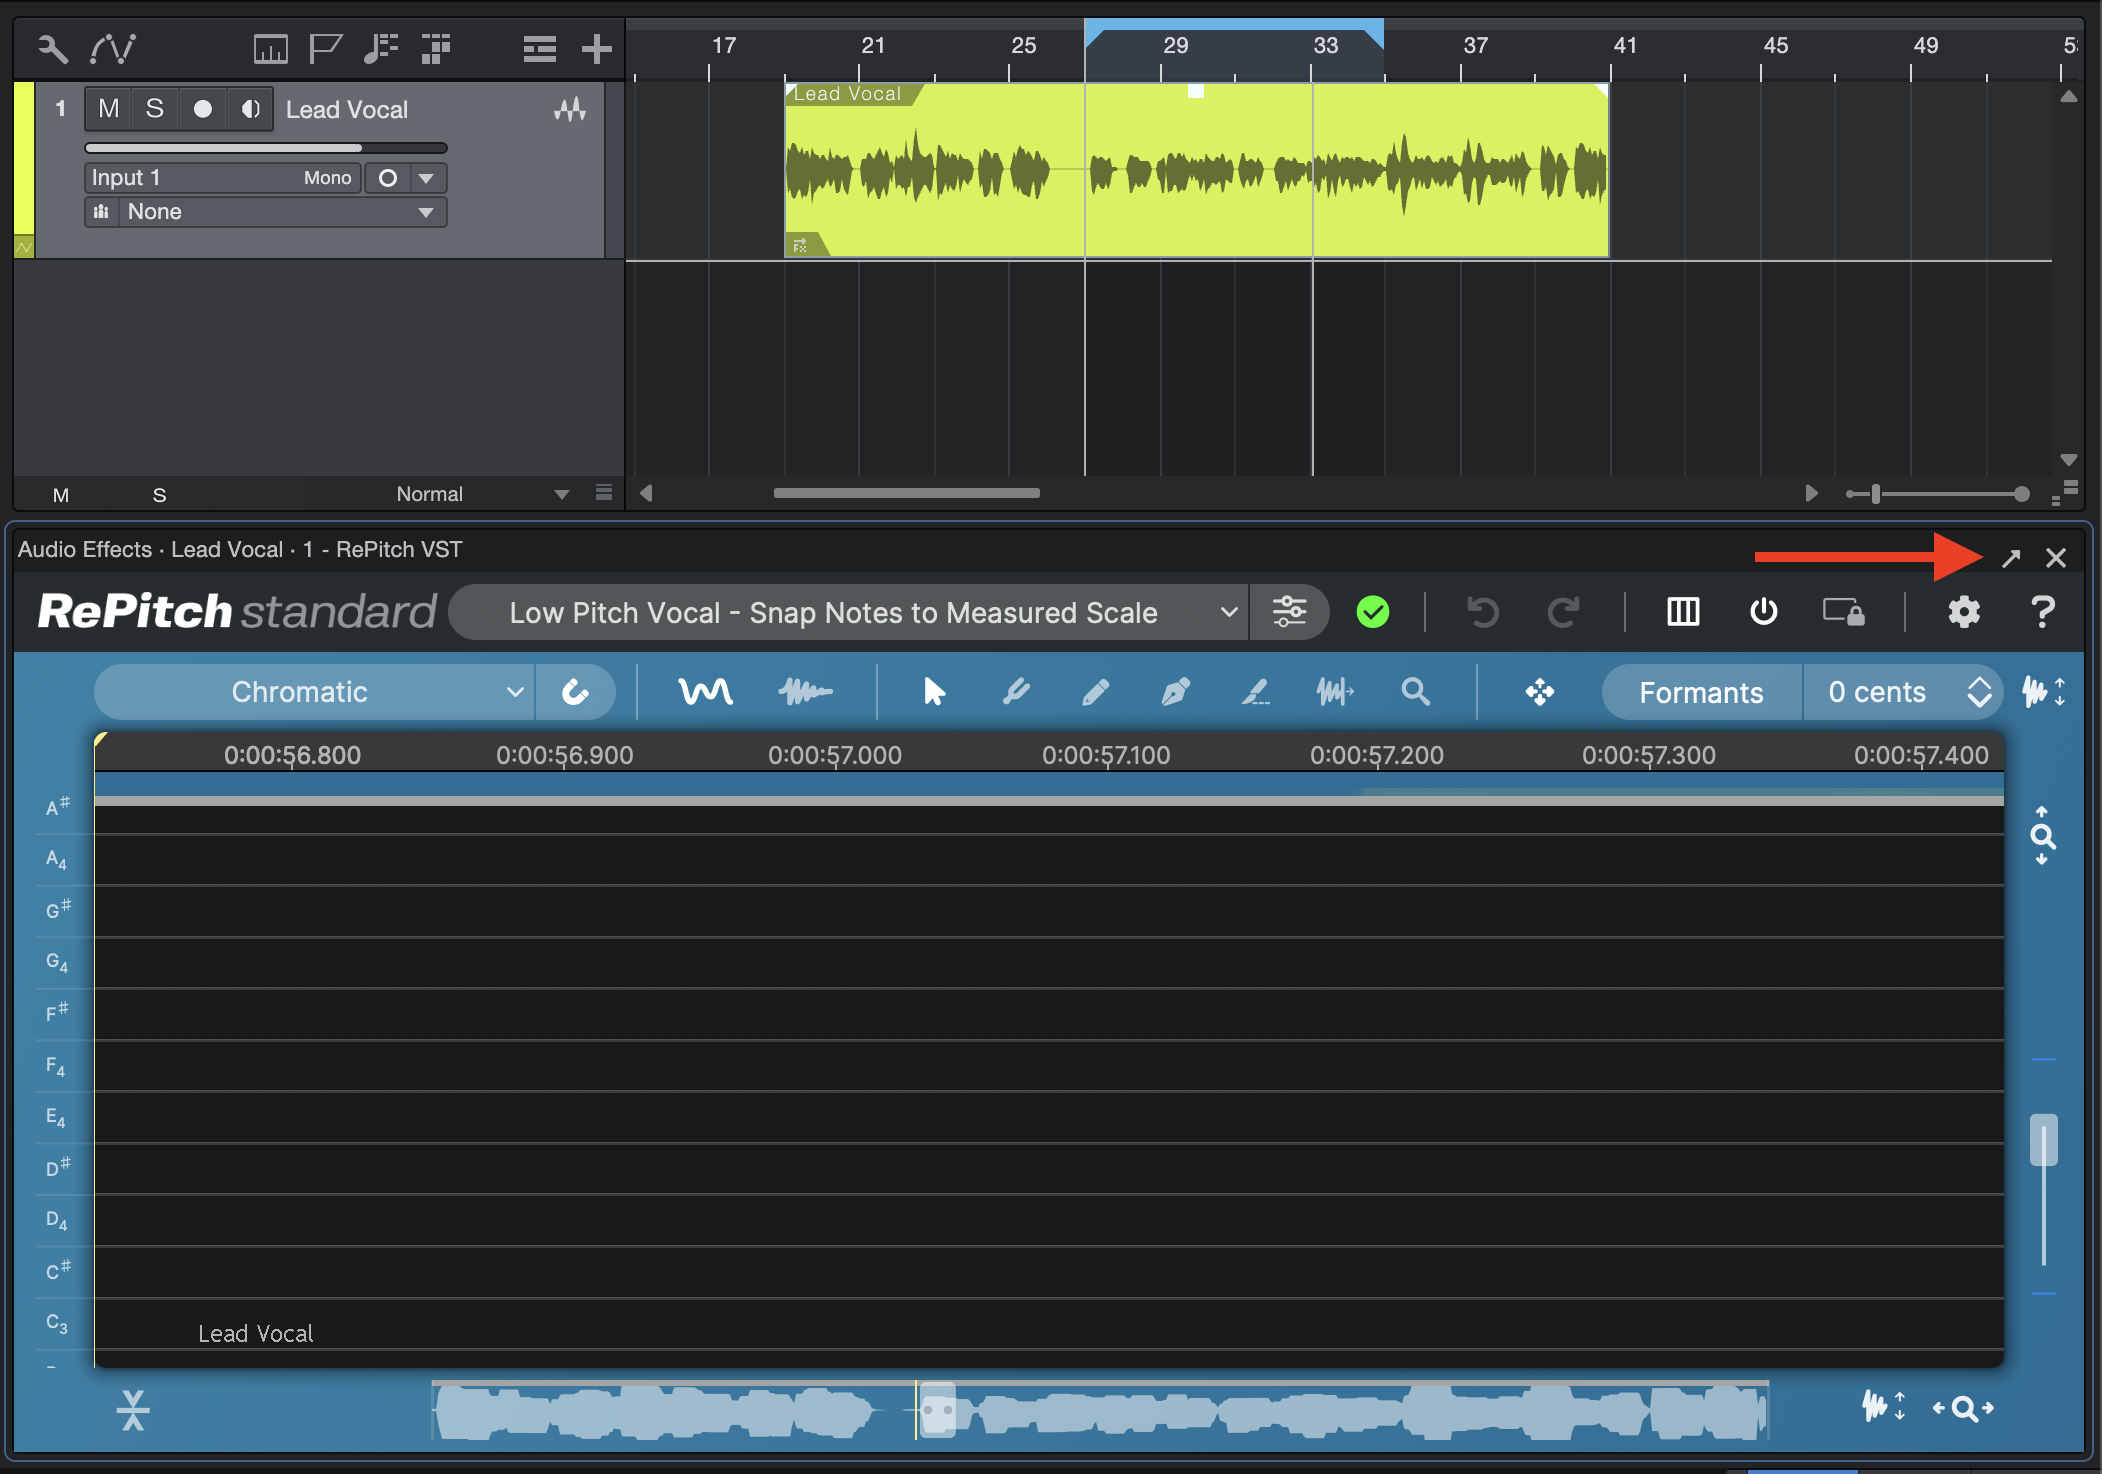
To undock the plugin, click the small button just to the right of the red arrow in the below image.

Resizing the RePitch window
If RePitch is unpinned from the Edit section of your DAW interface, you can resize it to almost any size by dragging the corners or edges of the plug-in window.
Process Your Audio
In order to process our audio, we will select a Scale and a Macro. These options define how RePitch will process our audio. There are Macros available for many common use-cases. Users can also create and save their own Macros. Macros are described further in this section.
Select a Scale
In order to quickly tune our selected vocal, we will use one of RePitch's built in Macros.
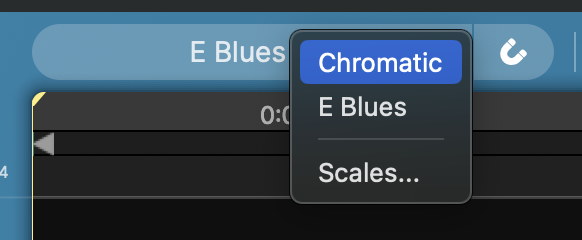
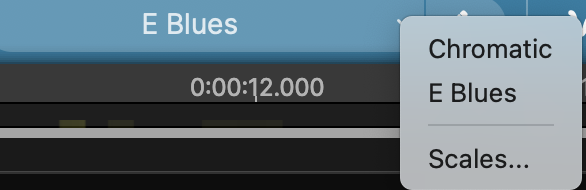
First, we will select the Chromatic scale from the Scale menu in RePitch.
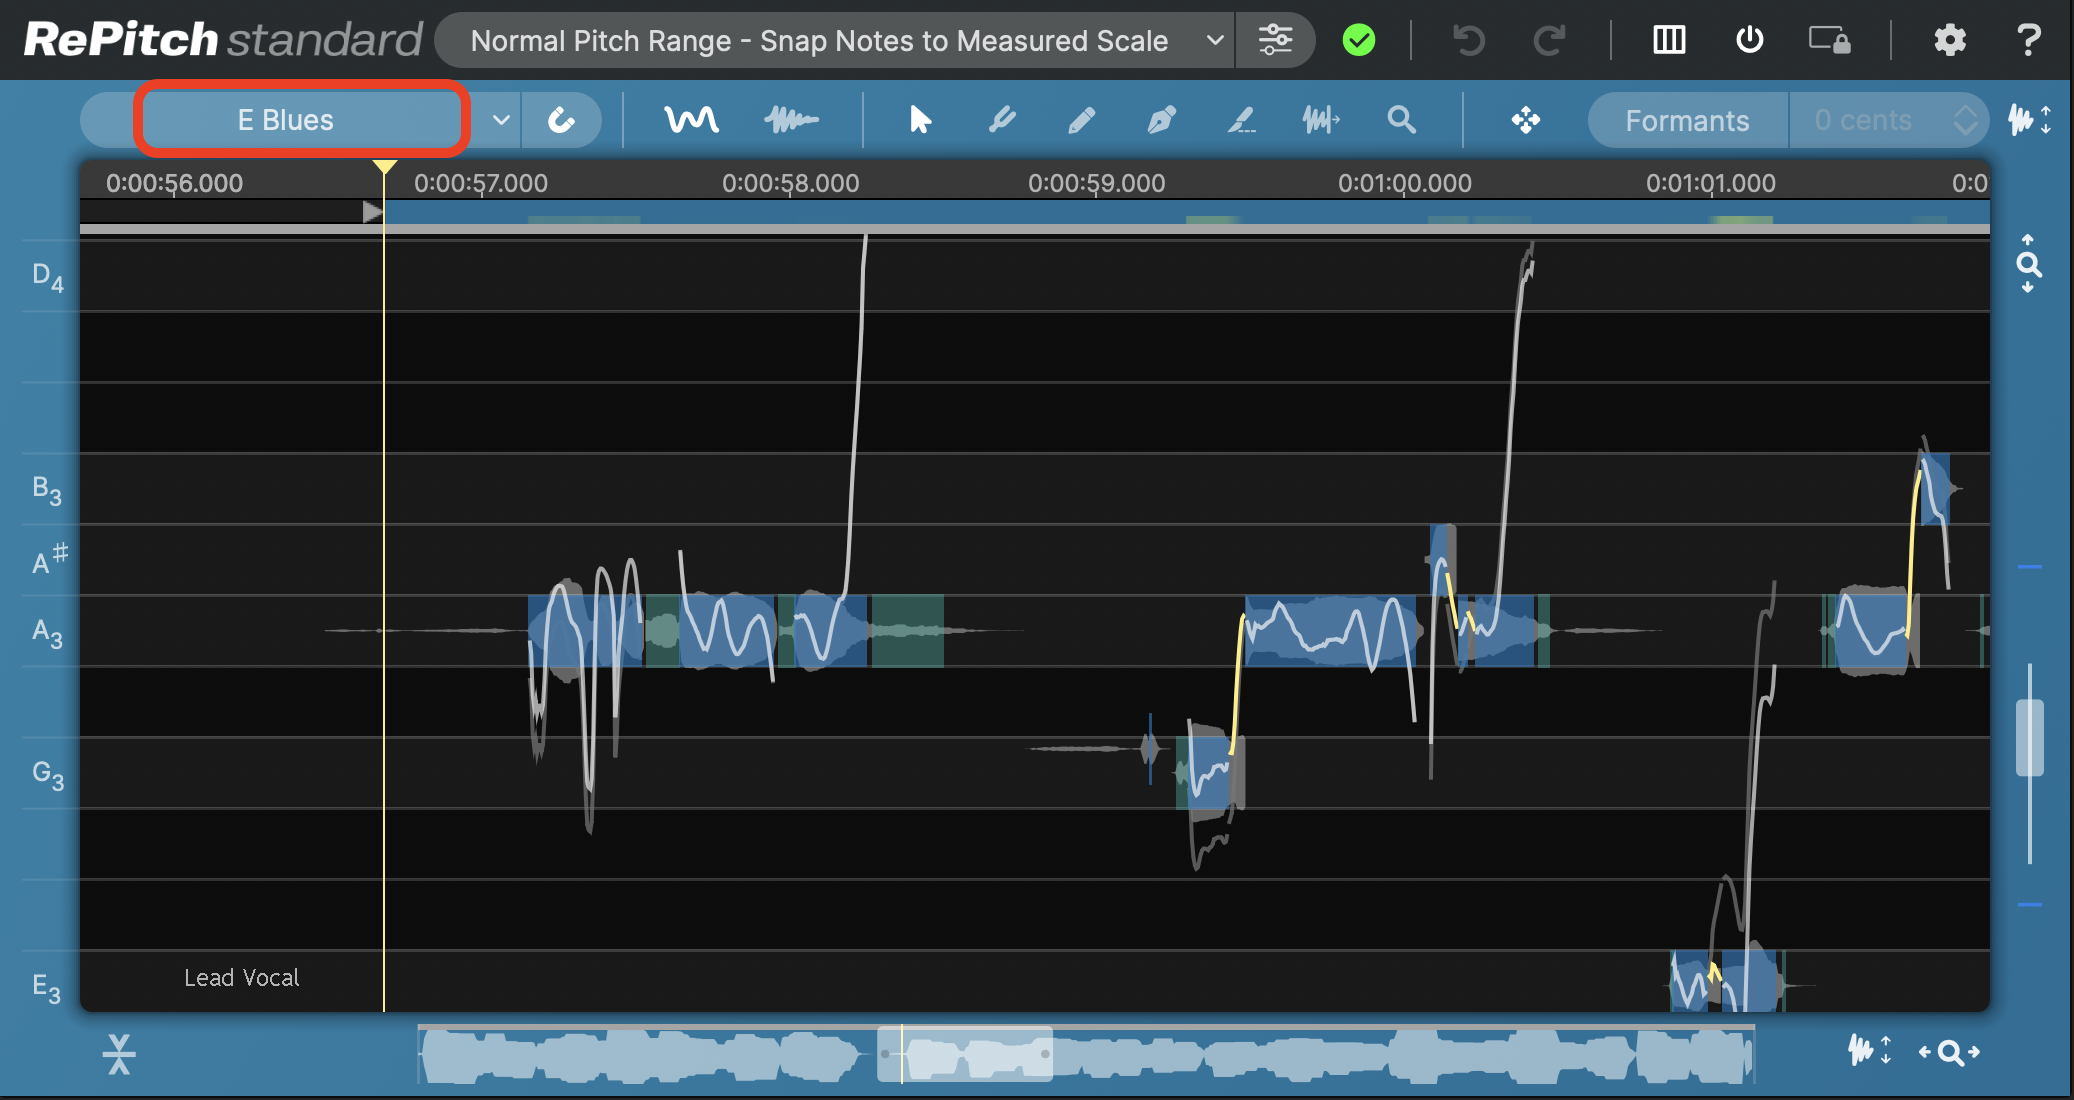
Clicking the drop down menu will show our current available scales. You can select the 'Scales...' item to add scales to this list later. For now, choose Chromatic.
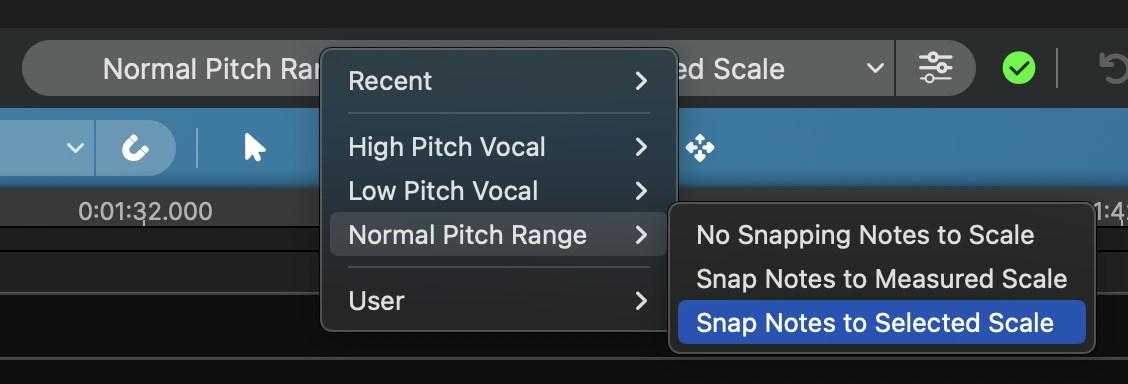
Applying a Macro
Next, select a Macro from the Macro drop down menu. The Macro menu is at the top of the RePitch plugin window, highlighted below in red.

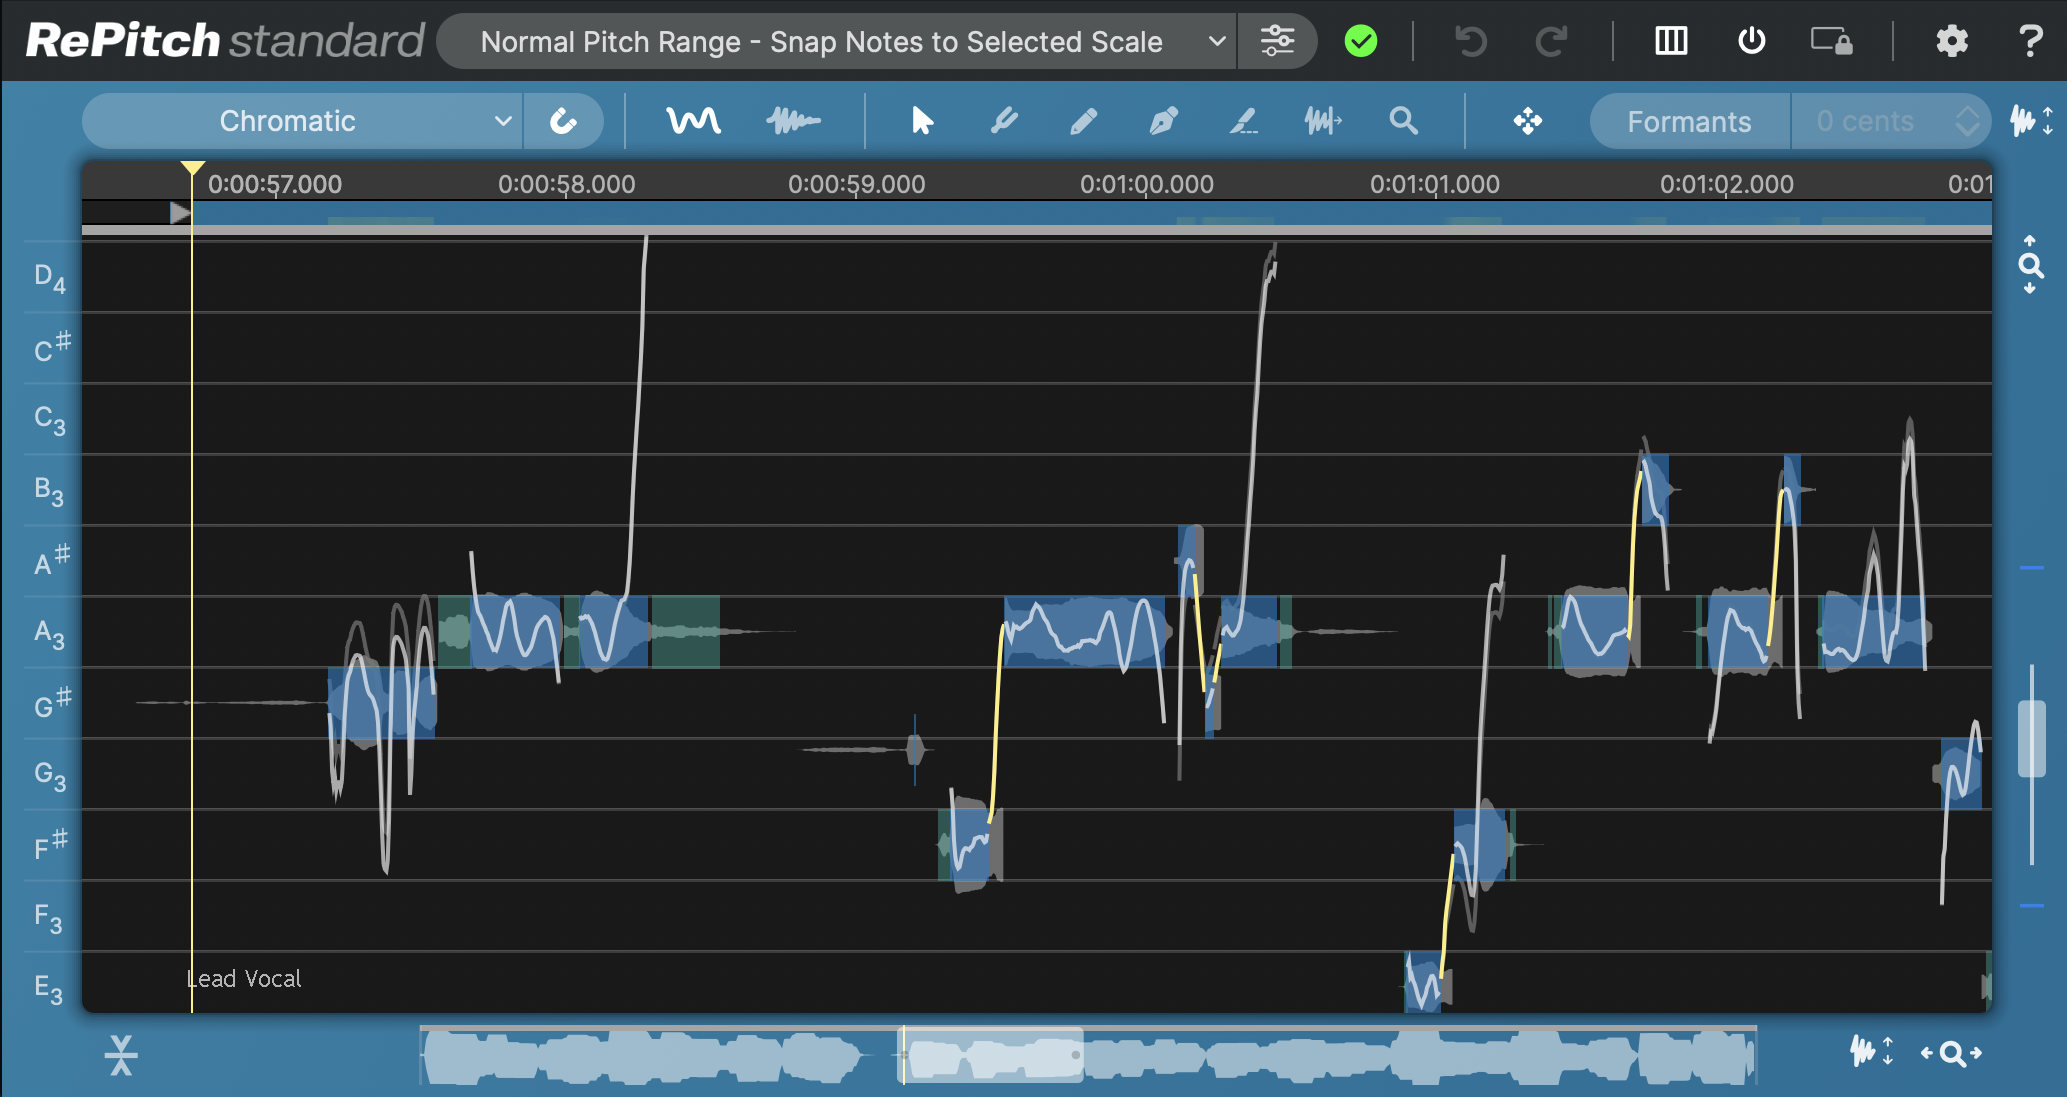
From the drop down, we'll select 'Normal Pitch Range > Snap Notes to Selected Scale'. This will tune our audio to the nearest chromatic pitch.
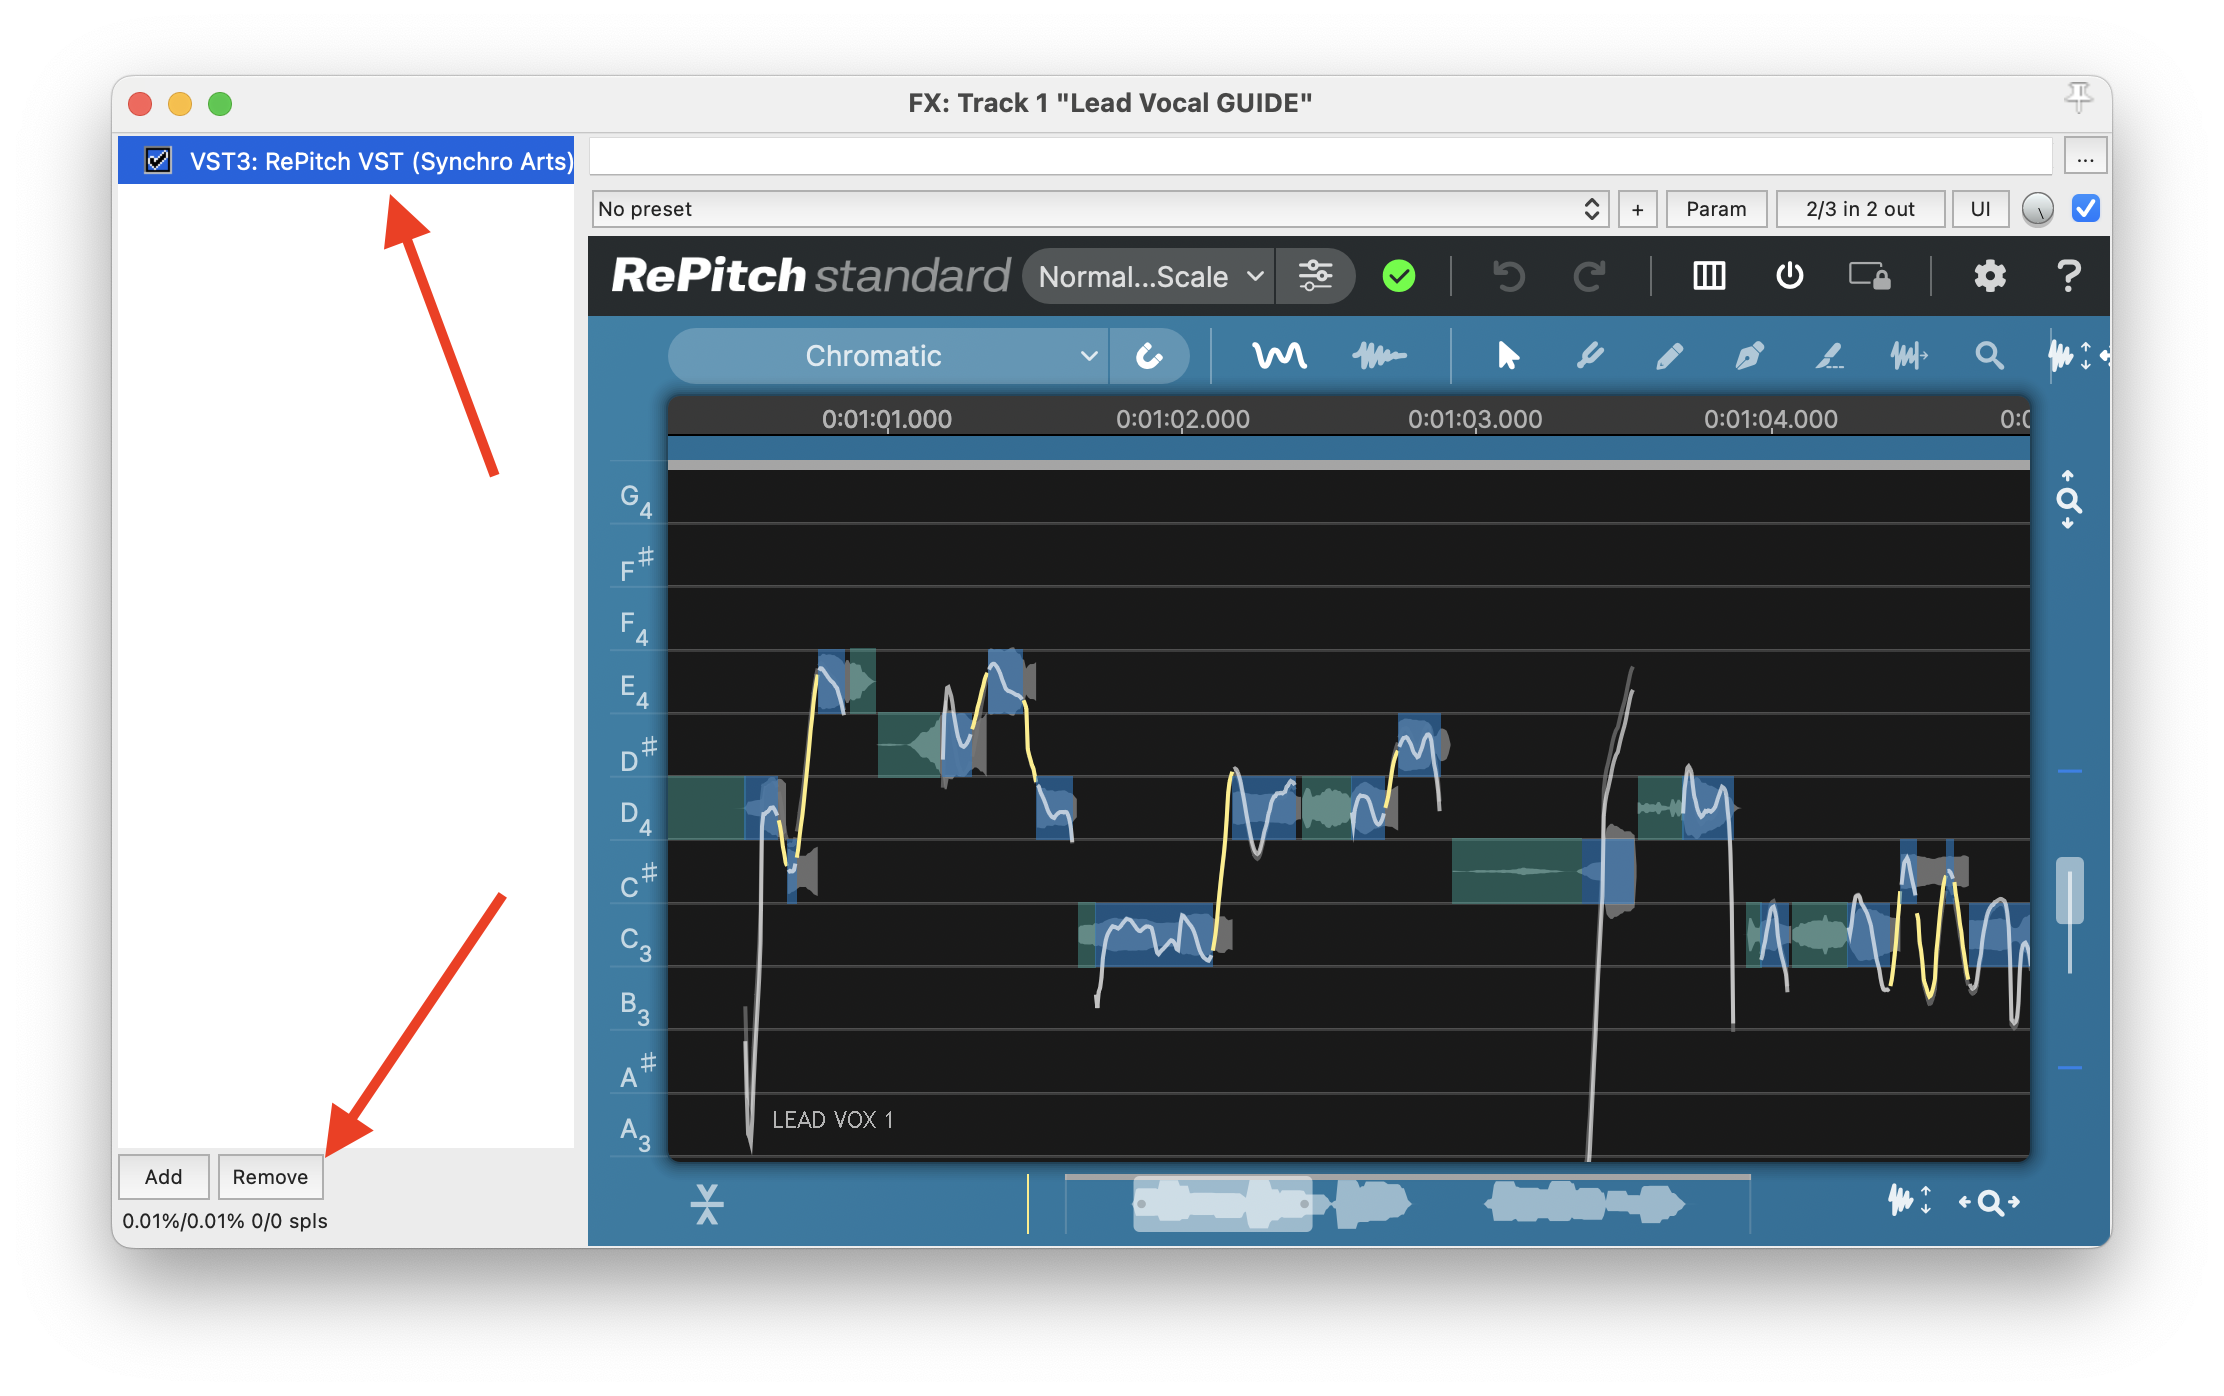
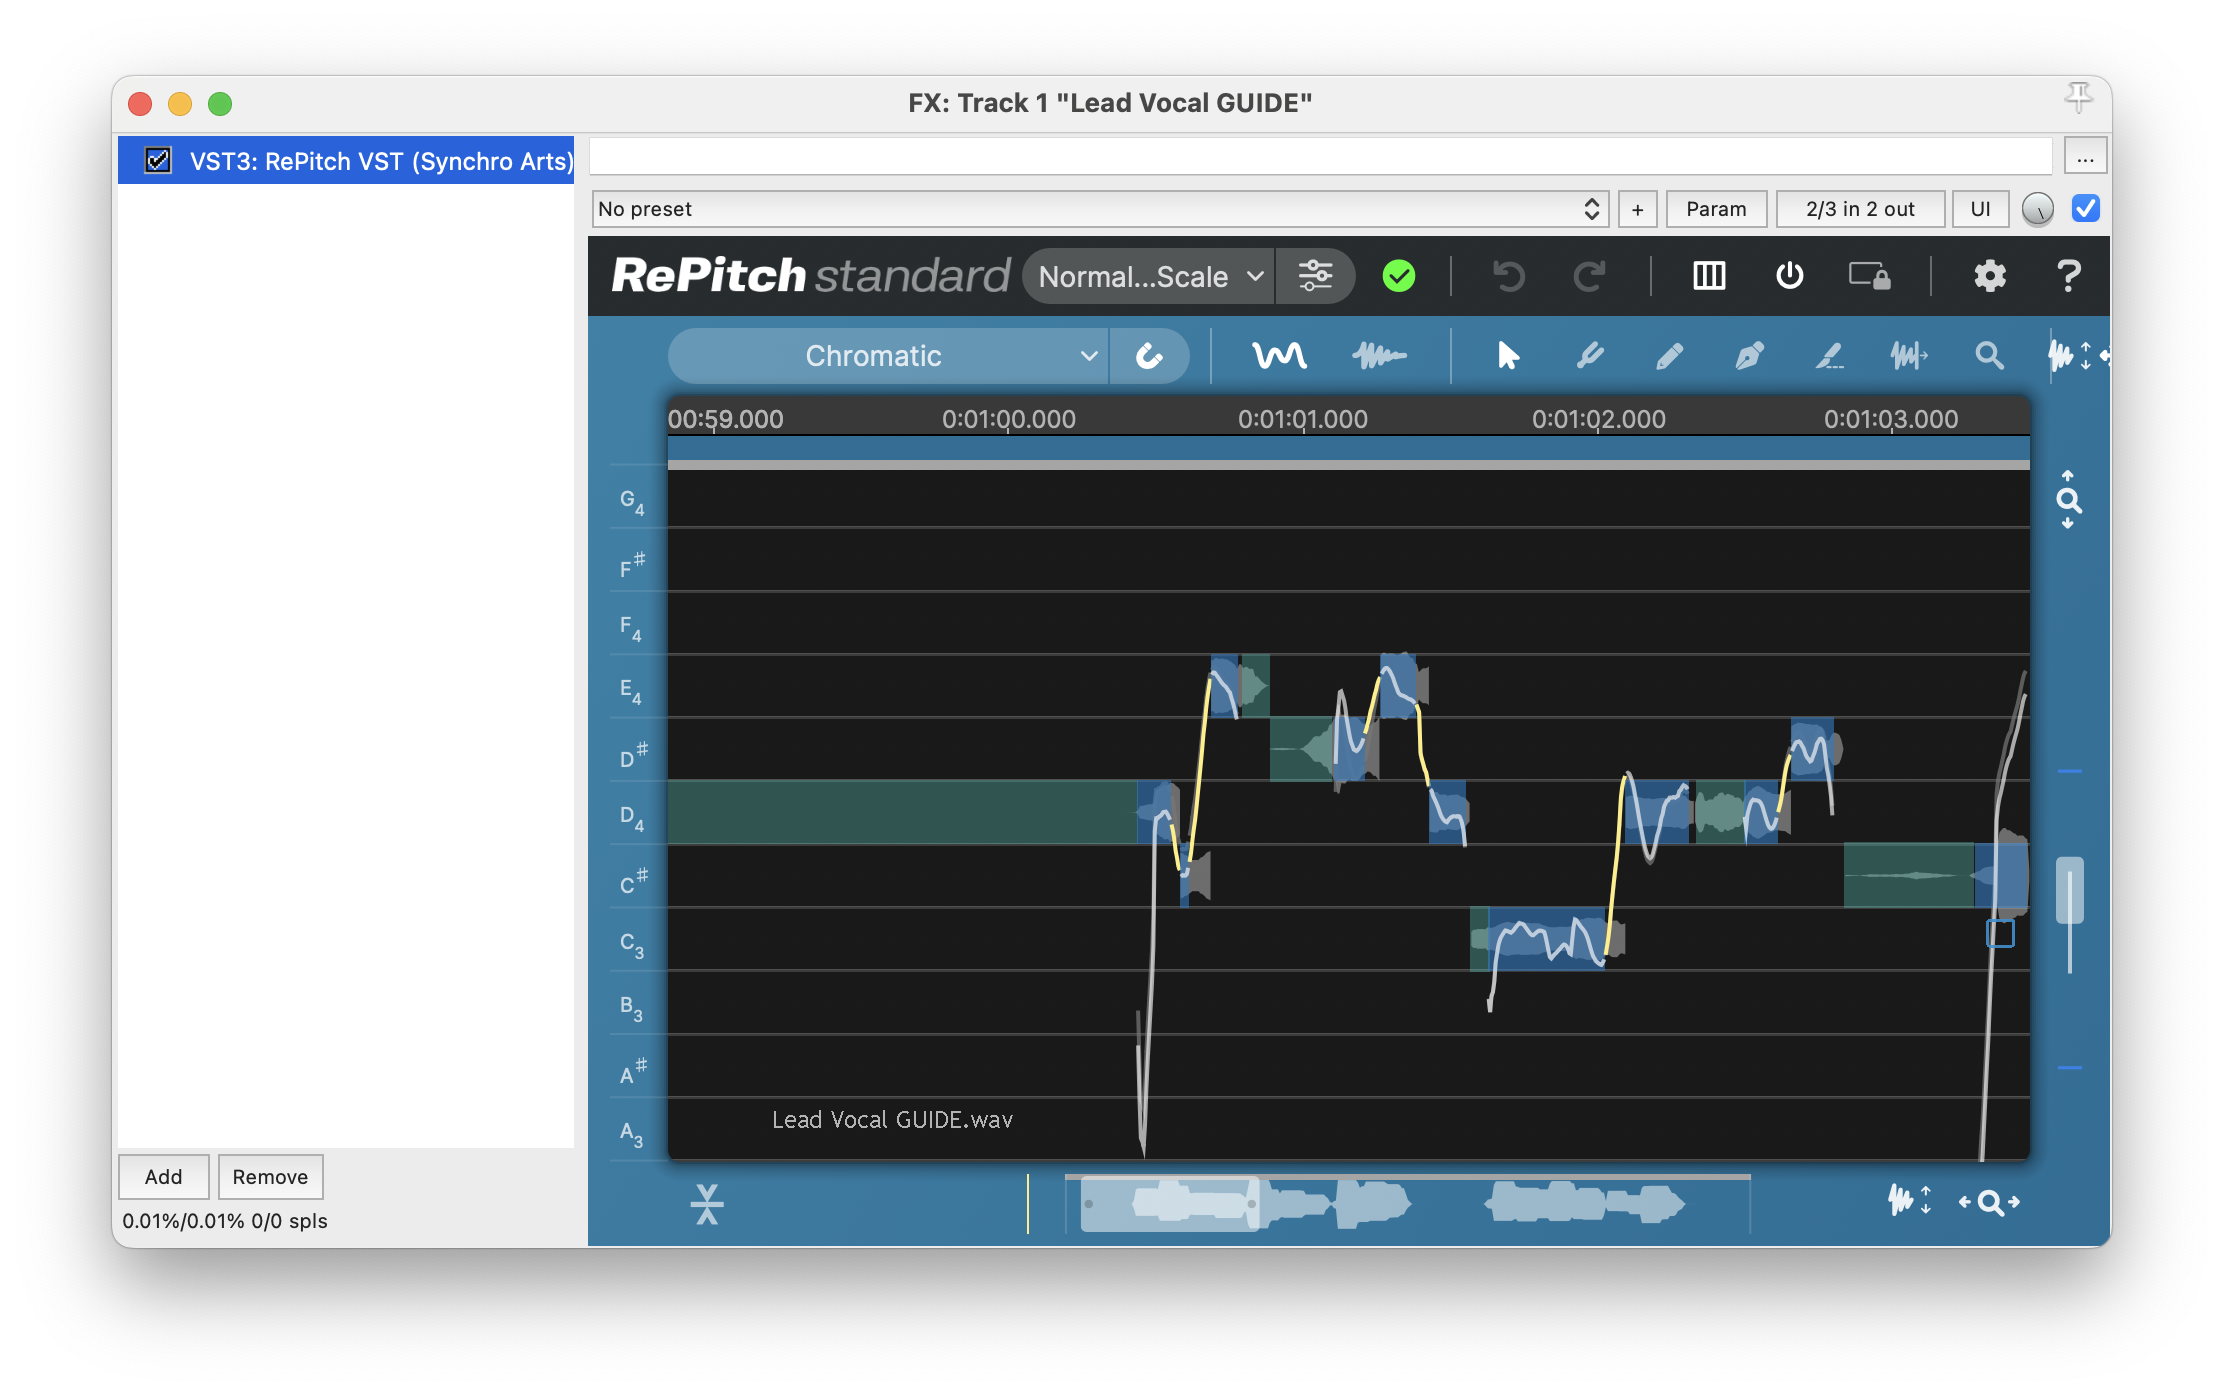
In the picture below, RePitch has processed the captured audio based on the currently selected Macro, so the blue note blocks are shown automatically centered (tuned) in the Note Lanes of the Chromatic Scale.
The white lines show the new pitch pattern and the faint grey pitch lines show the original pitch.
Other Useful Options
Snap Notes to Measured Scale
You could have also chosen the Macro below
Normal Pitch Range - Snap Notes to Measured Scale
This Macro would automatically detect the most likely tonic and scale from the notes in your audio track, and then move the detected note blocks in your audio to that Measured (i.e. detected) scale's note frequencies.
If you want to add your own Scale to be selected and tuned to, simply click the Scale display control shown below

and when this menu opens
Click Scales... and you'll see the window below
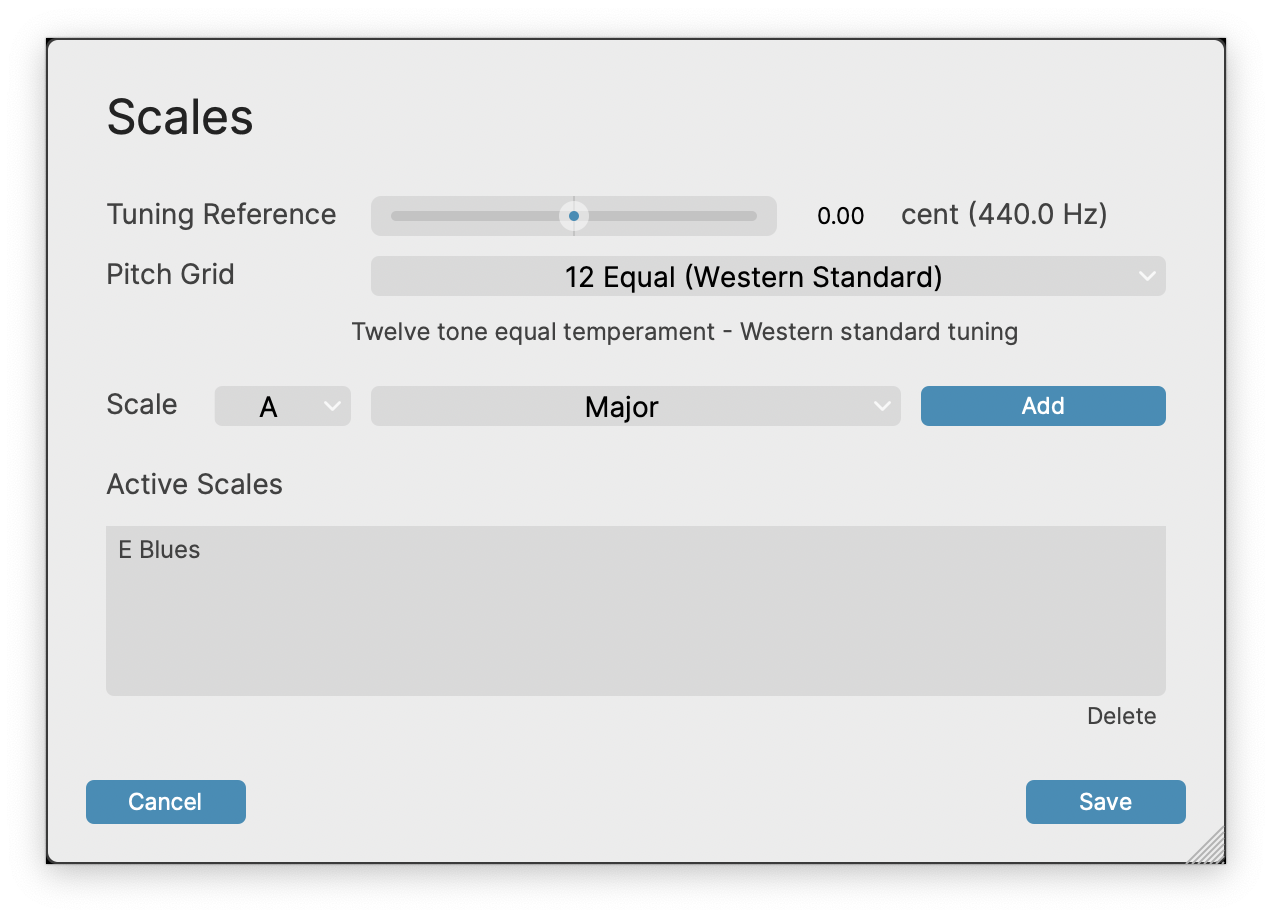
In the line that says Scale at the left, click the drop down menus to add your Tonic and Scale Mode and then click Add and then Save.
Your added scale should now be in the Scale window.
Now make sure the Macro is set to Snap Notes to Selected Scale and all further audio captures will use that scale and Macro automatically.
How to choose Manual Editing
Generally, you'll want to select one of two primary automatic tuning options above. However, the 'No Snapping Notes to Scale' macro shown below applies no automatic processing, leaving you free to make manual changes.

The controls for manual changes are discussed in detail in the Pitch Editing Tools and Time Modiciation Tools sections.
It's important to understand that once you've selected a Macro, you can change the Macro or Scale before you use it on the next captured audio or before you re-run the new Macro on the captured audio.
Switching Macros
If you have already run a Macro, switching to another Macro and running it by clicking "yes" in the window below will always discard all existing processing, so you will see the confirmation dialog below. A similar dialogue will appear in your DAW of choice.
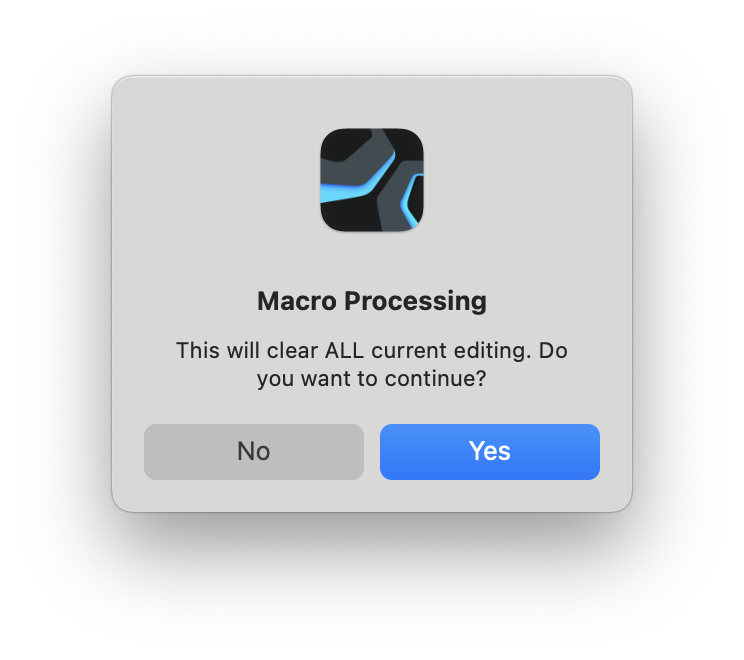
If you’ve not done any manual editing or want to start over, click YES.
If you click NO, you will see the changes made on screen, which will show the Scale and setting to be used in the next application of RePitch processing, whether with a Macro or Right Click menu.
Macros are described further in this section.
Rendering Your Audio
To render your audio, we suggest checking your DAW's documentation on Rendering, Bouncing, or Commiting audio regions.
Copyright © 2023 by Synchro Arts Ltd All Rights Reserved.