Create Processes using Playback Range
Setting a Playback Range to define the limits of a Match or Doubler process is one of the fastest and most efficient means for breaking up the signal into processing sections. In this section we will show how to quickly create two processes for different sections of audio.
The New Process window has been improved in Revoice Pro 5.
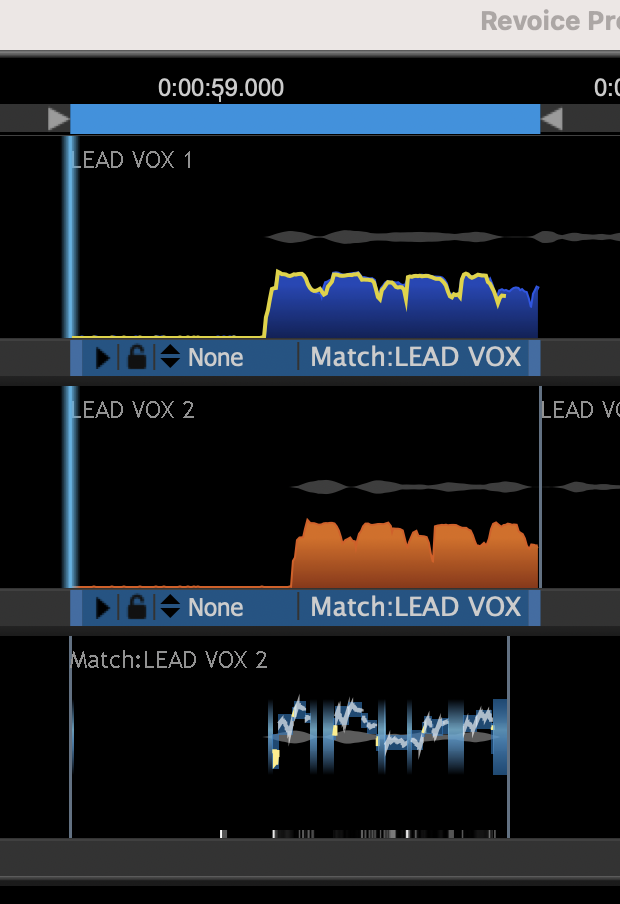
The new process window can be opened by right-clicking in the Process bar directly below an audio region, or by pressing the B key. With the New Process window open, set a new playback range by clicking and dragging along the Playback Range track (as in the blue Playback Range below), or by right-clicking an audio region and selecting "Set Playback Range".
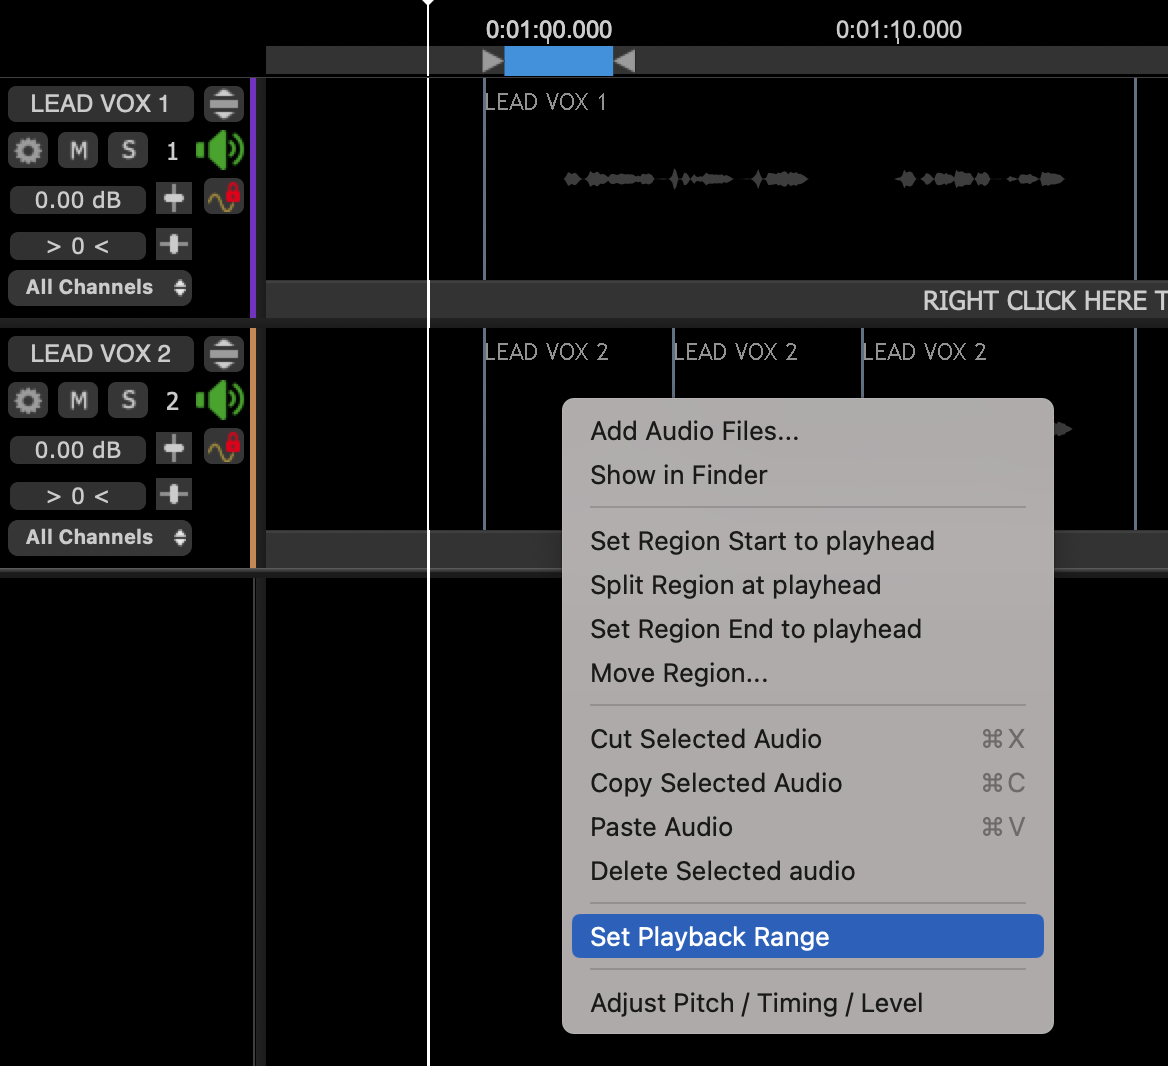
When a Playback Range is created or modified, it will automatically be selected in the New Process window.

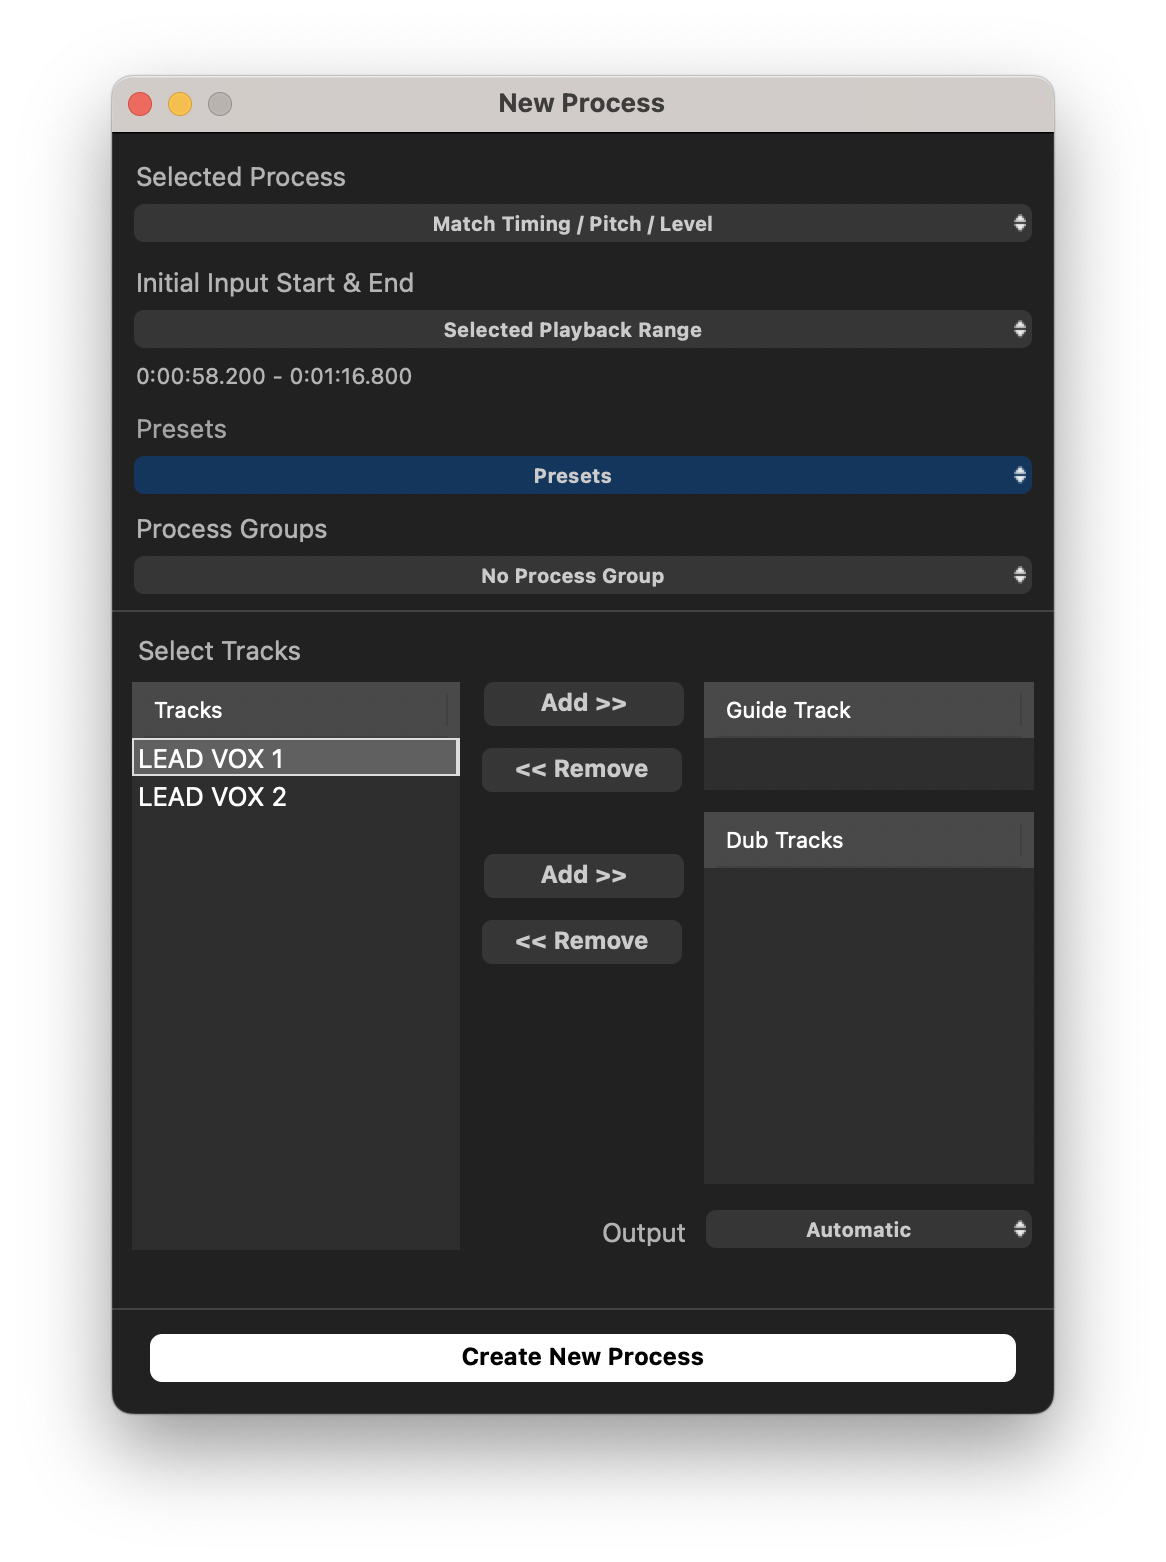
The Selected Playback Range is selected automatically in the New Process window and displayed under Initial Input Start & End, with the correct range set as shown within the red box in the above screenshot.
Once the process range is set, a preset can be chosen and the Guide Track and Dub Tracks can be assigned as shown below.
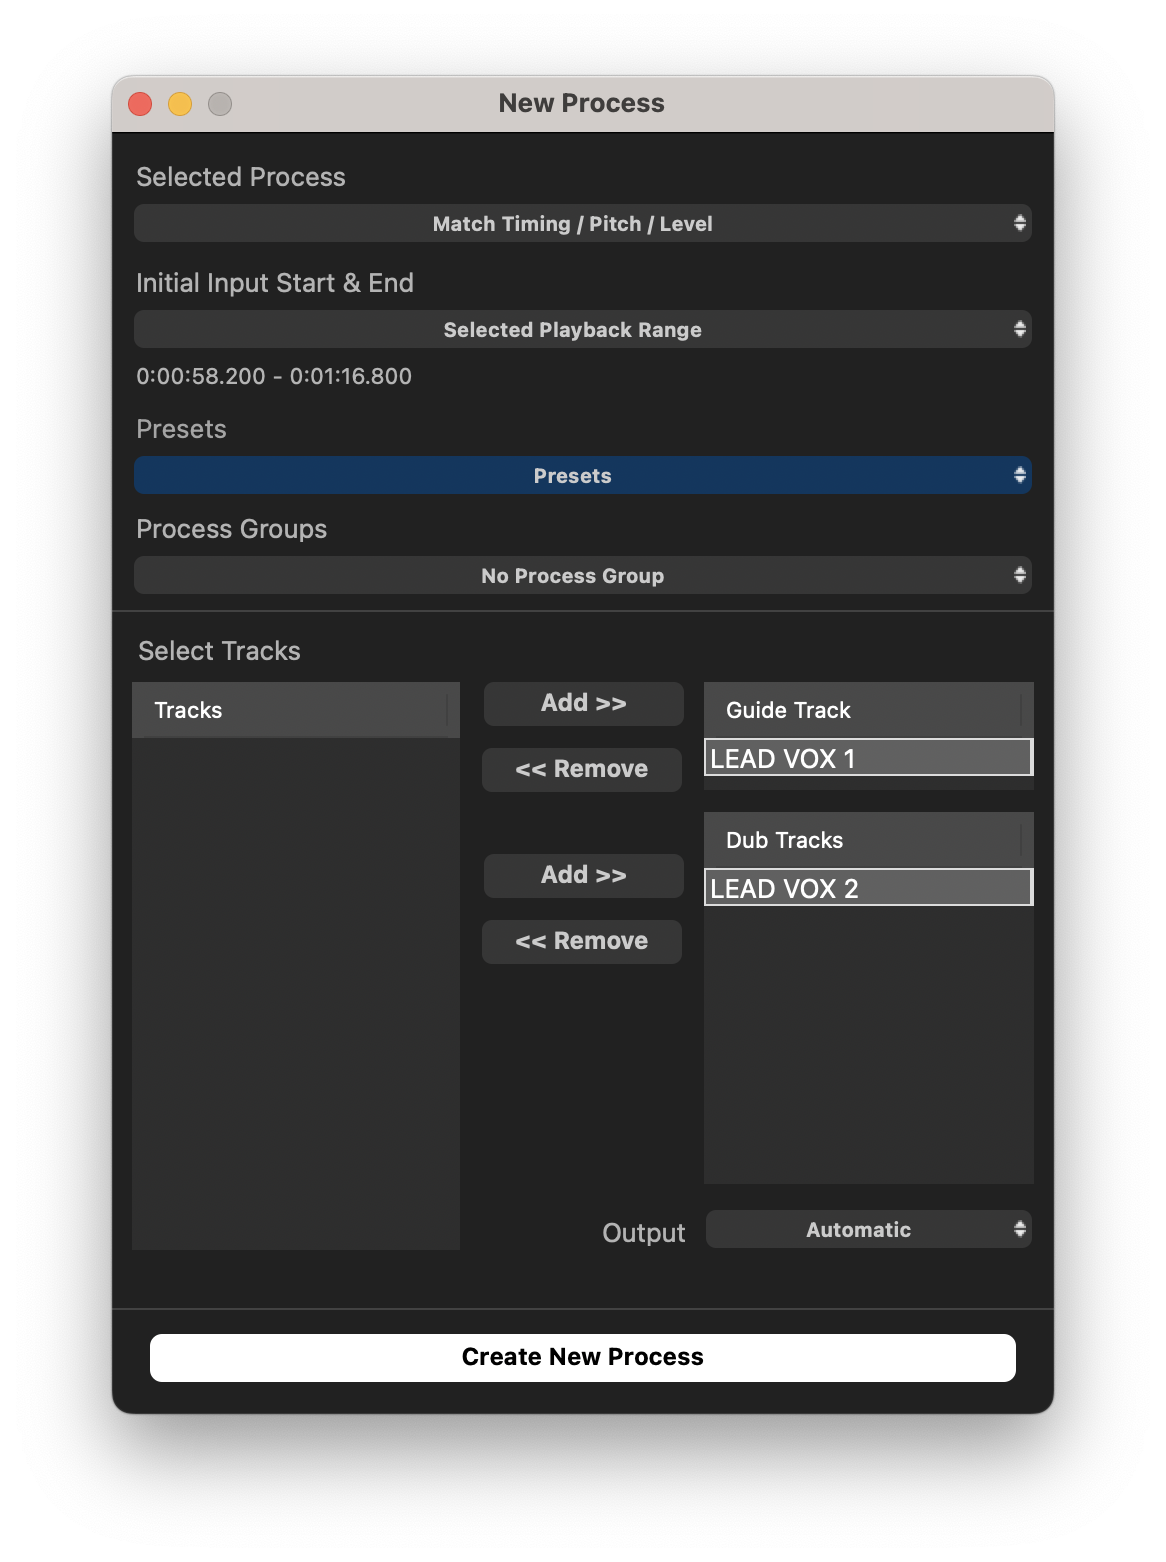
The user can now press the N key on the keyboard (or the New Process button in the New Process window) to create the new Process Control Blocks.
Processes created this way will use the selected preset settings. Changing Settings are discussed further in the Processes chapters.
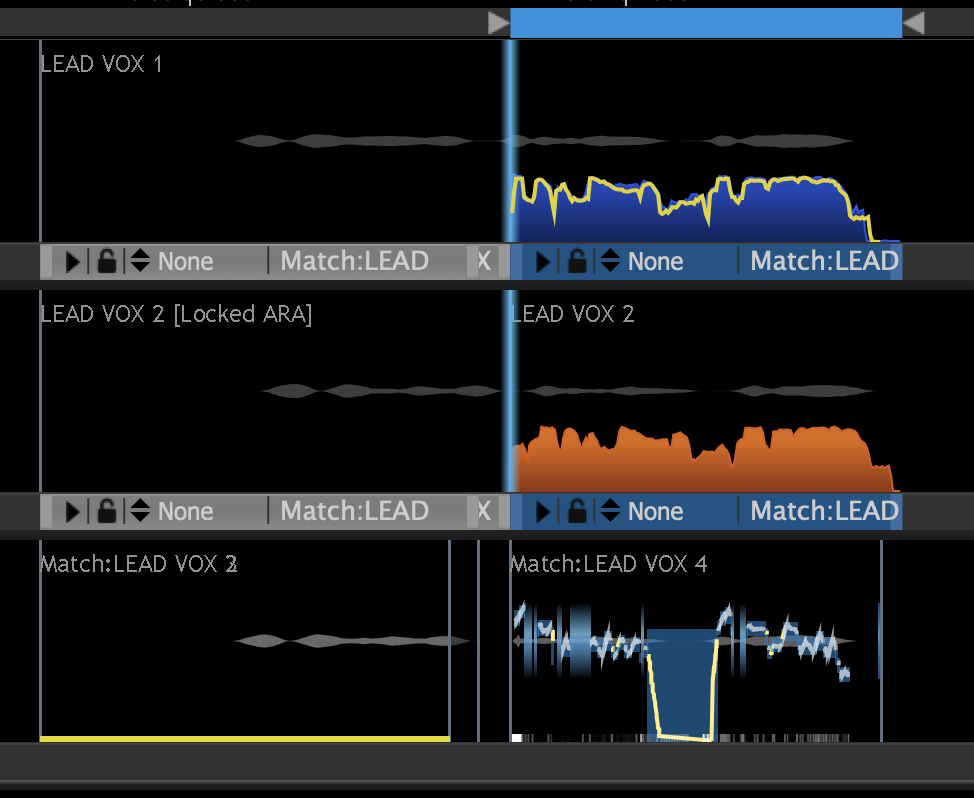
To quickly create Process Blocks that start where the previous process ended, the user can drag the Playback Range start point (the left most arrow) directly to a new end point for the Playback Range. In doing so, the new Playback range will begin exactly where the previous range ended. The red arrow in the below image begins at the previous start point, and shows the path along which the mouse was dragged.
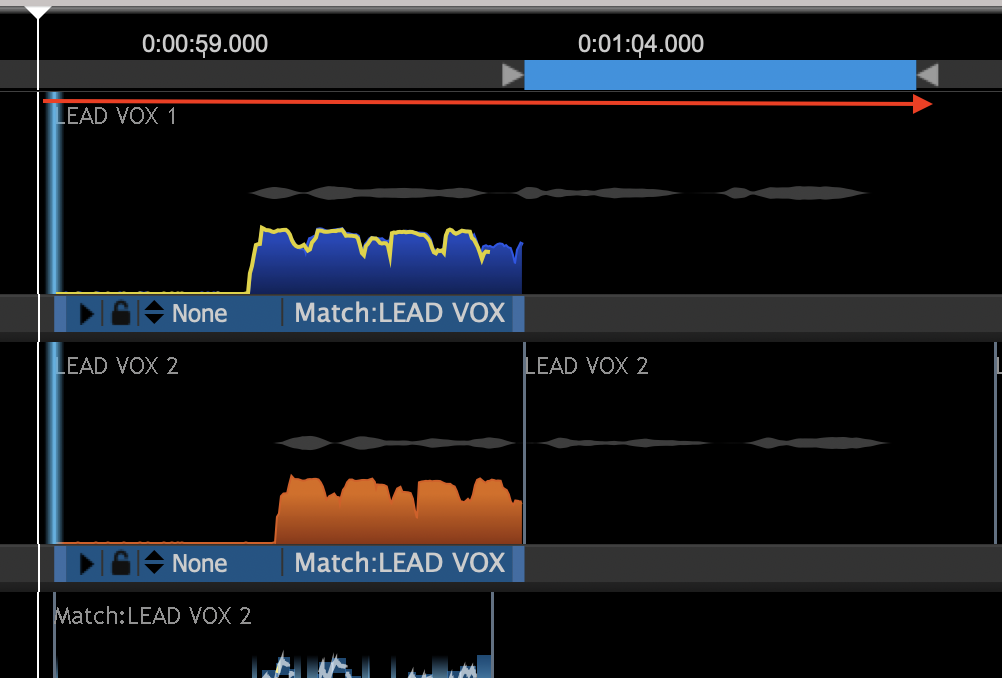
Pressing N once again will create the new Process Block.