Selecting blocks
Once you are displaying a process output with timing and pitch blocks, you can select parts of the audio to adjust in three ways, using the Selector tool:
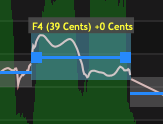
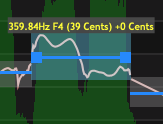
- To select one note or non-pitched block: click on the note, transition or non-pitched block to select it. Selected Blocks are indicated by a Block colour change. The yellow text above shows the nearest identified pitch of the note, plus or minus x cents, and any pitch shift applied to it in cents at the end. If Show Frequency in Hz is enabled in Preferences > Editing then the note's frequency is displayed first. (This is turned off by default, so as not to show too much information.)
 or showing frequency...
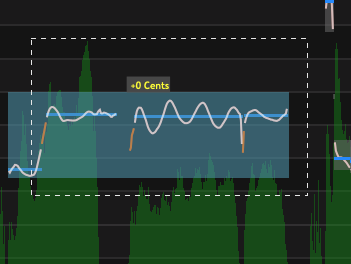
- To select a range of notes and/or non-pitched, either drag a marquee (selection box) across them, or shift-click to select multiple notes. The yellow text above shows any pitch shift of the combined notes in cents.

- To select ALL note and non-pitch blocks in a Warp Region or Warp process, choose Select All (cmd/ctrl-A) from the Revoice Pro Edit menu (not the contextual menu).
When multiple blocks are selected, the range of notes and non-pitched blocks and silence regions selected will become one block of values that can be manipulated together at the same time. Blocks will then behave in ways that depend on their signal content and the horizontal and vertical lock switches. (For now, we will assume the lock switches are OFF.)
You can audition audio in a looped fashion while you are manipulating time and pitch, to hear the effect. If background processing is turned on it will attempt to keep up with the changes you make, and with the effects of the various tools described below.
As you move the mouse cursor around or in the block, the cursor will change shape to show you what "tool" can be used to modify the signal and in which directions the block can be manipulated.
If the mouse cursor is placed within or on the edges of a selected Block, the cursor shape will indicate the available movements.