Audio Suite/AAX (Pro Tools)
![]() Revoice Pro 4 & Pro Tools – your guide to getting started
Revoice Pro 4 & Pro Tools – your guide to getting started
The Pro Tools AudioSuite/AAX Link plug-in can capture audio tracks from Pro Tools (PT) to Revoice Pro (RVP), optionally create RVP processes automatically, then transfer (render) the processed audio back to a selected PT track. Basic instructions are shown in plug-in control window. You can build up complex RVP sessions and make manual adjustments to RVP processes before rendering the processed tracks one-by-one back to selected PT tracks.
Pro Tools setup
Before using the AudioSuite/AAX Link plug-in, make sure in Pro Tools that the Session Setup window shown below (found in the Pro Tools Setup menu under Session) is set either to 00:00:00:00 or to a desired timecode offset.
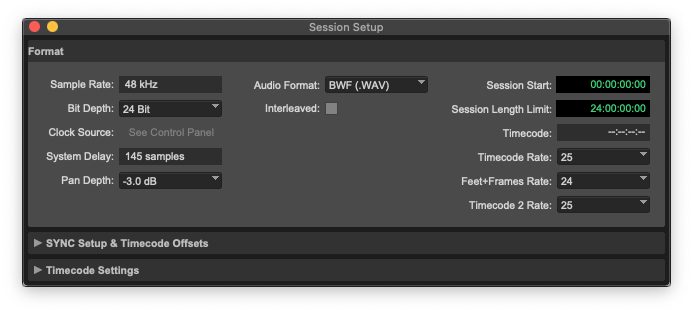
This Pro Tools Session Start offset will be added to the captured audio start timecode and be used as the timecode start in Revoice Pro.
The Sample Rate settings for the Pro Tools Session and the Revoice Pro Session need to be the same.
Opening the Link plug-in
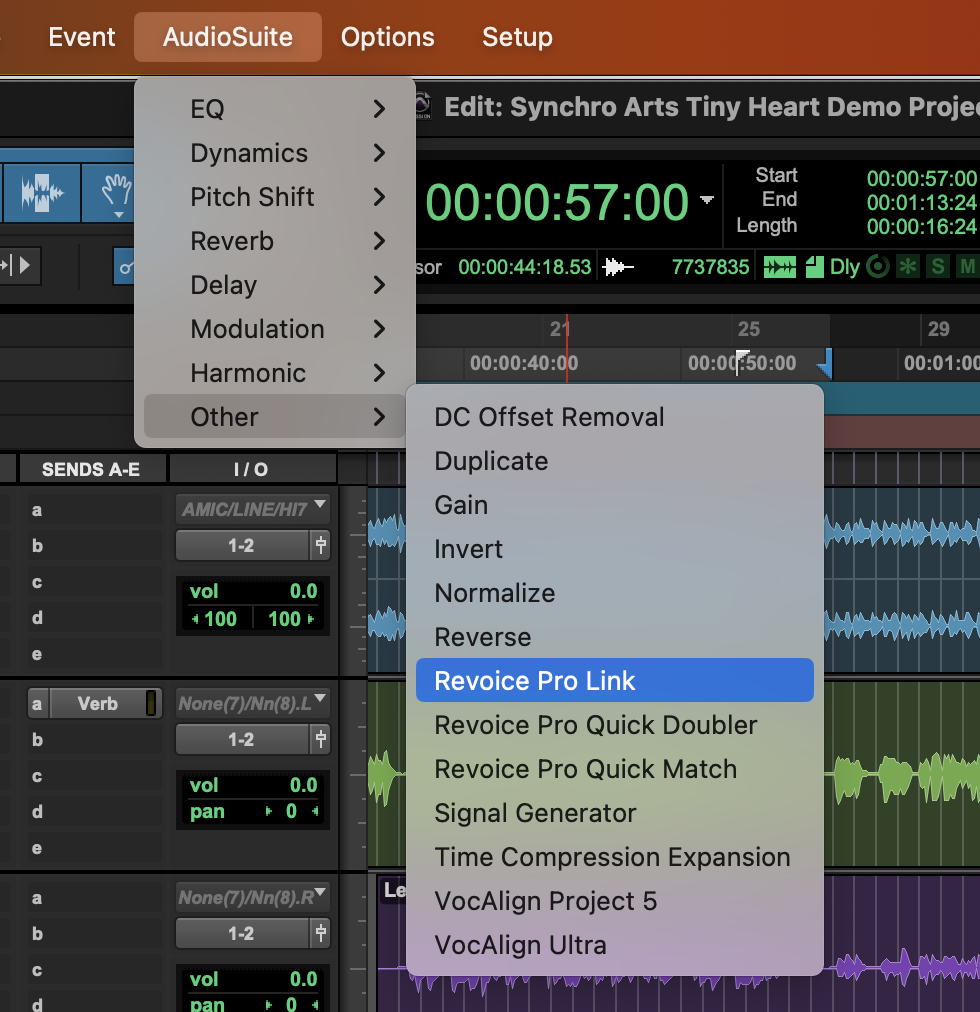
Select Revoice Pro Link in the Pro Tools Audio Suite > Other plug-in menu, shown below.
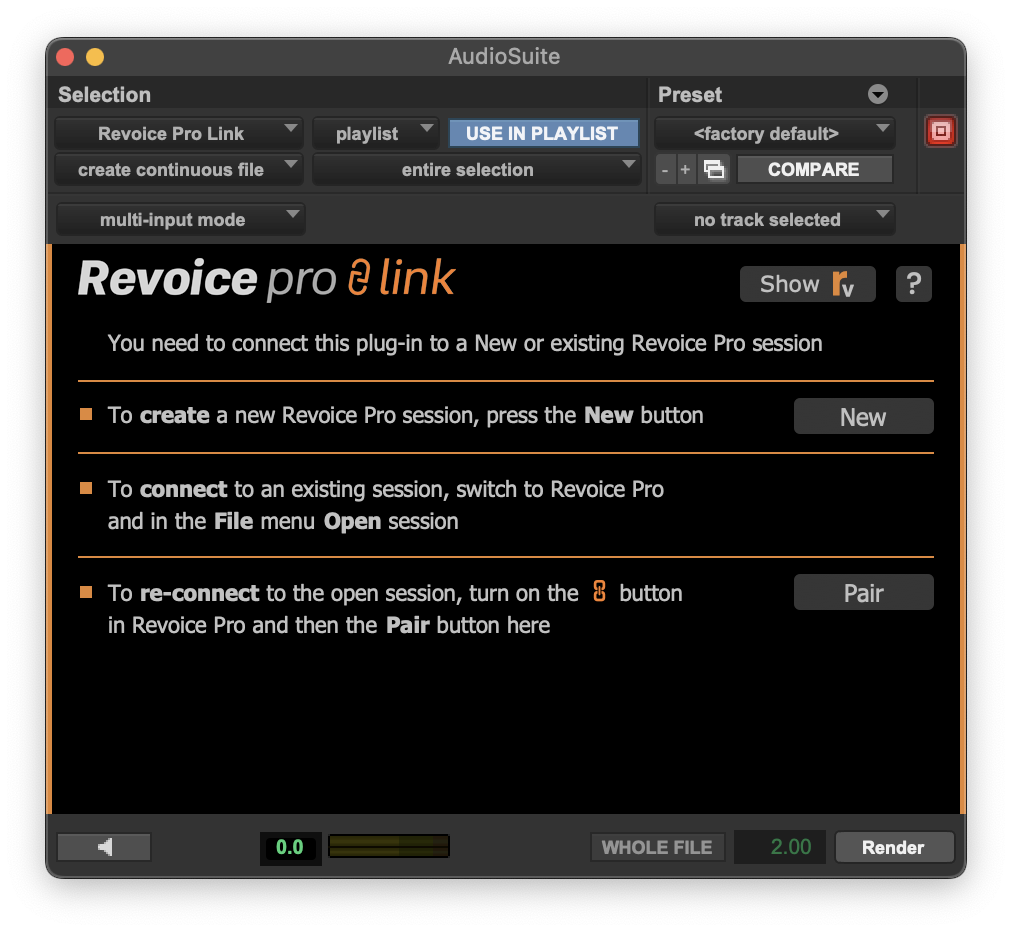
Once selected, you will see the Revoice Pro Link plug-in control window (below). At the top are the standard plug-in controls. Detailed information about header controls is available in the Pro Tools Help system.
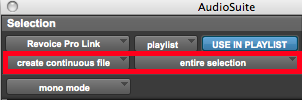
The only plug-in settings that are reliably supported for transfer of audio are "create continuous file" and "entire selection", which essentially grabs everything you have selected and makes one continuous audio file for use in RVP. (From PT 12.6 no other modes of operation can be selected with Revoice Pro Link.)
"Use in Playlist" must be turned on (blue) if processed audio from RVP is to be successfully rendered back to Pro Tools and appear in the session playlist (as opposed to the list of available clips).
Opening and showing Revoice Pro
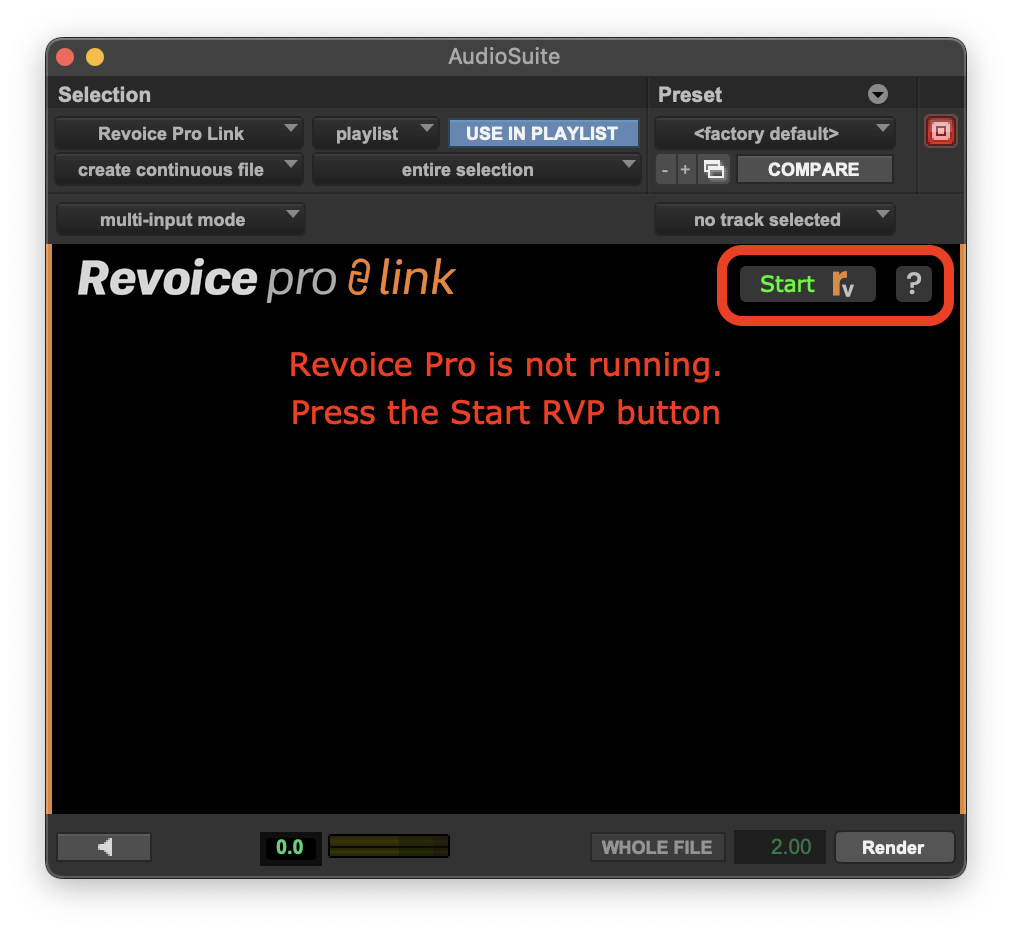
There is a button in the plug-in window that enables you to Start Revoice if it is not already open, or to Show RVP if it is open and you want to reveal its session window:
Creating and pairing sessions
The Link plug-in works by pairing your Pro Tools (PT) session with a new or existing Revoice Pro (RVP) session. This way, you can build up a complex RVP session and save it for subsequent use alongside the related PT session. It does this by saving the full file path of the PT session in the RVP session. If you rename or move the PT session the RVP session will need to be paired with it again.
New session
To create a new Revoice session, paired with the current PT session, press New in the plug-in window:

Existing session
To link to a previously saved and paired RVP session, go to RVP and open the saved RVP session.
Re-pairing sessions
To re-connect to an existing RVP session (in case the pairing has been lost for some reason), open the session in RVP, turn on the green Link button in RVP, then select Pair in the plug-in window:

Plug-in control window
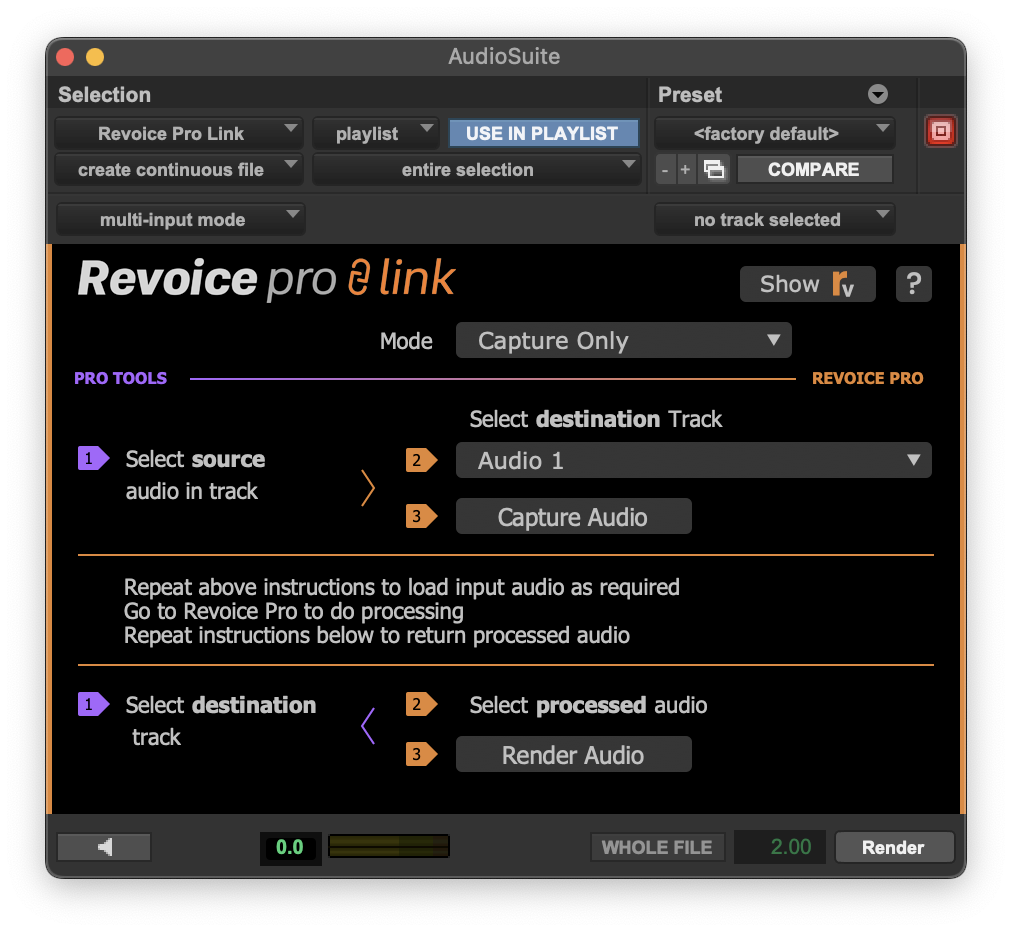
Once an RVP session has been created or paired, you will see the audio capture and rendering functions in the Link plug-in control window, shown below, which are described in detail in the following sections. Essentially, audio from PT has first to be captured by RVP, a process created in RVP (plug-in Functions can do this automatically), and the processed audio rendered (transferred) back to a selected PT track.
Revoice Pro Link Switch
![]()
To transfer audio using any of the Link Plug-ins to Revoice Pro, the Revoice Pro Link Switch must be ON (green as shown above) in the destination Revoice Pro Session window.
Otherwise, the Link plug-ins will display an error message.
Only one Revoice Pro Session can have this switch ON at a time.
Topics in this section:
Capturing audio from Pro Tools using the link plug-in
Transferring the audio back to ProTools using the link plug-in
![]()