User Interface and Operation
Using VocAlign 6 Pro » User Interface and Operation
- Using VocAlign 6 Pro
- Interface overview
- The Overview window
- Selecting Audio
- Settings and Help
- Resizing the Vocalign Window
- Guide, Dub and Output display modes
- Audio alignment controls
- Optimising the Pitch Detection accuracy for the Guide and Dub
- How to check that the Dub is aligned with the Guide
Using VocAlign 6 Pro
In this section we will provide a look at the VocAlign 6 Pro user interface and cover several more advance controls.
Interface overview
The VocAlign 6 Pro interface is divided into two main sections.
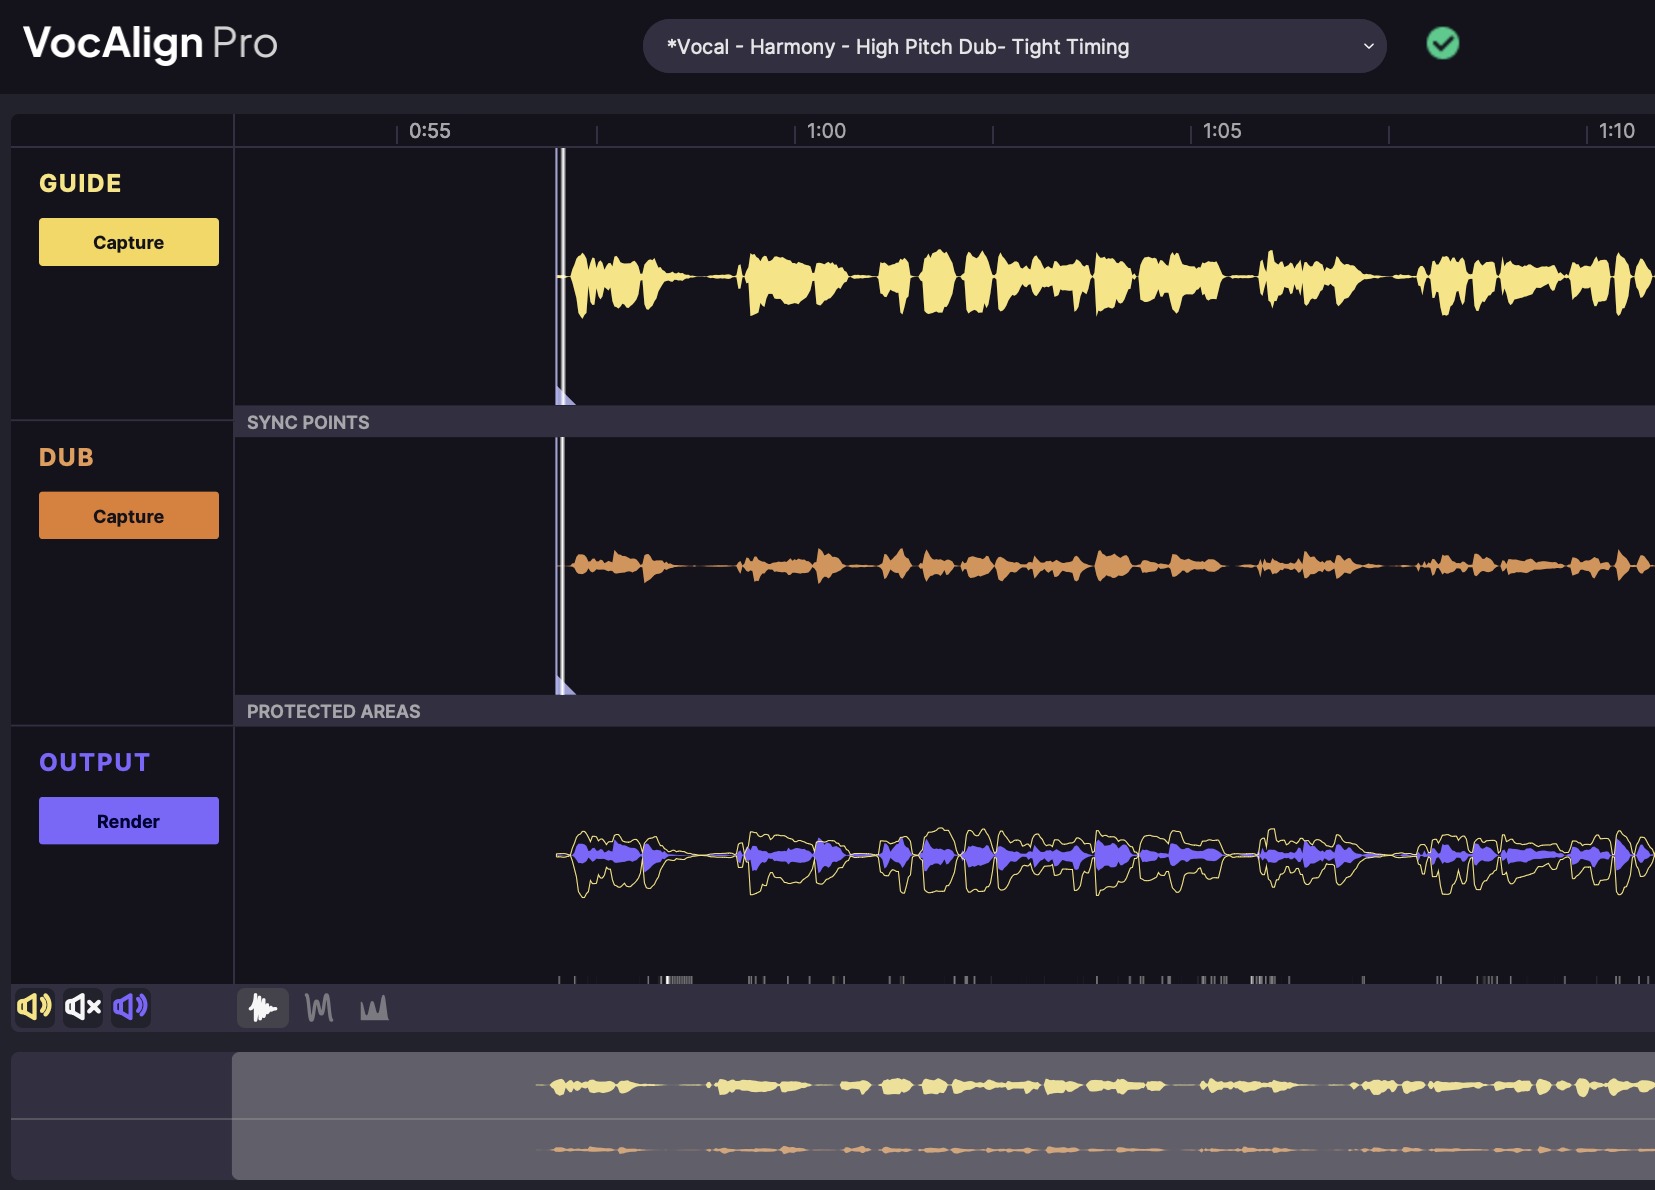
The left-hand side contains the Guide, Dub and Output Capture/Render controls and displays.
- The right-hand side is home to the Timing, Pitch, and Other controls that guide the all-important alignment algorithms.
Note that there will be differences in the left side's Guide, Dub Capture and Output Return controls, because these depend on the way your DAW exchanges audio with VocAlign 6 Pro. The three different audio capture and return methods are AAX (Audio Suite and ARA2), VST and AU Realtime capture, and VST and AU ARA2 capture.
Below is the left side of the AAX Audiosuite interface.
The Overview window
Because the ARA, VST and AU versions of VocAlign 6 Pro support sequential capturing of multiple regions along the session timeline for independent alignment, there is an extra panel at the bottom which displays the captured Guides and Dubs along the timeline. This window is called the Overview.

The overview shows the currently selected Guide and Dub signals in Yellow and Orange, and all the not-selected regions in grey. A vertical white line indicates your position on the timeline in VocAlign and your DAW.
Click anywhere in the overview to change the region selection, immediately jumping to it in the main display and updating the controls accordingly. Click the bin/trash icon at the left-hand end to clear the selected region from the plugin.
On the right side of the Overview, the magnifying glass ![]() provides horizonal zoom of the timeline and audio, and the waveform icon
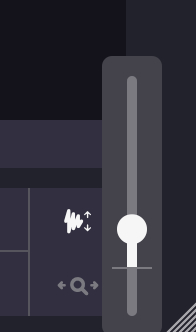
provides horizonal zoom of the timeline and audio, and the waveform icon ![]() changes the vertical size of the waveforms within the Overview display. Clicking either will open a vertical scroll bar, shown below, with which you can change your settings, or return to the default via the Option+Click on Mac or ALT+Click on Windows.
changes the vertical size of the waveforms within the Overview display. Clicking either will open a vertical scroll bar, shown below, with which you can change your settings, or return to the default via the Option+Click on Mac or ALT+Click on Windows.
Selecting Audio
When working with multiple Guide and Dub tracks in the ARA version of VocAlign 6 Pro, you can select each track by right-clicking on the Guide or Dub display and mousing over Select Audio.
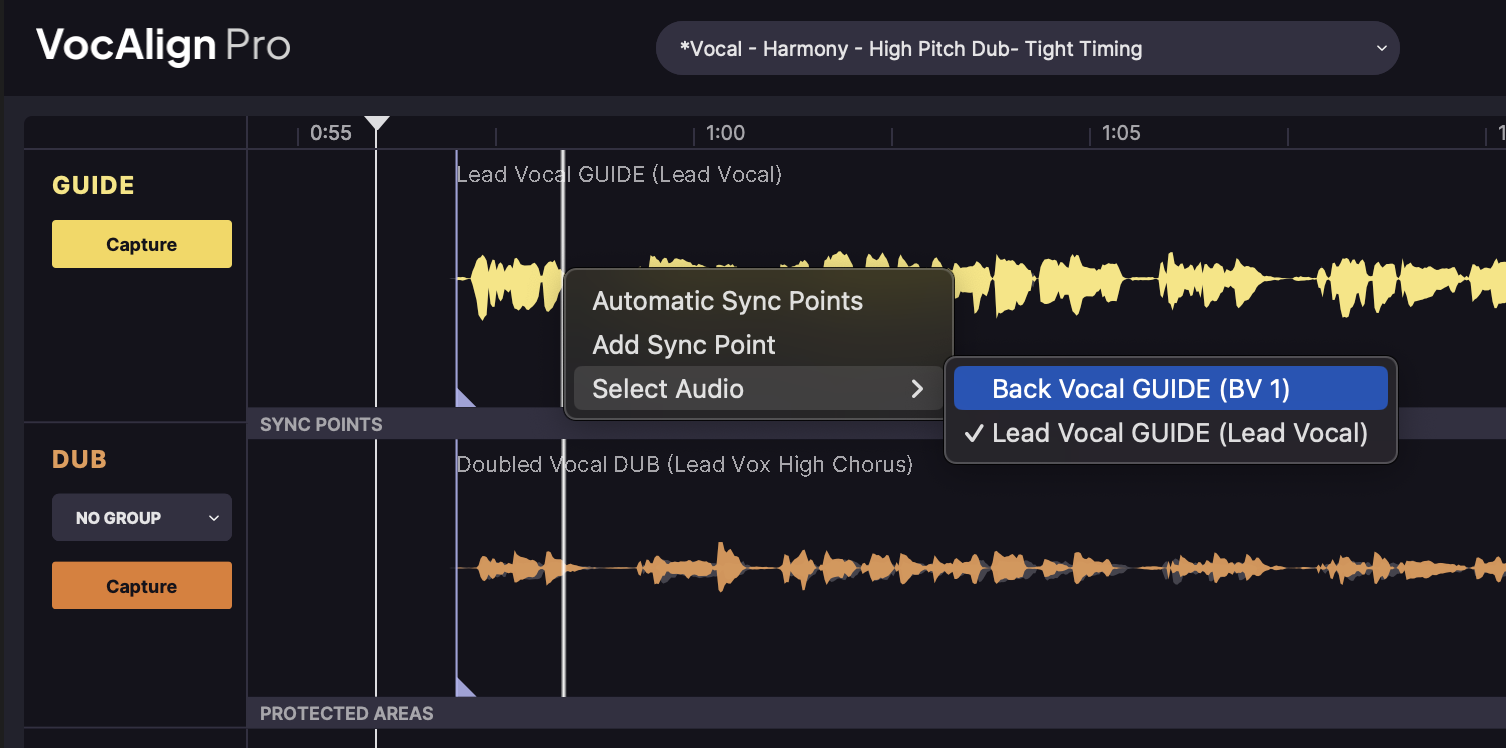
NOTE: In the ARA versions, clicking in the Overview (or main) displays will move the Playhead in the DAW to the clicked position. This is useful for many reasons described later.
Settings and Help
Along the top of the interface are the preset menu, undo / redo icons, and the Settings and Help buttons.

Clicking the help  button will open the Vocalign Pro 6 manual.
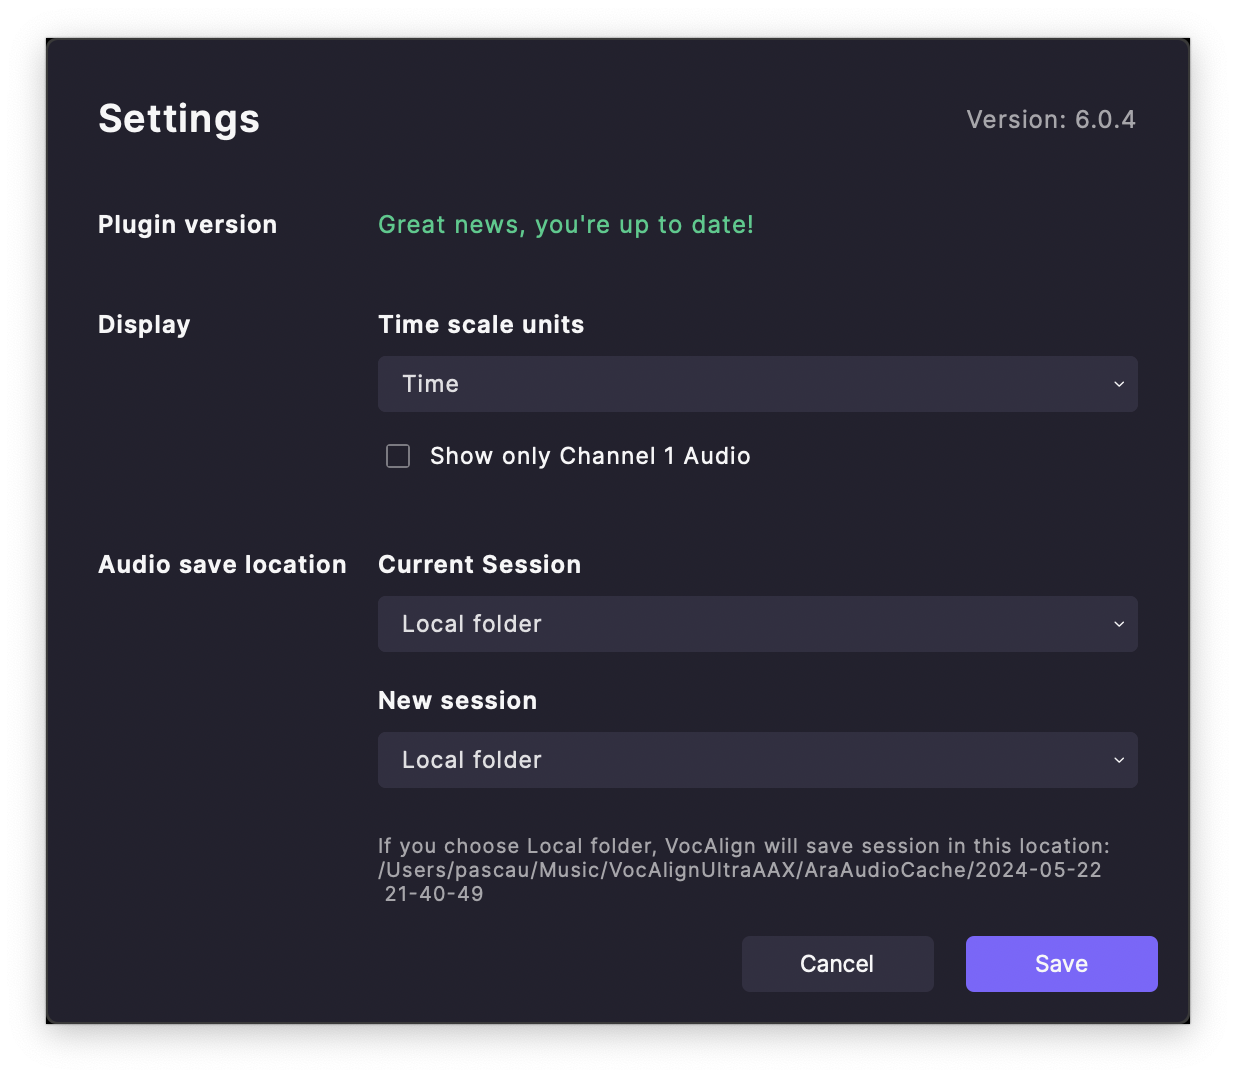
Clicking the Settings  will open the settings panel. It is worth noting here that you can change the top axis in VocAlign to display Bars and Beats (ARA only), Time, or Samples. Select whichever best fits the current session you are working with. See Saving VocAlign 6 Pro's Audio Data for more information on settings related to saving and date management.
Resizing the Vocalign Window
The interface is freely resizable to suit any size or resolution of monitor by dragging the bottom right corner or sides, depending on the DAW and OS.
Below, we see the compressed user interface.
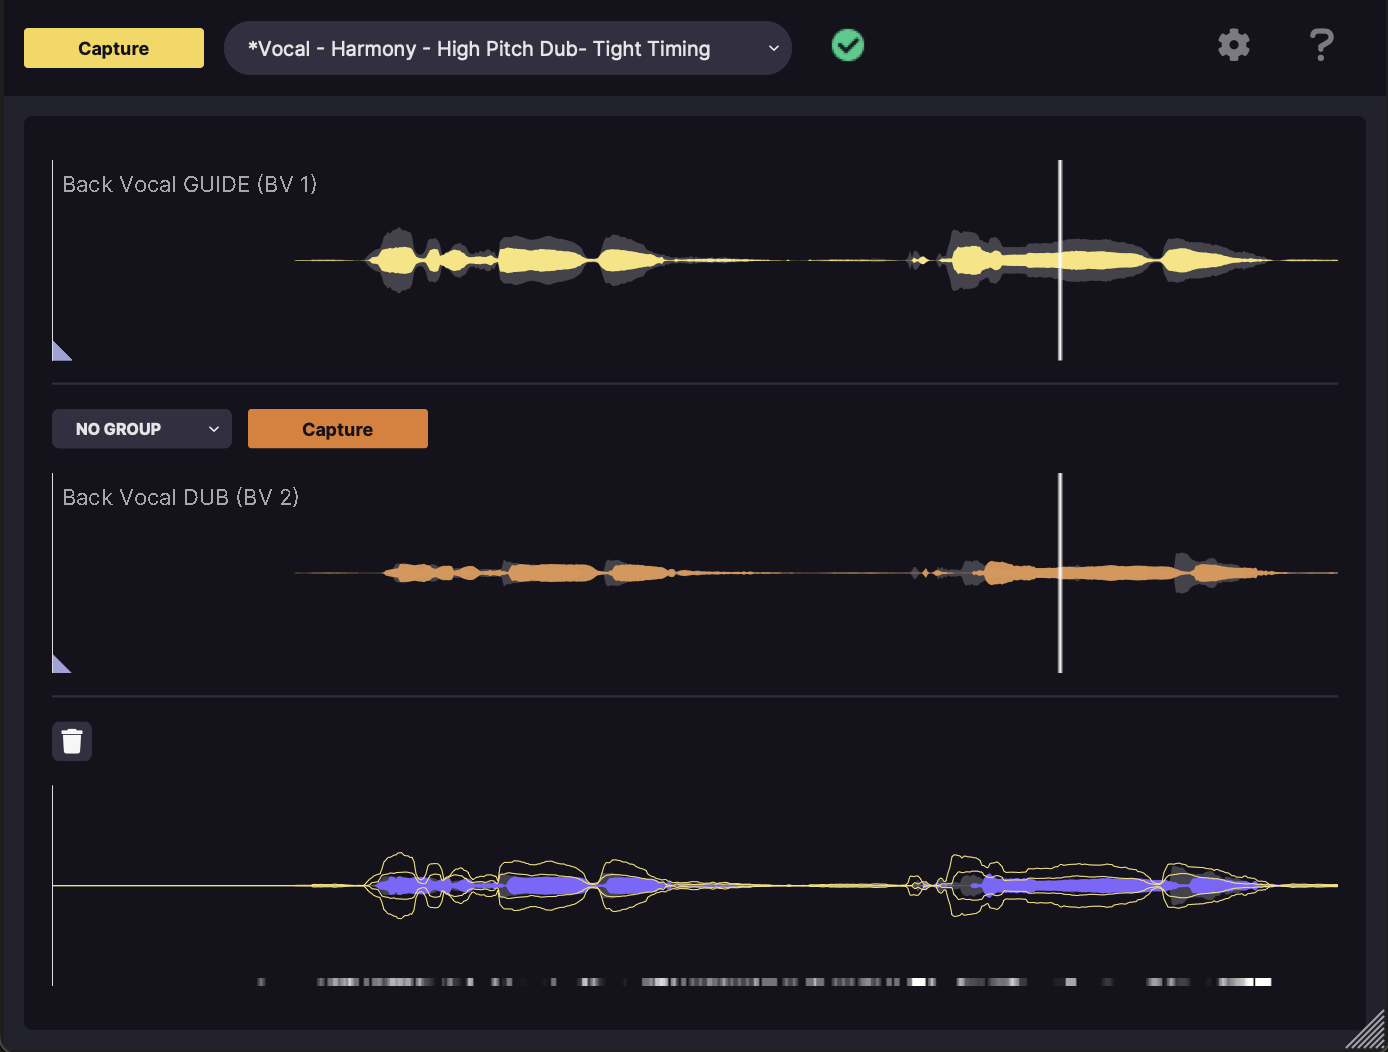
This shows that the control panels and associated controls can shrink out of sight, while the Guide, Dub and Output displays adapt their shape and size to fit the remaining defined space.
This is useful if you have a lot of tracks on the screen that you need to see and are happy to operate the plug-in with the Presets alone.
Guide, Dub and Output display modes
The display section offers three modes of visualising the Guide, Dub and Output signals, selected using the three buttons at the bottom left of the UI.
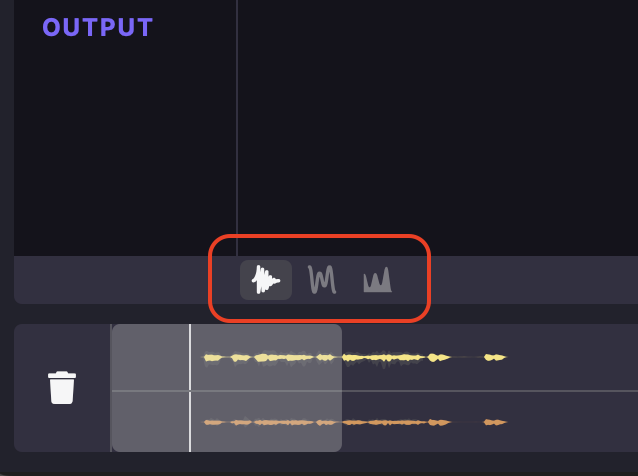
From left to right these are the Waveform display, the Pitch display, and the Energy Display (similar to the main display of the previous VocAlign products).

In all three modes, the Output visualizer updates to reflect changes made to parameters as they’re applied. Consistent colour coding is used throughout the three views: yellow for the Guide, orange for the Dub, and purple for the Output.
Incidentally, although you’ll likely be using VocAlign 6 Pro with mono signals the vast majority of the time, multi-channel signals – 2-channel stereo to 7.1 surround – are also supported, with all channels stacking up in the display. Note that channel 1 (the left channel in a stereo pair, for example) is always used as the alignment source: Dub channel 1 is aligned to Guide channel 1, then all subsequent Dub channels are aligned using the same calculation. Also, only channel 1 shows the Guide outline, Protected Areas, Sync Points and red processing activity line.
Waveform Display
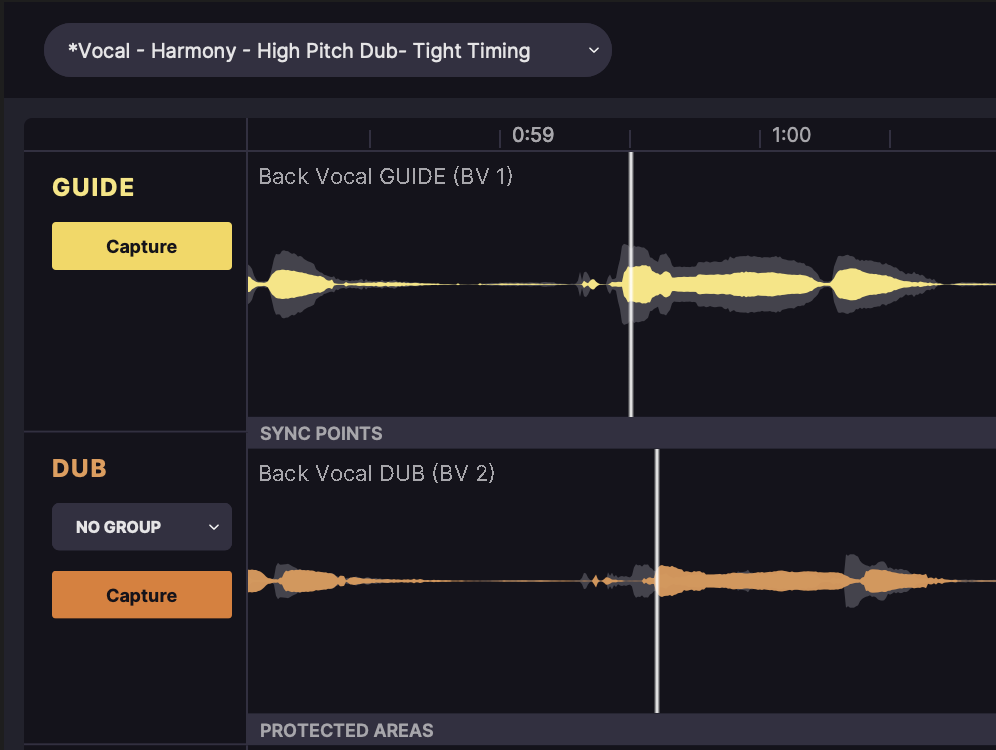
The default view shows separate waveforms for each of the three signals.
The Output waveform is overlaid with an outline of the Guide waveform, making it easy to assess the temporal alignment applied by the current parameter configuration.
The two white lines in the Guide and Dub tracks show the result of the "thinking" that the time matching alignment algorithm has done, by showing where a time position of features in the guide waveform match the time position of similar features in the Dub waveform. These floating white Offset Indicators follow movement of the mouse pointer over either waveform, showing the continuous mapping of the position under the pointer to its counterpart in the other waveform.
Pitch Profile Display
While the Waveform and Energy Profile views are intended for visualizing alignment in the time domain, the The Pitch Profile view – you won’t be surprised to learn – provides equivalent information in the frequency domain. A 'piano keyboard' underlay in this view represents pitch on the Y axis. Lastly, to provide a familiar timing reference for the pitch traces, the Guide waveform is included as a grey waveform in the background
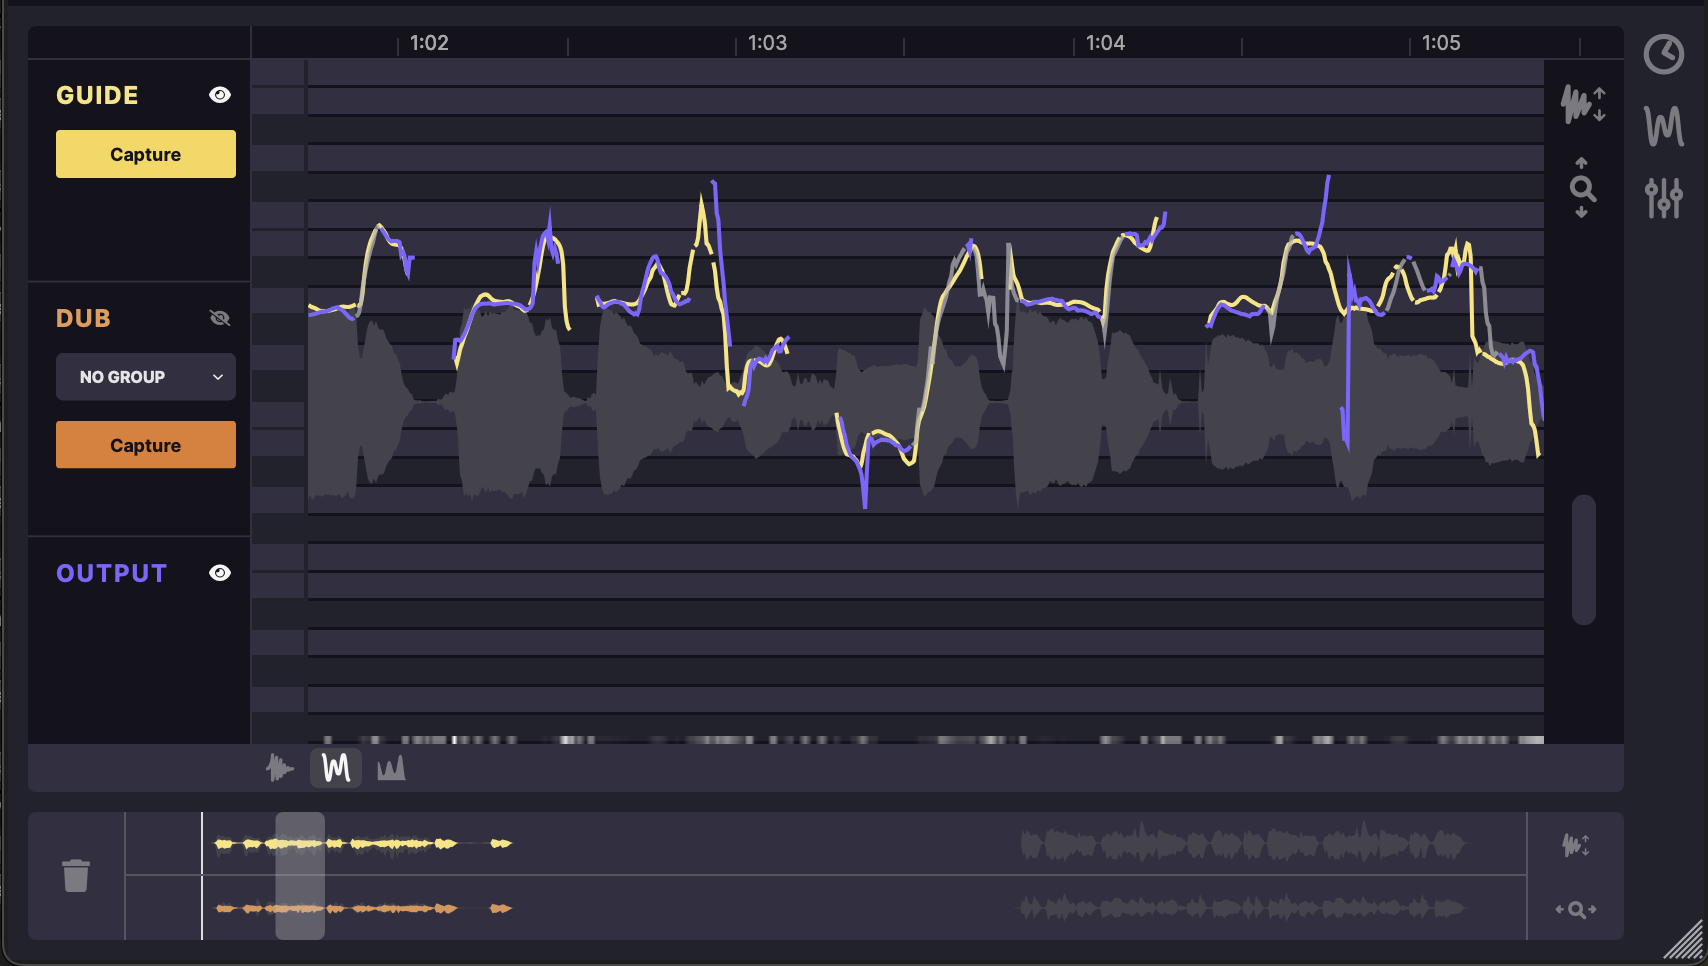
Each signal is represented in the Pitch Profile window by a line in its usual colour – yellow for the Guide, orange for the Dub and purple for the Output – that tracks its pitch progression over time. See the Quick Start Guides for information on how to put this to use.
Clicking ‘eye’ button in the Guide, Dub or Output header toggles that signal’s pitch profile line on and off. In the below image, we can see that the Guide and Output tracks have their pitch profile lines toggled on, while the Dub pitch profile is toggled off.
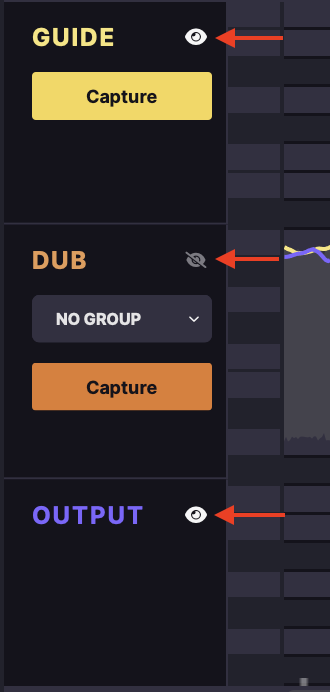
At the very bottom of all the displays, the greyscale ‘heat map’ provides insight into the amount of processing being applied to the Dub along the timeline. This is useful for auditioning the Output, allowing you to focus your attention on the lightest areas showing the greatest changes. The greyscale heat map is shown in the below image, just above the red line.

Energy Profile Display
The Energy Profile view (which will be familiar to users of previous VocAligns) displays the Guide and Dub as solid energy contours over time, and the Output energy as a purple trace over the Guide. Again, the Offset Indicators show the temporal mapping of Guide to Dub, as described above.
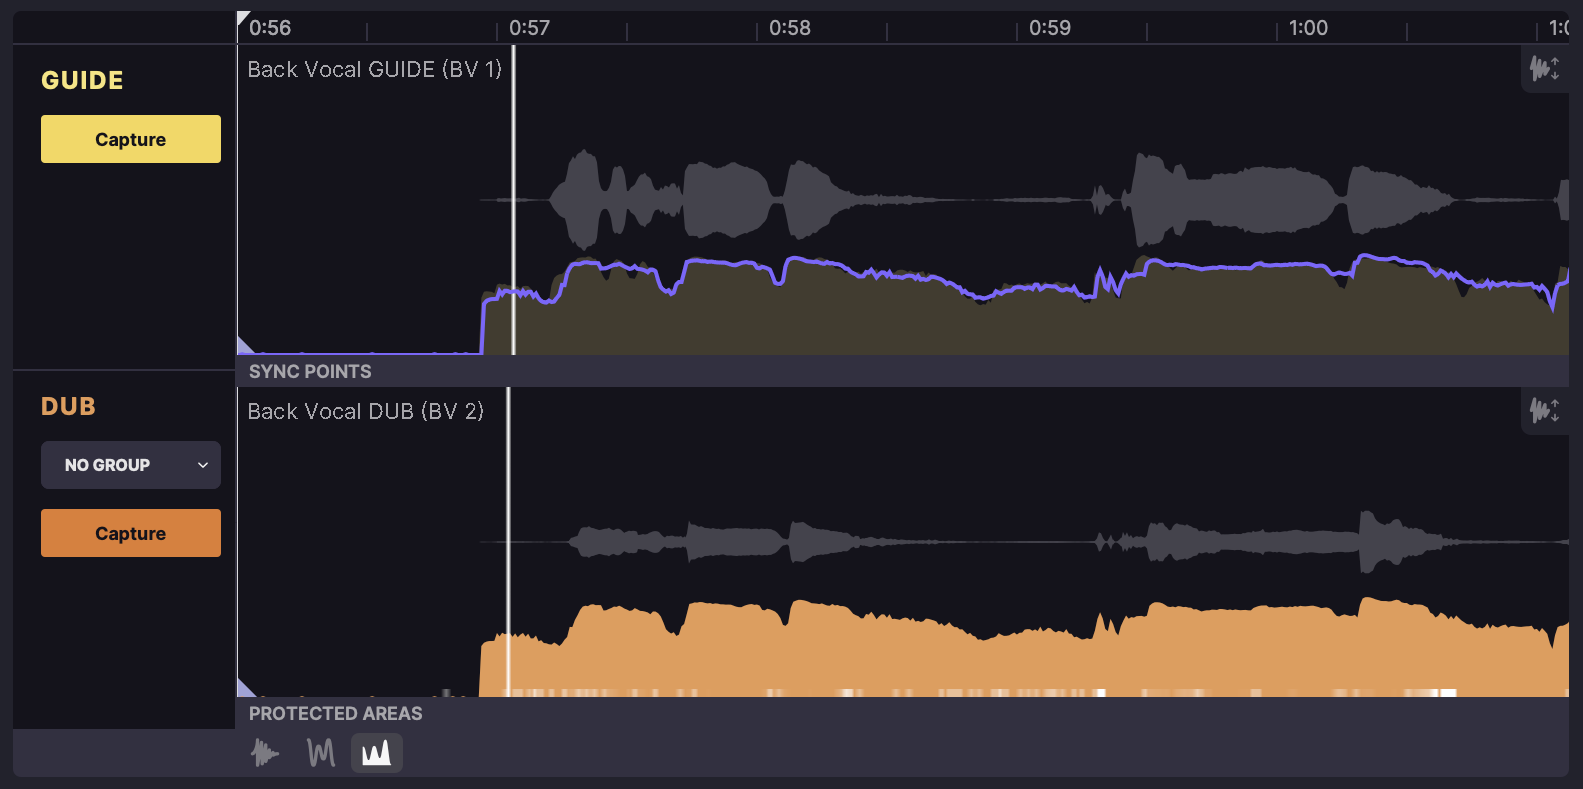
Scrolling in the display
In all three display view modes, horizontal scrolling is done using the overview area at the bottom of the user interface; and the Pitch Profile view also allows for vertical scrolling via a vertical scrollbar on the right hand edge of the display. You can scroll with your mouse or trackpad, too.
Zooming the display

The horizontal zoom control at the right of the overview area ![]() facilitates zooming into and out of all three views on the X axis, applied to all panes collectively.
facilitates zooming into and out of all three views on the X axis, applied to all panes collectively.
Vertical zooming is handled on a per-pane basis: click the small level control icon ![]() at the top right of any the three Waveform view panes, two Energy Profile view panes, or the Pitch Profile display to reveal the vertical zoom slider for that pane. Use the mouse wheel or drag the pop up control up and down to scale the height of the Y axis.
at the top right of any the three Waveform view panes, two Energy Profile view panes, or the Pitch Profile display to reveal the vertical zoom slider for that pane. Use the mouse wheel or drag the pop up control up and down to scale the height of the Y axis.
This increase in the waveform height is only visual and the gain of the audio is not affected.
Audio alignment controls
Before continuing, please refer back to the section on capturing the Guide and Dub for your particular DAW if you’re not yet familiar with how to get audio into the plugin. You can find a guide for your DAW, or a similar DAW, in the Quick Start section of this manual.
You can show / hide the individual alignment control panels by clicking the icons on the right hand side of the user interface, there are separate panels for controlling the timing, pitch and other settings.
Please see the section Adjusting the Automatic Time and Pitch Matching for further information on the alignment settings.
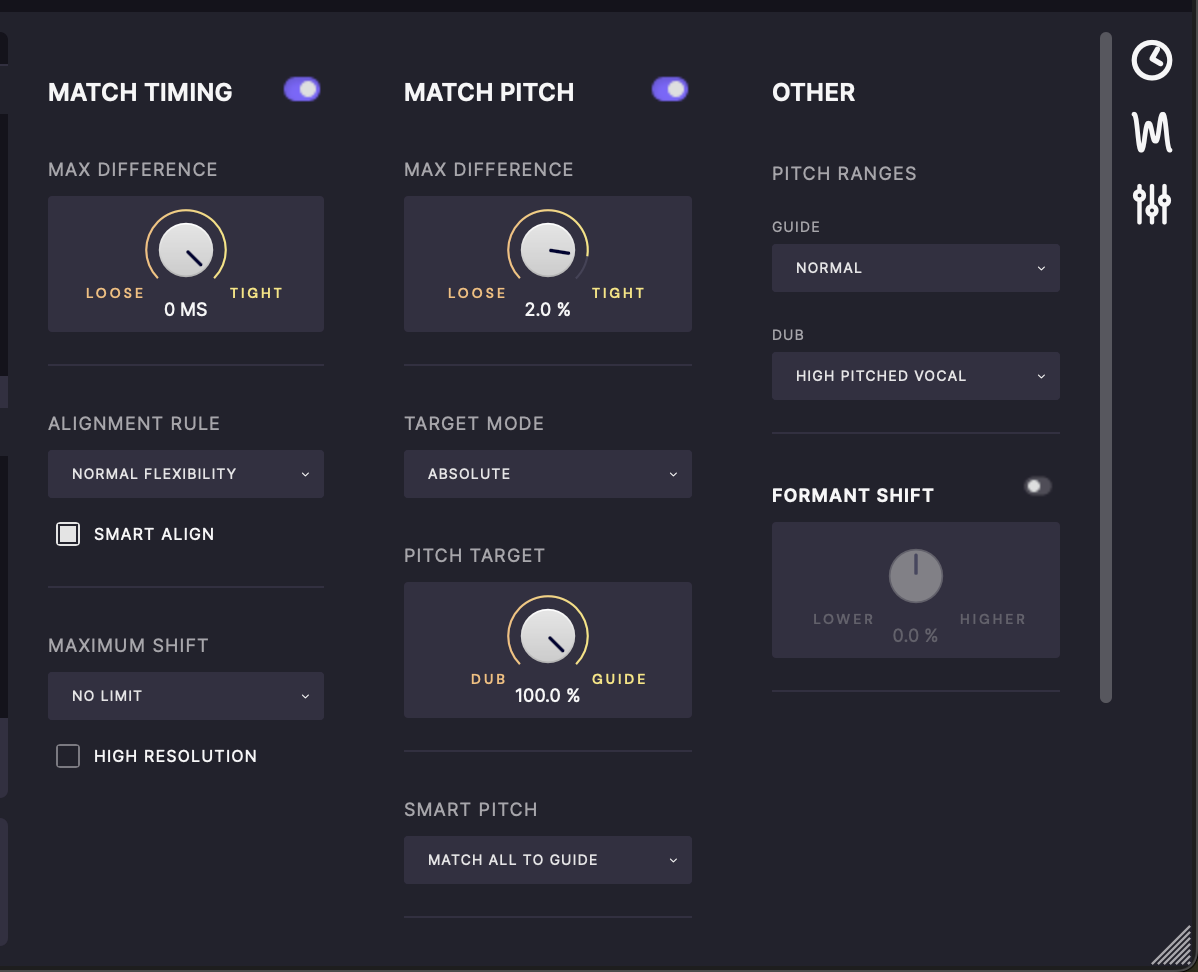
Optimising the Pitch Detection accuracy for the Guide and Dub
Pitch Ranges
These controls are shown in the figure above can be found in the 'Other' panel. You can optimise VocAlign 6 Pro’s pitch detection algorithm for specific "unnormal" source signal types by focusing its attention on higher or lower ranges. You can do this by making appropriate selections in the Guide and Dub menus.
By targeting the algorithm independently to each of the two signals, you can ensure the best results possible, whether you’re aligning a lead vocal with a harmony an octave above, say, or a lead guitar to a bassline.
The available ranges are explained in the section here
How to check that the Dub is aligned with the Guide
VocAlign 6 Pro’s three display views provide comprehensive visualisation of the Guide, Gub and Ouput signals.
To check the timing alignment of the Dub with the Guide, focus on the Output display in the Waveform view.

This layers the Guide (yellow waveform outline) and Output (purple solid waveform) on top of each other, giving an excellent overview of their positional relationship. The greyed out waveform is the original position of the Dub track.
The Energy Profile is also helpful here, and offers a “legacy“ view option of alignment quality as a counterpart to the waveform display.
To check the pitch matching (which also shows the time matching of the pitch traces), switch to the Pitch Profile view.
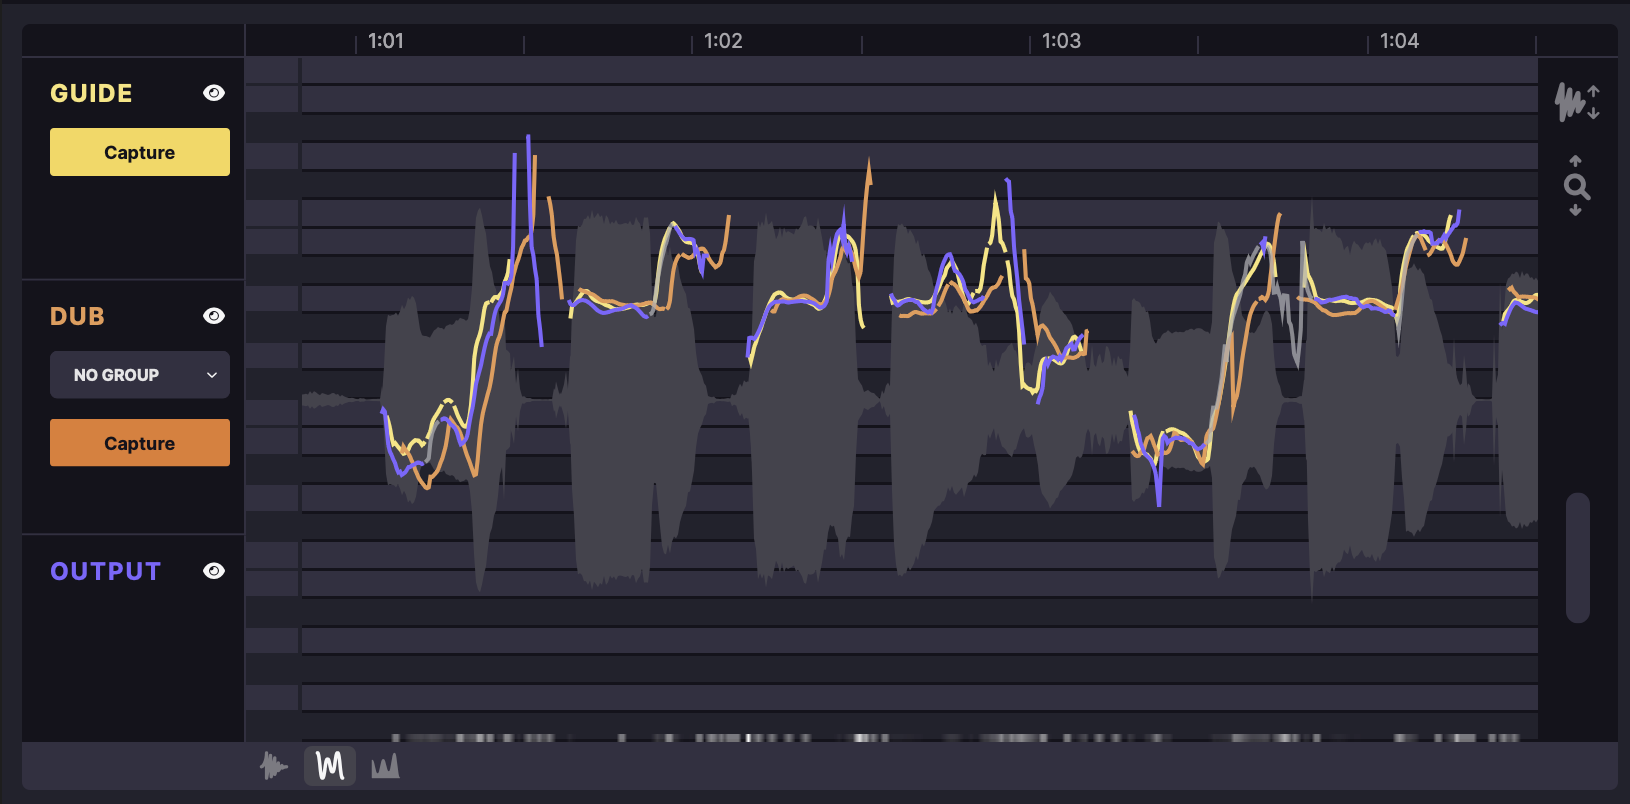
Here, the Guide, Dub and Output signals are shown together on a sequencer-style piano roll, with the Guide waveform in the background for timing reference and a greyscale processing heatmap at the bottom. As you raise the two Max Difference controls, you’ll see the purple Output trace move increasingly close to the Guide trace on the X (Match Timing) and Y (Match Pitch) axes, which can make this the most effective view when working with sung vocals or melodic instrumental parts.
In the above display, it is set to slightly loose time and pitch, meaning the Output (purple) is closer to the Guide (yellow) than the incoming Dub (organe), allowing natural variations to come through - which differences could be "dialed out" by turning the Timing and Pitch knobs towards the "Tighter" setting.
Visual references aside, of course, the best way to check the alignment of your Dub is to audition the Guide and Output signals using the Preview and Solo buttons in the AAX AudioSuite version,

or playback and the Solo controls in the host DAW in all other versions.
Start and End Markers
At both the start and end of the Guide and Dub signals, the white vertical markers with triangles at the bottom define their Start and End points, as used by the processing algorithm to work out their alignment.
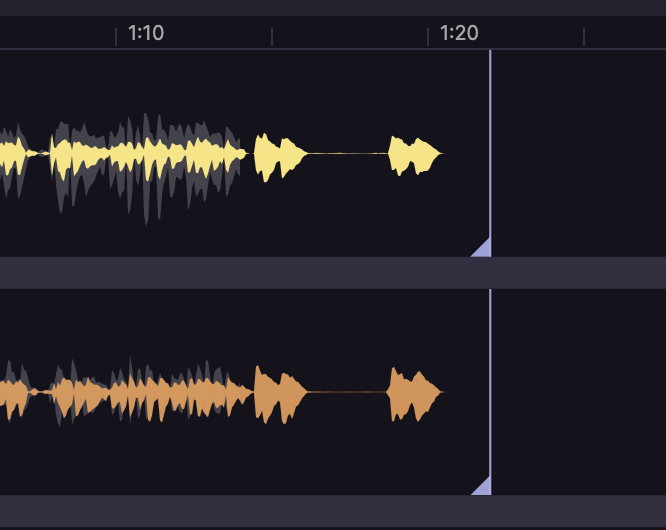
If your Guide and Dub start and end at roughly the same points on the timeline, you probably won't need to touch these. However, if you have, say, a loud breath sound or cough before the vocal starts in one signal but not the other, moving that signal’s Start Marker past the offending intrusion will prevent the algorithm misinterpreting it as the start of the vocal.
However, if the Dub continues beyond the end of the Guide, VocAlign 6 Pro will simply add the extra Dub after the Guide ends, unless you move the Dub's end marker.
If the Guides is longer than the Dub, however, you might wish to move the Guide's end marker to the end of the corresponding Dub audio, to keep the Dub from being stretched unnaturally to match the continued energy of the Guide.
To move the Start and End Markers, drag their triangular handles or the vertical lines.