User Interface and Operation
- Using VocAlign Ultra
- Interface overview
- Audio alignment
- How to check that the Dub is aligned with the Guide
Using VocAlign Ultra
Now that you’re up to speed with the fundamentals of VocAlign Ultra – importing and exporting audio, loading presets and the Basic editing controls – let’s get into the details, looking at preset management, the three Display switches (at the bottom of the screen), the Advanced editing controls and more.
Interface overview
The VocAlign Ultra interface is divided into two main sections.
The left-hand side contains the Guide, Dub and Output Capture/Render controls and displays.
- The right-hand side is home to the Basic and Advanced controls that guide the all-important alignment algorithms.
Note that there will be differences in the left side's Guide, Dub Capture and Output Return controls, because these depend on the way your DAW exchanges audio with VocAlign Ultra. The three different audio capture and return methods are AAX (Audio Suite), VST and AU Realtime capture, and VST and AU ARA2 capture.
Below is the left side of the AAX interface.
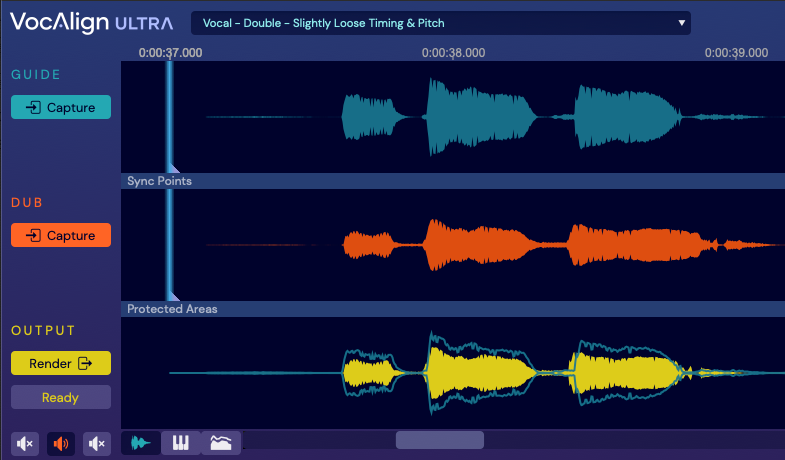
Because the ARA, VST and AU versions of VocAlign Ultra support sequential capturing of multiple regions along the session timeline for independent alignment, there is an extra panel at the bottom which displays an overview of the captured Guides and Dubs along the timeline.

The overview shows the currently selected Guide and Dub signals in Blue and Orange, and all the not-selected regions in grey. Click anywhere in the overview to change the region selection, immediately jumping to it in the main display and updating the controls accordingly. Click the bin/trash icon at the left-hand end to clear the selected region from the plugin.
When working with multiple Guide and Dub tracks in the ARA version of VocAlign Ultra, you can select each track by right-clicking on the Guide or Dub display and mousing over Select Audio.
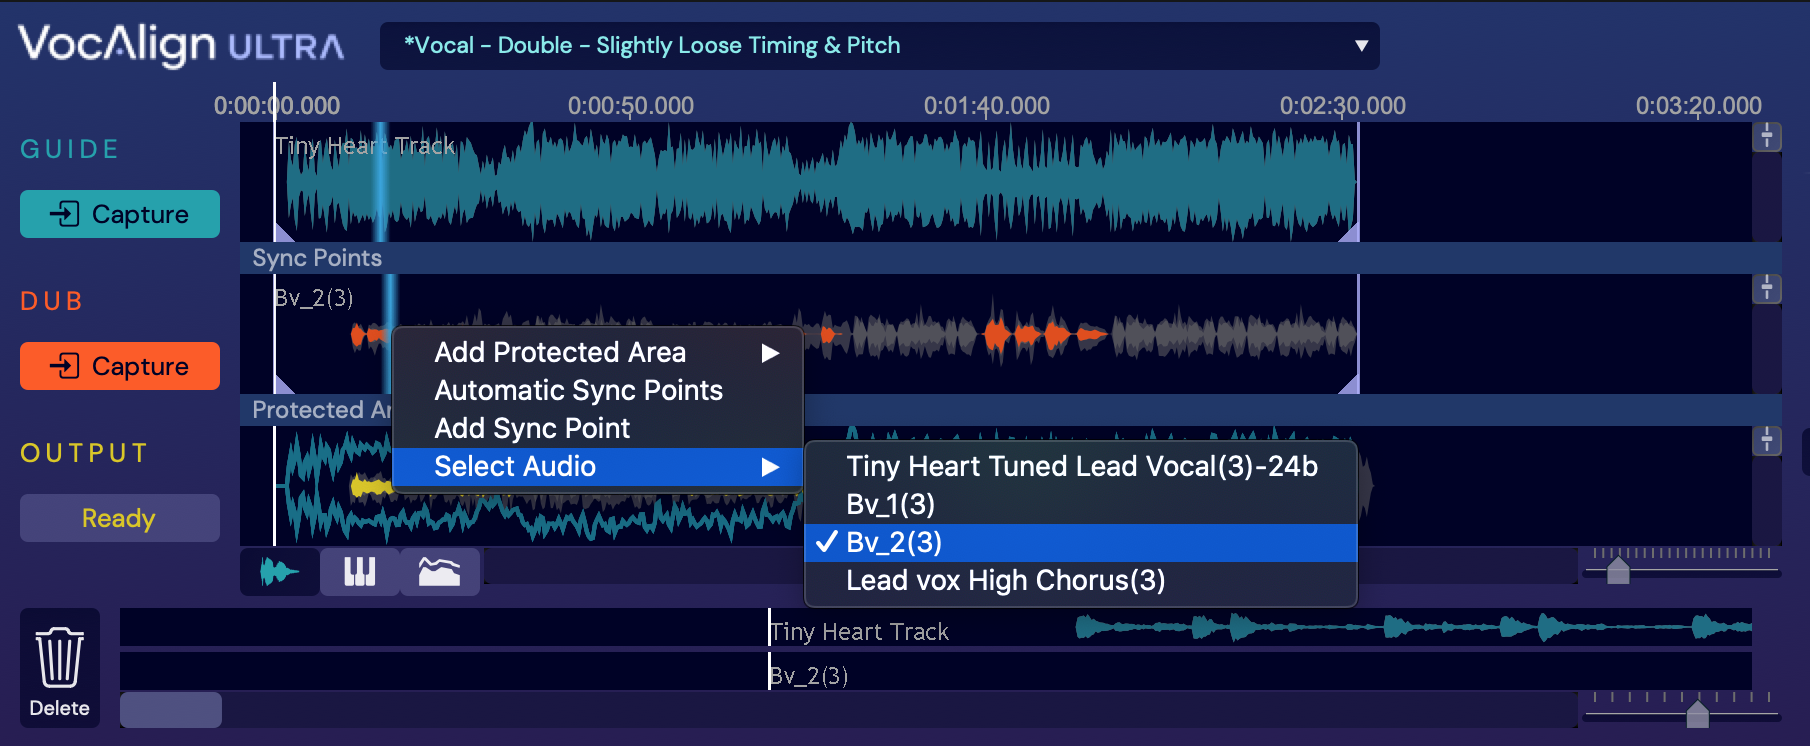
NOTE: In the ARA versions, clicking in the Overview (or main) displays will move the Playhead in the DAW to the clicked position. This is useful for many reasons described later.
Along the top of the interface are the preset menu, the Basic/Advanced edit mode toggle, and the Settings and Help buttons.

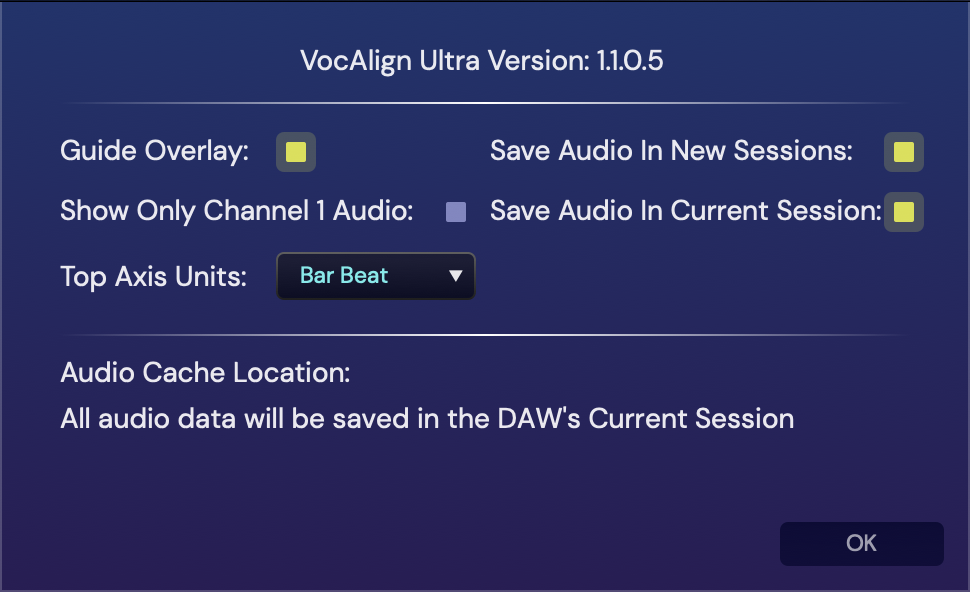
Clicking the Settings  will open the settings panel. It is worth noting here that you can change the top axis in VocAlign to display Bars and Beats, Time, or Samples. Select whichever best fits the current session you are working with. The rest of these options will be covered in detail in Adjusting the Automatic Time and Pitch Matching and Saving VocAlign Ultra's Audio Data.
The interface is freely resizable to suit any size or resolution of monitor by dragging the bottom right corner or sides, depending on the DAW and OS.
Below, we have compressed the width.
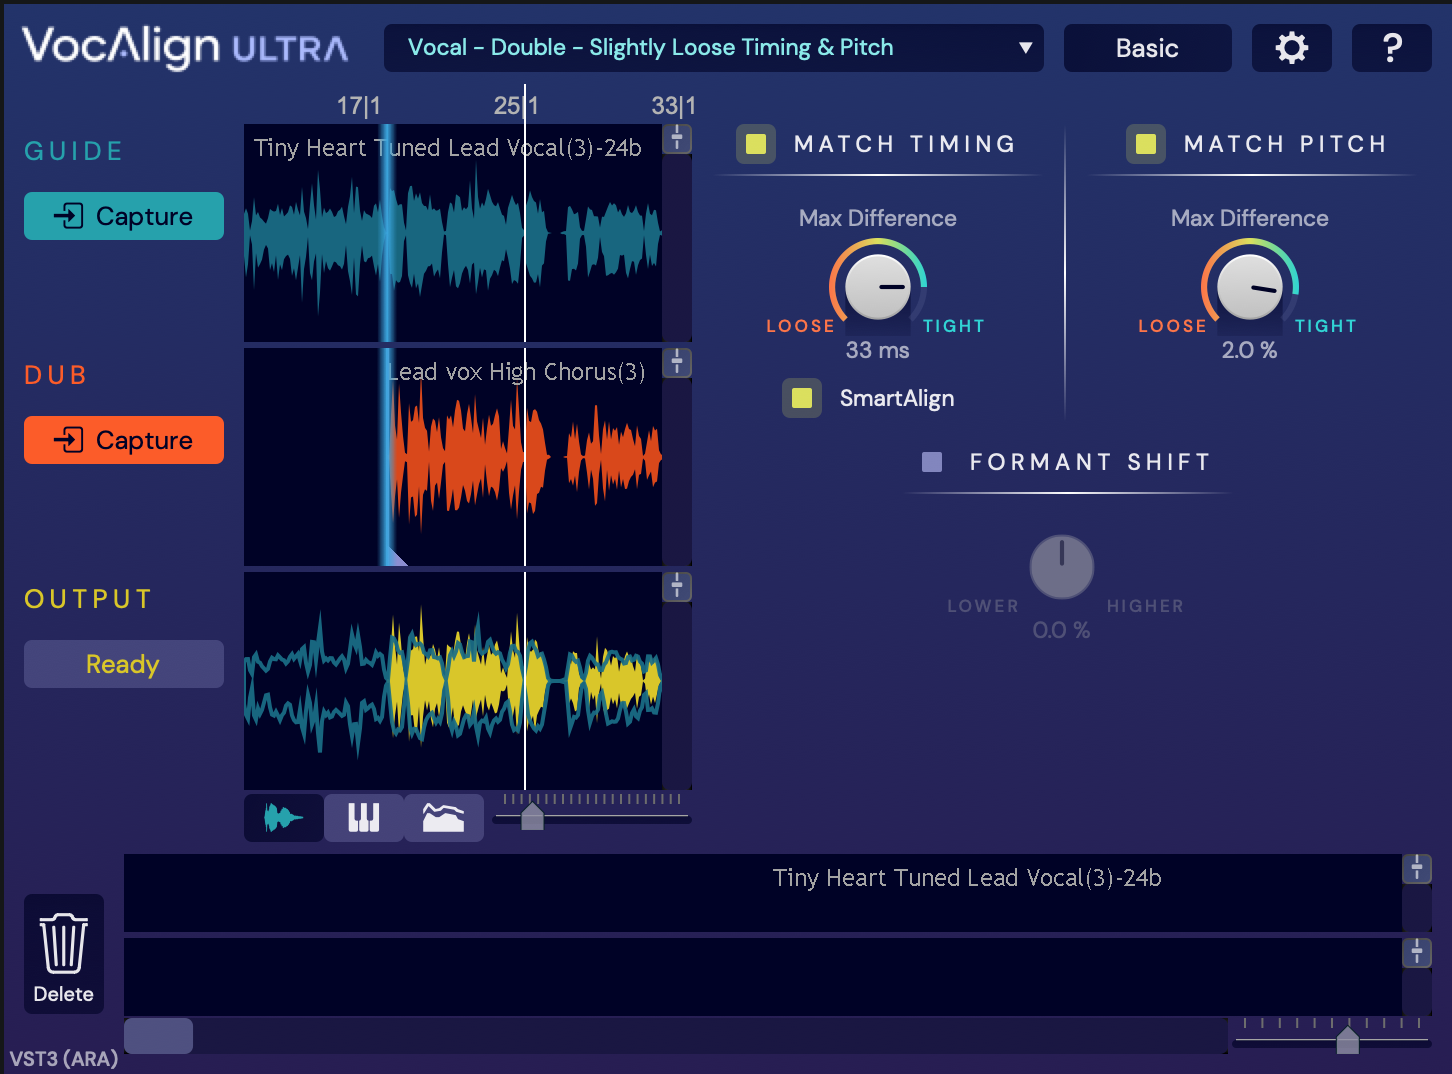
And below, we have compressed both the width and height.
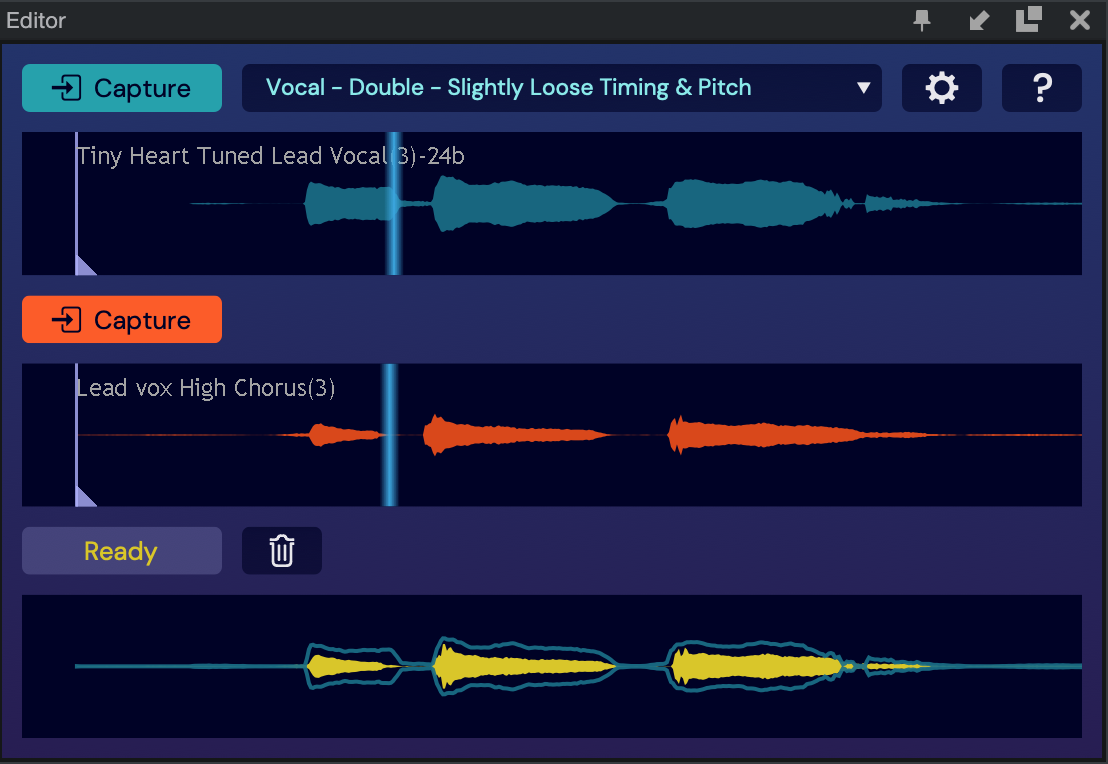
This shows that the Basic or Advanced control panels can shrink out of sight, while the Guide, Dub and Output displays adapt their shape and size to fit the remaining defined space.
This is useful if you have a lot of tracks on the screen that you need to see and are happy to operate the plug-in with the Presets alone.
Guide, Dub and Output display modes
The display section offers three modes of visualising the Guide, Dub and Output signals, selected using the three buttons at the bottom.
From left to right these are the Waveform display, the Pitch display, and the Energy Display (similar to the main display of the previous VocAlign products).

In all three modes, the Output visualizer updates to reflect changes made to parameters as they’re applied. Consistent colour coding is used throughout the three views: blue for the Guide, orange for the Dub, and yellow for the Output.
Incidentally, although you’ll likely be using VocAlign Ultra with mono signals the vast majority of the time, multi-channel signals – 2-channel stereo to 7.1 surround – are also supported, with all channels stacking up in the display. Note that channel 1 (the left channel in a stereo pair, for example) is always used as the alignment source: Dub channel 1 is aligned to Guide channel 1, then all subsequent Dub channels are aligned using the same calculation. Also, only channel 1 shows the Guide outline, Protected Areas, Sync Points and red processing activity line.
Waveform Display:
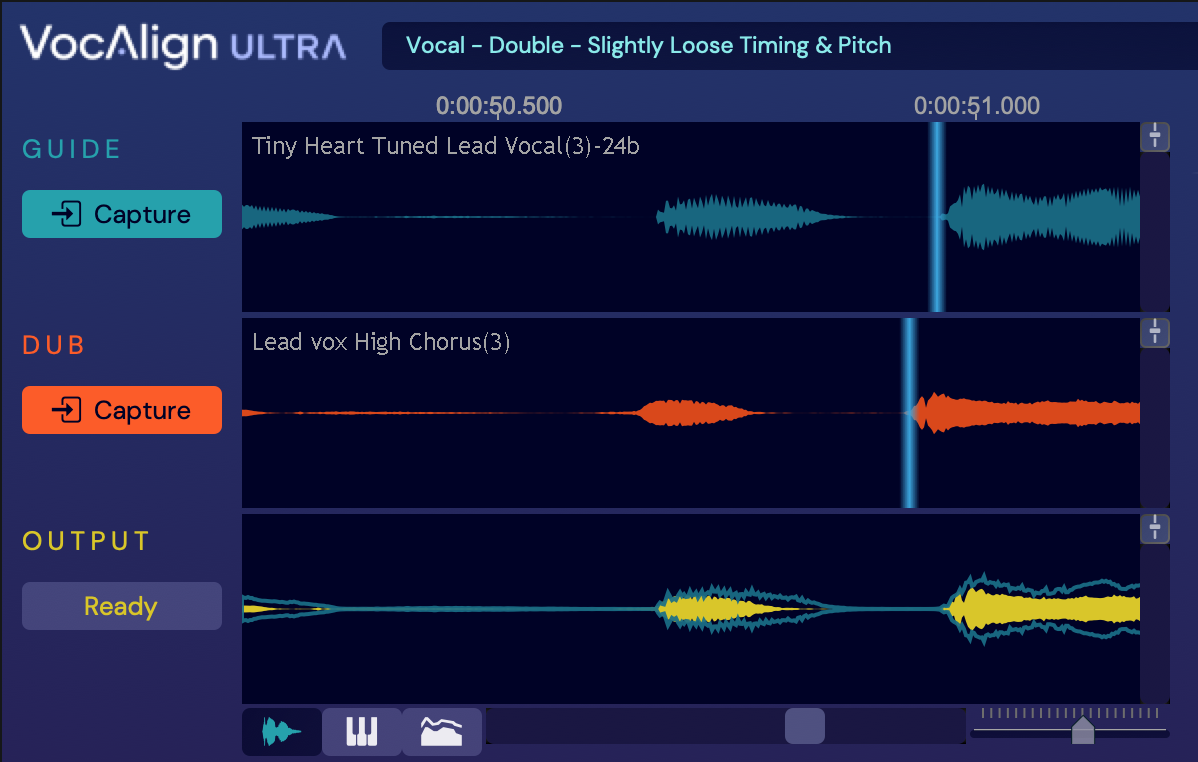
The default view shows separate waveforms for each of the three signals.
The Output waveform is overlaid with an outline of the Guide waveform, making it easy to assess the temporal alignment applied by the current parameter configuration.
The two blue lines in the Guide and Dub tracks show the result of the "thinking" that the time matching alignment algorithm has done, by showing where a time position of features in the guide waveform match the time position of similar features in the Dub waveform. These floating blue Offset Indicators follow movement of the mouse pointer over either waveform, showing the continuous mapping of the position under the pointer to its counterpart in the other waveform.
Pitch Profile Display
While the Waveform and Energy Profile views are intended for visualizing alignment in the time domain, the The Pitch Profile view – you won’t be surprised to learn – provides equivalent information in the frequency domain. A piano keyboard down the left hand edge represents pitch on the Y axis. Lastly, to provide a familiar timing reference for the pitch traces, the Guide waveform is included as a grey waveform in the background
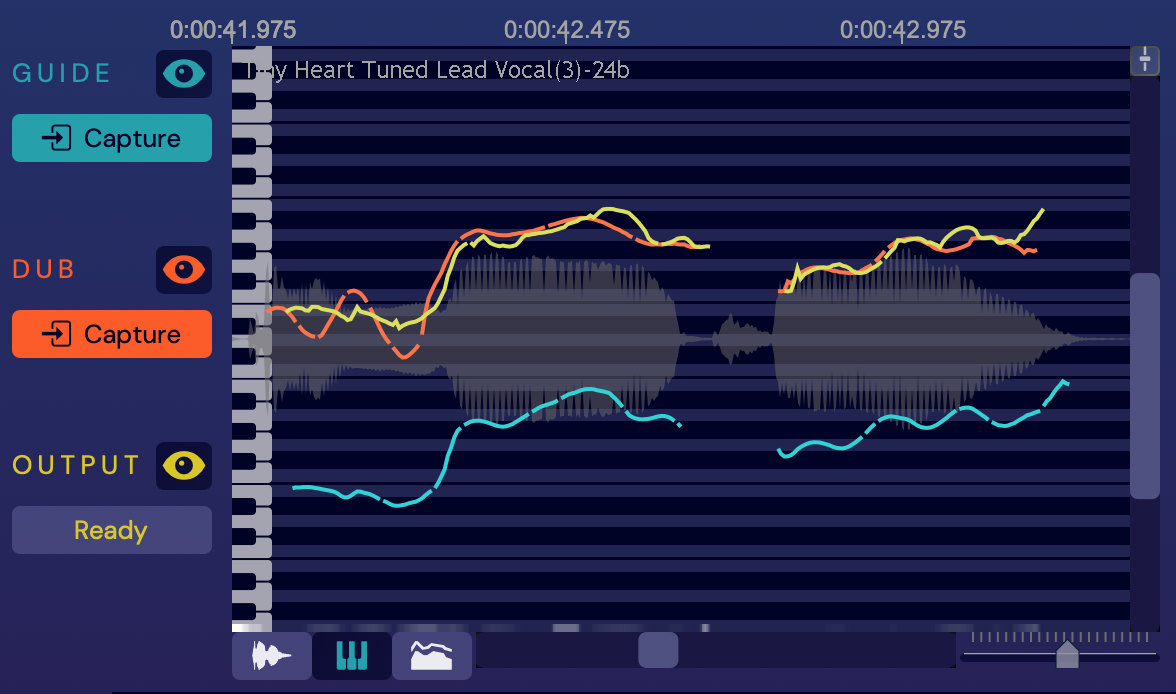
Each signal is represented in the Pitch Profile window by a line in its usual colour – blue for the Guide, orange for the Dub and yellow for the Output – that tracks its pitch progression over time.
See the Quick Start Guides for information on how to put this to use. Clicking the colour-coded ‘eye’ button  in the Guide, Dub or Output header toggles that signal’s pitch profile line on and off.
At the very bottom of the Pitch Profile window, the greyscale ‘heat map’ provides insight into the amount of processing being applied to the Dub along the timeline. This is useful for auditioning the Output, allowing you to focus your attention on the lightest areas showing the greatest changes.
Energy Profile Display
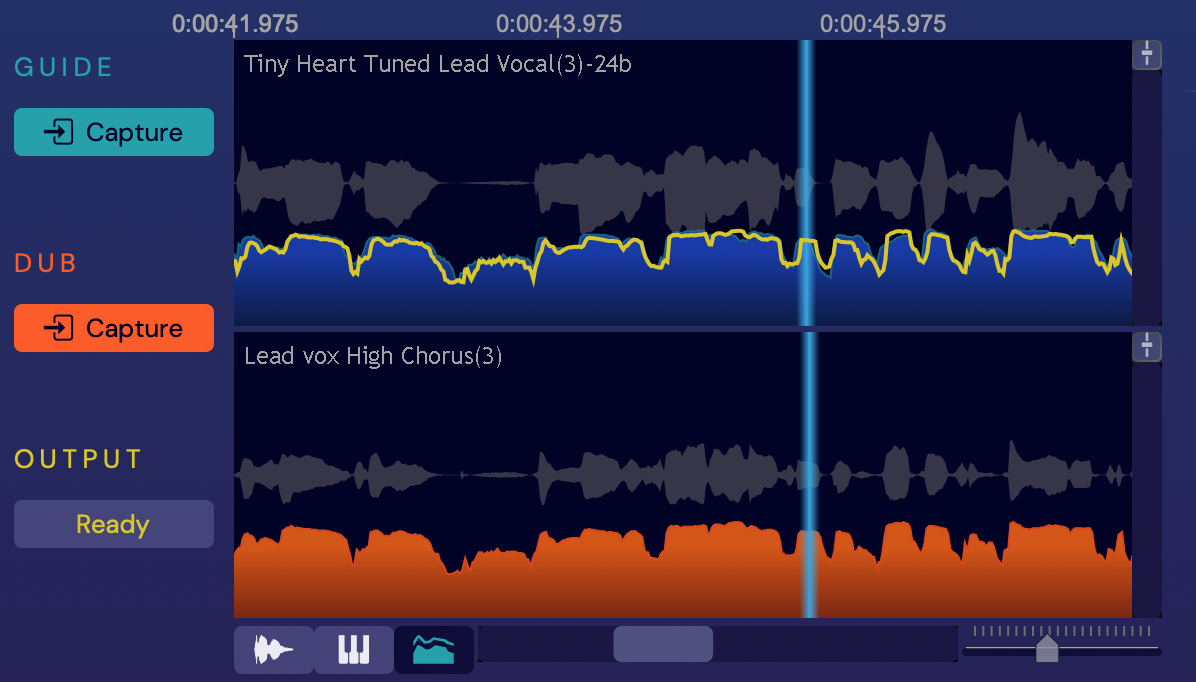
The Energy Profile view (which will be familiar to users of VocALign Pro or Project) displays the Guide and Dub as solid energy contours over time, and the Output energy as a yellow trace over the Guide. Again, the Offset Indicators show the temporal mapping of Guide to Dub, as described above.
Scrolling in the display
In all three display view modes, a horizontal scroll bar at the bottom of the display (as seen in picture above) enables horizontal scrolling; and the Pitch Profile view also allows for vertical scrolling via a vertical scrollbar on the right hand edge of the display. You can scroll with your mouse or trackpad, too.
Zooming the display
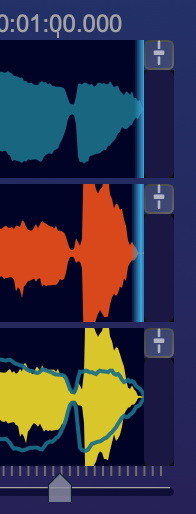
The horizontal zoom control at the bottom right of the display facilitates zooming into and out of all three views on the X axis, applied to all panes collectively.
Vertical zooming is handled on a per-pane basis, however: click the small level control icon  at the top right of any the three Waveform view panes, two Energy Profile view panes, or the Pitch Profile display to reveal the vertical zoom slider for that pane. Use the mouse wheel or drag the pop up control up and down to scale the height of the Y axis.
To zoom all waveforms or energy profiles together, hold down the Shift key when you click  and then click directly on the pop-up slider and move it up or down.
This increase in the waveform height is only visual and the gain of the audio is not affected.
Audio alignment
While you won't often need to go any deeper than the Basic editing mode to get the desired alignment of your Dub to your Guide, VocAlign Ultra’s Advanced editing
mode and other controls offer plenty of scope for manipulating the algorithms and processing when tweaking is required.
Before continuing, please refer back to the section on capturing the Guide and Dub for your particular DAW if you’re not yet familiar with how to get audio into the plugin. Then, if VocAlign Ultra is in Basic editing mode, click the Advanced edit mode button to reveal the controls we’re now going to explore.
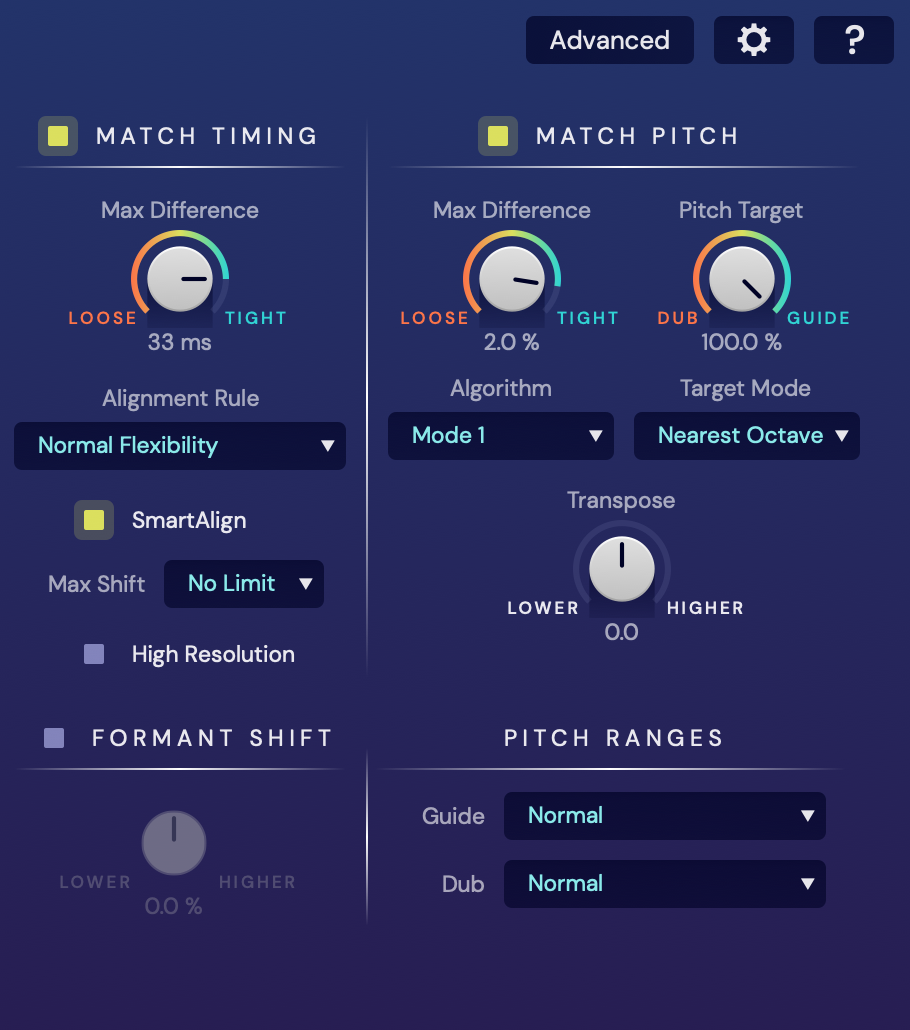
Optimising the Pitch Detection accuracy for the Guide and Dub
Pitch Ranges
These menus are shown in the figure above. You can optimise VocAlign Ultra’s pitch detection algorithm for specific "unnormal" source signal types by focusing its attention on higher or lower ranges. You can do this by making appropriate selections in the Guide and Dub menus.
By targeting the algorithm independently to each of the two signals, you can ensure the best results possible, whether you’re aligning a lead vocal with a harmony an octave above, say, or a lead guitar to a bassline.
The available ranges are explained in the next section here
How to check that the Dub is aligned with the Guide
VocAlign Ultra’s three display views provide comprehensive visualisation of the Guide, Gub and Ouput signals.
To check the timing alignment of the Dub with the Guide, focus on the Output display in the Waveform view.

This layers the Guide (blue waveform outline) and Dub (yellow solid waveform) on top of each other, giving an excellent overview of their positional relationship.
The Energy Profile is also helpful here, and offers a “legacy“ view option of alignment quality as a counterpart to the waveform display.
To check the pitch matching (which also shows the time matiching of the pitch traces), switch to the Pitch Profile view.
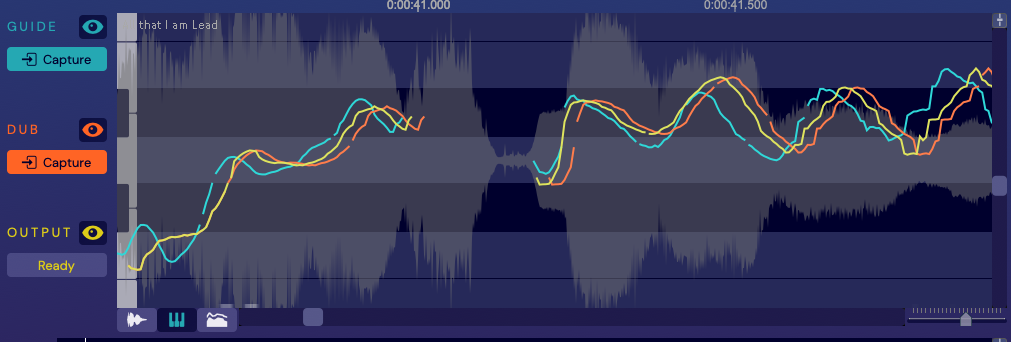
Here, the Guide, Dub and Output signals are shown together on a sequencer-style piano roll, with the Guide waveform in the background for timing reference and a greyscale processing heatmap at the bottom. As you raise the two Max Difference controls, you’ll see the yellow Output trace move increasingly close to the Guide trace on the X (Match Timing) and Y (Match Pitch) axes, which can make this the most effective view when working with sung vocals or melodic instrumental parts.
In the above display, it is set to slightly loose time and pitch, meaning the Output (yellow) is closer to the Guide (Blue) than the incoming Dub (red), allowing natural variations to come through - which differences could be "dialed out" by turning the Timing and Pitch knobs towards the "Tighter" setting.
Visual references aside, of course, the best way to check the alignment of your Dub is to audition the Guide and Output signals using the Preview and Solo buttons in the AAX AudioSuite version,

or playback and the Solo controls in the host DAW in all other versions.
Start and End Markers
At both the start and end of the Guide and Dub signals, the white vertical markers with triangles at the bottom define their Start and End points, as used by the processing algorithm to work out their alignment.
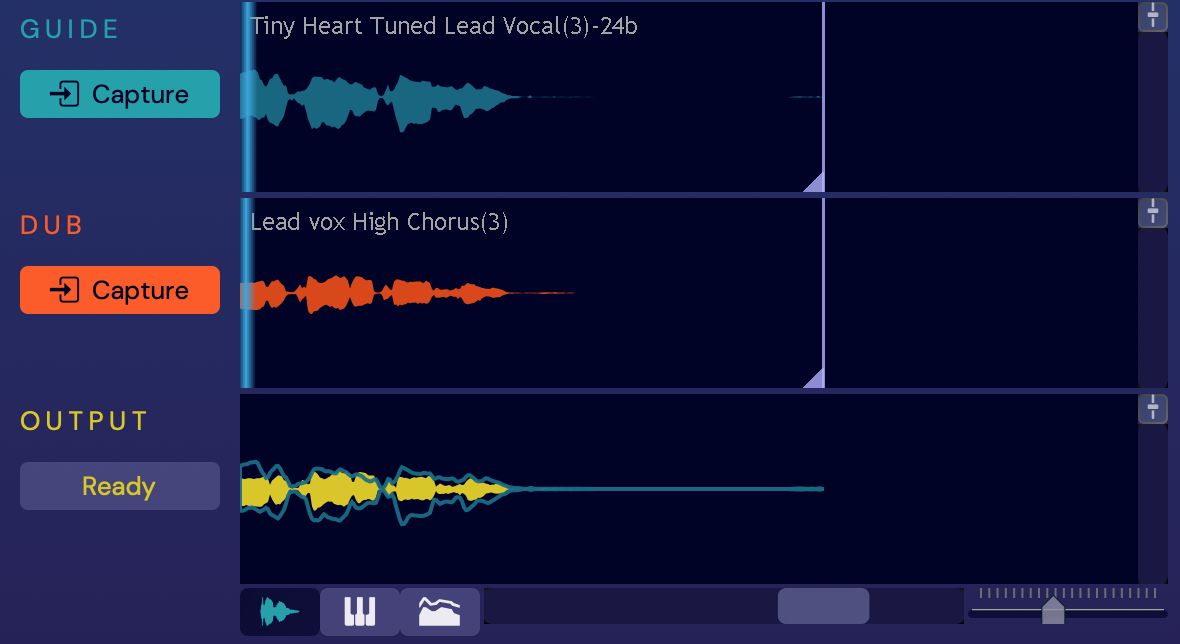
If your Guide and Dub start and end at roughly the same points on the timeline, you probably won't need to touch these. However, if you have, say, a loud breath sound or cough before the vocal starts in one signal but not the other, moving that signal’s Start Marker past the offending intrusion will prevent the algorithm misinterpreting it as the start of the vocal.
However, if the Dub continues beyond the end of the Guide, VocAlign Ultra will simply add the extra Dub after the Guide ends, unless you move the Dub's end marker.
If the Guides is longer than the Dub, however, you might wish to move the Guide's end marker to the end of the corresponding Dub audio, to keep the Dub from being stretched unnaturally to match the continued energy of the Guide.
To move the Start and End Markers, drag their triangular handles or the vertical lines.
Sync Points
Although SmartAlign and the time alignment algorithm at the heart of VocAlign Ultra can be relied on to accurately match Guide and Dub signals, when some localised differences between the two signals cause mismatching of similar sounds, you can nudge specified points in the two signals towards each on the timeline other by manually adding Sync points. Automatic adding is also available, but generally that will not know what you want to fix.
To add Sync Points manually, switch to Advanced edit mode and click inside the Sync Points bar in between the Guide and Dub displays at roughly the point in the Dub that you want to alter the alignment of. Alternatively, you can right-click in the display and select Add Sync Point. A pair of connected Sync Point markers will appear in the Guide (blue) and Dub (orange). Drag each one to the position in their corresponding signal that you want to align to try and ‘pin’ the Sync Point in the Dub to its paired Sync Point in the Guide, intelligently stretching and compressing the Dub on either side to maintain alignment.
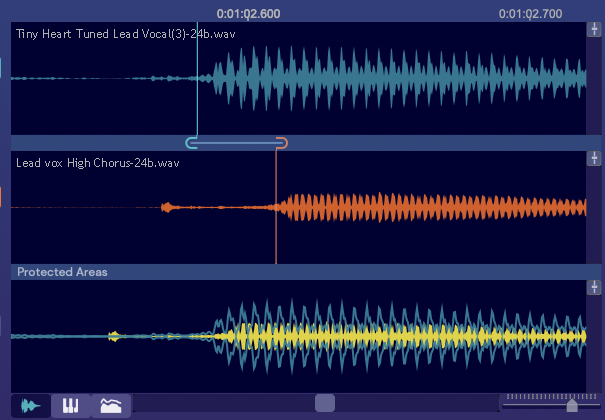
We say ‘try’, as the Sync Point alignment isn’t absolute – it’s more of a suggestion, on which the algorithm will base the decisions it continues to make. As we said, Sync Points let you influence the alignment of the Output, rather than take full ‘warping’-style control of it. Indeed, if you set Sync Points that the alignment algorithm can’t achieve without adversely affecting the audio on either side, they’ll turn red and be ignored.
Sync Points can also be created automatically: right-click in the display and select Automatic Sync Point. VocAlign Ultra will place Sync Points where it thinks they need to be, so if your Guide and Dub are already well matched, nothing will happen.
To delete a Sync Point, Shift+click it. To delete all Sync Points, right-click and select Clear all Sync Points.
Sync Point placement tips
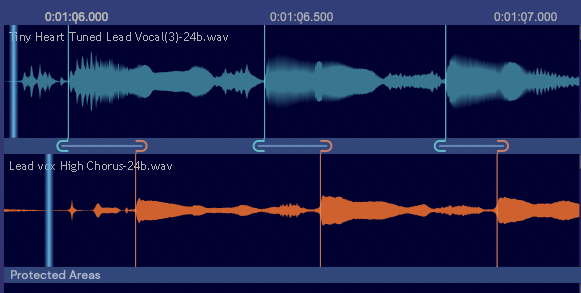
- Don’t add Sync Points to silent parts of the Dub. The results will be unpredictable. Try to anchor them to a voiced part of the Dub and Guide.
- Use multiple Sync Points to force the alignment of a section of the Dub to a section of the Guide. Placing one Sync Point at the start of the section and another at the end usually works well.
- Refine the alignment further by adding more Sync Points before and after each.
- To maximise the influence of Sync Points, set the Match Timing Alignment Rule to Normal or High Flexibility.
Protected Areas
When your Dub contains one or more sections that contains different audio than the Guide and you do not want to have time or pitch matching in these areas, you can define Protected Areas, rendering them ‘immune’ to processing of the Dub's timing, pitch or both. This is also useful if there are distracting noises in the Guide which would cause unwanted time or pitch changing.
To create a Protected Area, switch to Advanced edit mode, if you haven’t already, and drag on the Protected Areas bar across the range within the Dub to be protected. The Protected Area appears as a red highlight, resizable by dragging the ‘shield’ handles at either end, within which no processing is applied to the Dub.
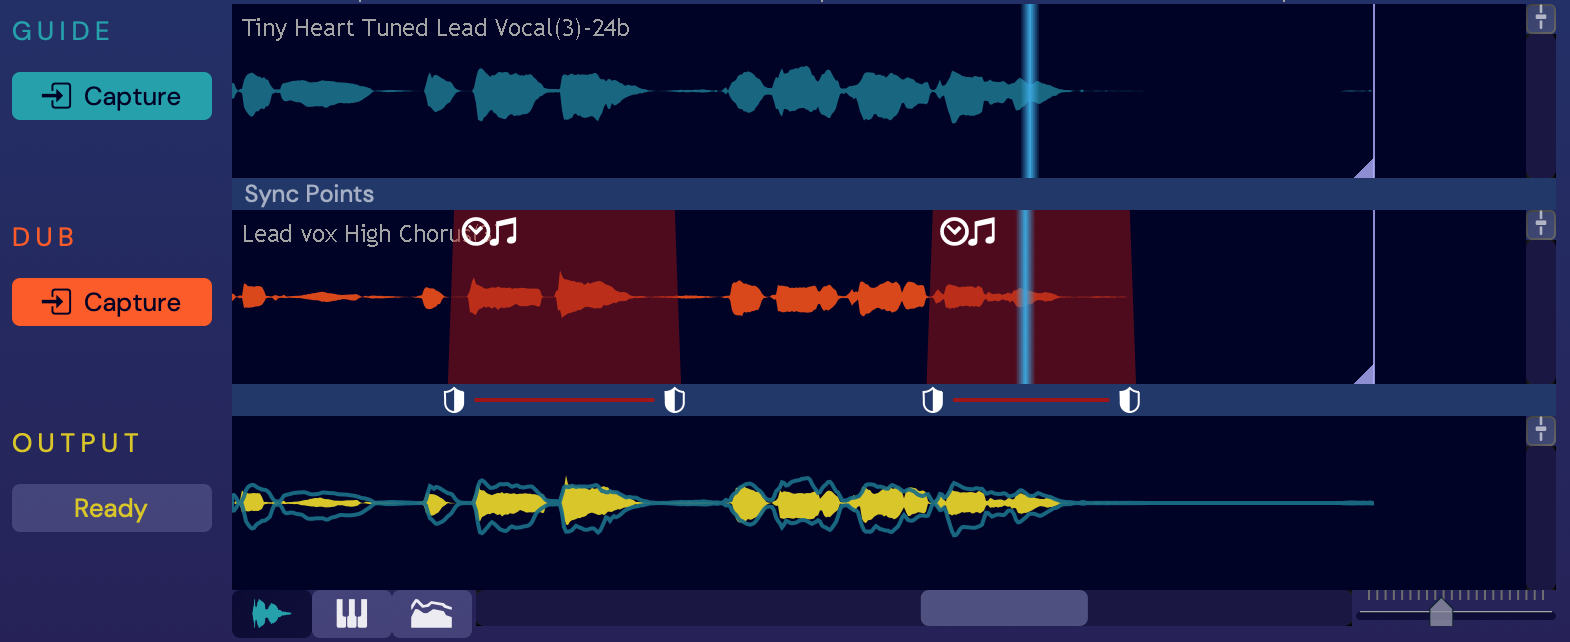
By default, a Protected Area is protected from both pitch and timing alignment changes, but this can be narrowed to pitch or time by right-clicking the Protected Area and selecting Modify Protected Area > Protect Pitch or Protect Time. The clock (time) and musical notes (pitch) icons at the top left of the Protected Area show whether it’s protected from pitch, time or both.
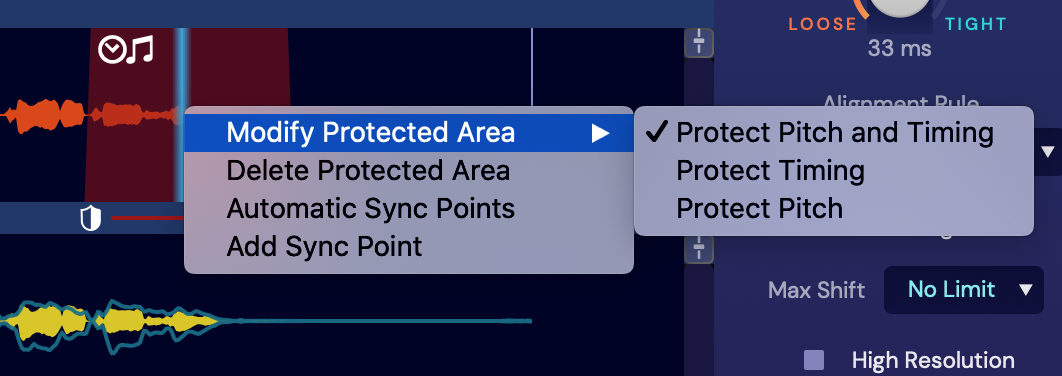
If you zoom in to either end of a Protect Pitch Area, you’ll see that it slopes outward. This indicates the smooth skewing of pitch alignment into and out of the Protected Area, thereby ensuring that there are no sudden and unnatural jumps in pitch when processing stops and starts.
You can also create a Protected Area by right-clicking the Dub and selecting Add Protected Area > Protect Pitch and Timing, Protect Pitch or Protect Timing.