Pitch Editing Tools
- The Main Toolbar
- Note and Scales Displays
- The sequence of RePitch Tuning Operations
- Scales - Choosing and Adding
- Summary of Scale Operations
- Using an Added Scale to Snap to
- Turning off the Automatic Use of Scales
- Making editing a note easier
- Tools and Quick Keys
- Editing Note Blocks
- Control Points
- Dragging Notes Up and Down in Pitch
- Drag continuously or in semi-tone steps
- Double clicking Notes
- Modulation Control
- Tilt Pitch
- Editing Transitions
- Actions on a Range of Selected Notes
- Three ways to make a selection in main window
- Right Click Menu in Main Screen
- Summary of Available Key Commands and Actions for Selected Range of Notes
- Previous Next
In this section, we will look at the RePitch editing tools and some examples of how they are used.
The Main Toolbar
At the top of the RePitch window is the main Toolbar shown below. This section will briefly explain the tools, but later walkthroughs will give examples of how they are normally used. We will describe the items in this Toolbar left to right.

Note and Scales Displays
The left side of the screen (shown below) displays the Selected Scale's Note Names next to their “note lanes” which transverse the main screen horizontally.
Before or after you capture audio, using Macros, you can choose to provide the targets for automatic tuning operations from:
- The Measured Scale - that RePitch determines from audio measurements or
- A Selected Scale - that you know is correct and can choose from a list that you create in the Scale system
 , the scale's note lanes across the screen will be displayed in a lighter grey than the the black non-scale note lanes, as shown below.
 In this picture, the signal's pitch traces in white and orange have been measured and separated into predicted defined notes that are indicated by blue semitone-high blocks containing the white pitch trace sections. After automatic tuning, these note blocks are centered on the frequency that the RePitch predictor expects will be heard.
If the note block is not centered in the note lane, then the note is probably not exactly in tune, but you should listen to everything to be sure.
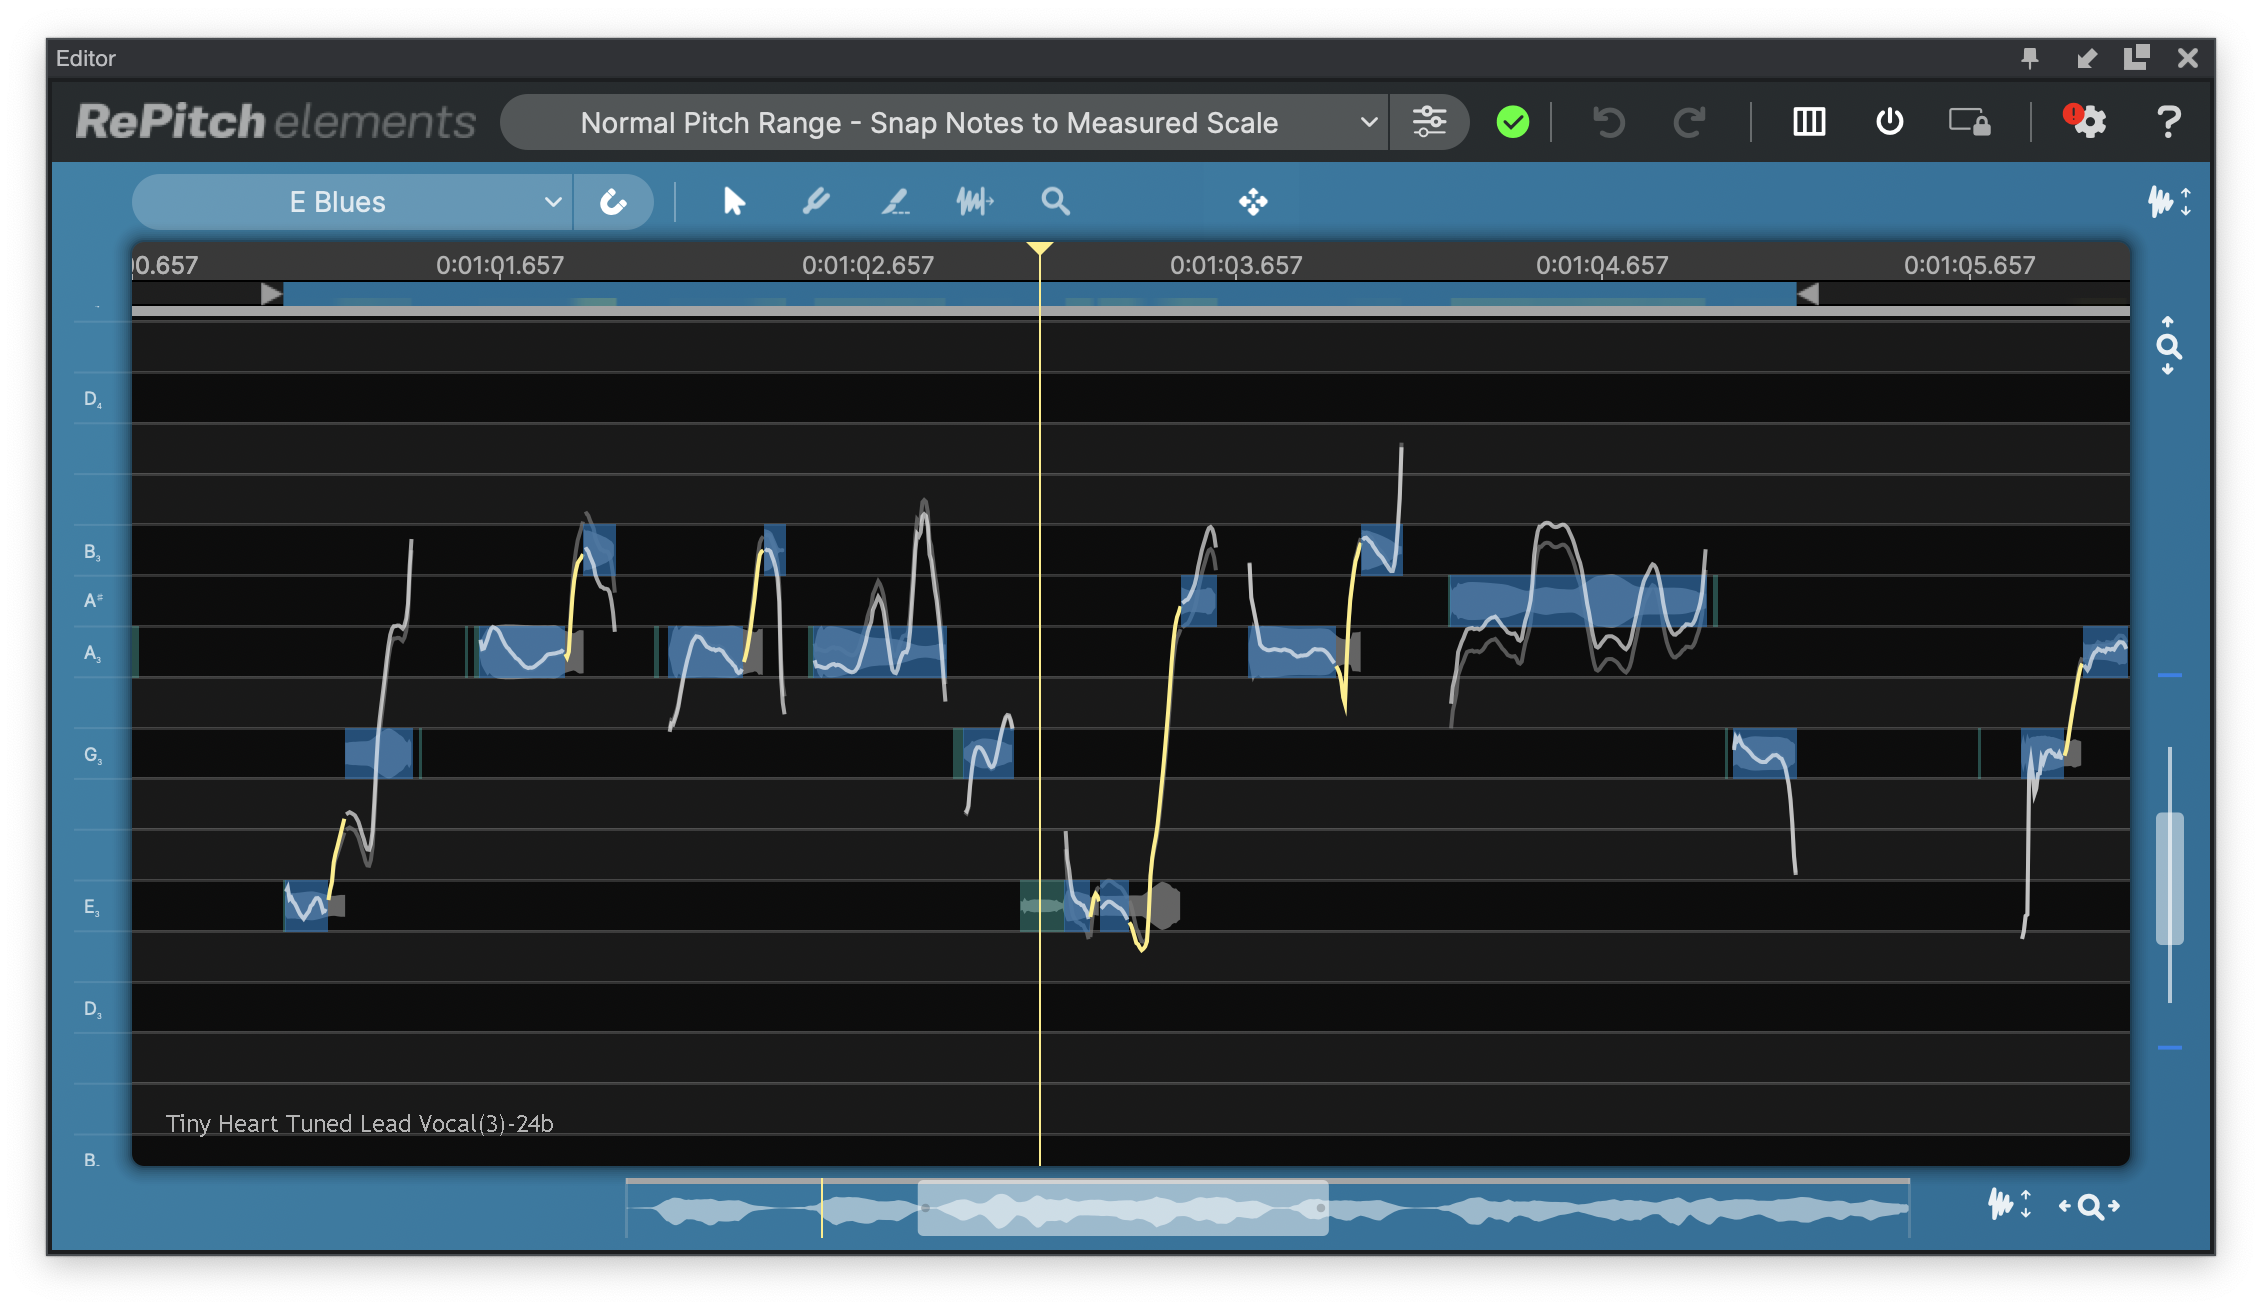
The orange traces are fast changing transitions and clicking on them will reveal a blue control box.
Transitions will be discussed in more detail later.
 |
If you don’t see any note names in the left border, make the RePitch plug-in window taller or zoom in vertically to make the note lanes taller. |
The sequence of RePitch Tuning Operations
When audio is captured, RePitch always auto-detects the most likely scale from the frequencies of the notes detected and creates a "Measured" scale in the Scale List (discussed below). If the user-selected Macro is set to use the Measured Scale, RePitch will display its detected name in the Scale drop-down control as below.

 |
You do NOT have to use the automatically Measured Scale. If "Use the Selected Scale" is set in the Macro, then you can choose a scale from List you can create in the Scale Menu. |
If you turn on Snap  , or have “Snap Notes” in the Macro (Initial Processing) selection, automatic and some manual tuning tools will snap note block centers to the allowed (displayed) scale notes.
Notes that are not displayed on the left of the main window are “Not allowed notes” and are indicated as black note lanes when snap is active. Notes will not be snapped to "not allowed notes".
Listen to Notes
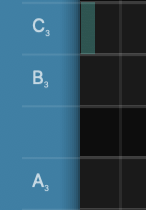 If you click on a note name display area with or without a note name shown (shown at left in blue and separated vertically by thin white lines), you should hear the pitch of that note (in most DAWs).
Add or remove Allowed Notes
You can switch “Not allowed notes” to “Allowed notes” or "Allowed Notes" to "Not allowed Notes" by Right-Clicking in the note name display area and then click the pop-up "Toggle Note" switch which will appear as shown below.
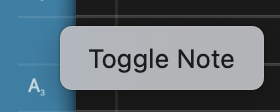
This will turn "Not Allowed Notes" back ON to include them as "snappable target” scale notes when Snap is active.
With Snap OFF, all note lanes will be shown as dark grey (i.e. not black). This means they are all “allowed”. This is effectively allowing a Chromatic scale to be used as "targets" for the Double Click snapping to nearest note center, even if a note name is not shown.
Scales - Choosing and Adding
Lists of Scales and the Scale control panel are accessed by clicking on the drop-down control button shown below, which will show the name of the currently-selected scale (e.g. Chromatic is the default scale and is shown in this example).

Clicking on this button will reveal a menu that, at first, looks like this:
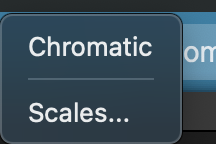
QUICK TIP | If your singer is normally close to being in tune, select "Chromatic" scale and use the Snap Notes to Selected Scale macro to perform a first pass of making slight tuning adjustments. |
Clicking on "Scales..." will open the "Scales Settings menu" shown below.
Its main purpose is to let you add and delete scales in the Active Scales list, and also select the scale whose name and notes will be displayed in the Main Window and will provide the note frequencies that automatic tuning (snapping) will use as targets for the detected notes to be moved towards.
You will also be able to choose the Chromatic scale or a detected ("Measured") scale after audio is captured.
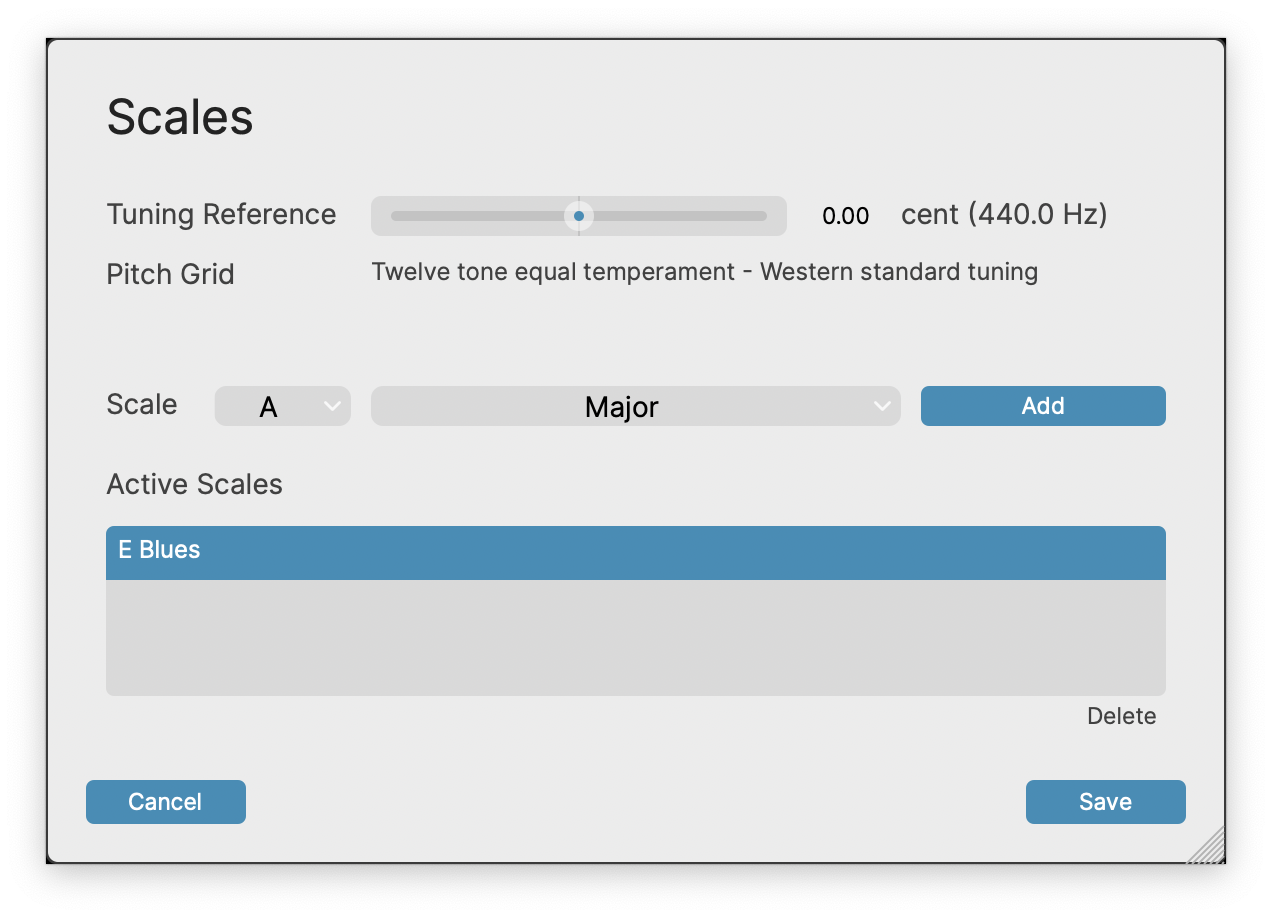
When the above window is opened, if you are happy with the most common Tuning Reference and Pitch Grid (shown above), then you can use the two drop down menus to the right of Scale let you chose the Scale "Tonic note" and the "Scale Mode" (major, minor etc.).
There are over 20 Scale Modes to choose from which can generate a display such as this:

If you click the Add button to add the scale to the Active Scales list, you can the choose any scale from the list you want to display and use next and then press Save.
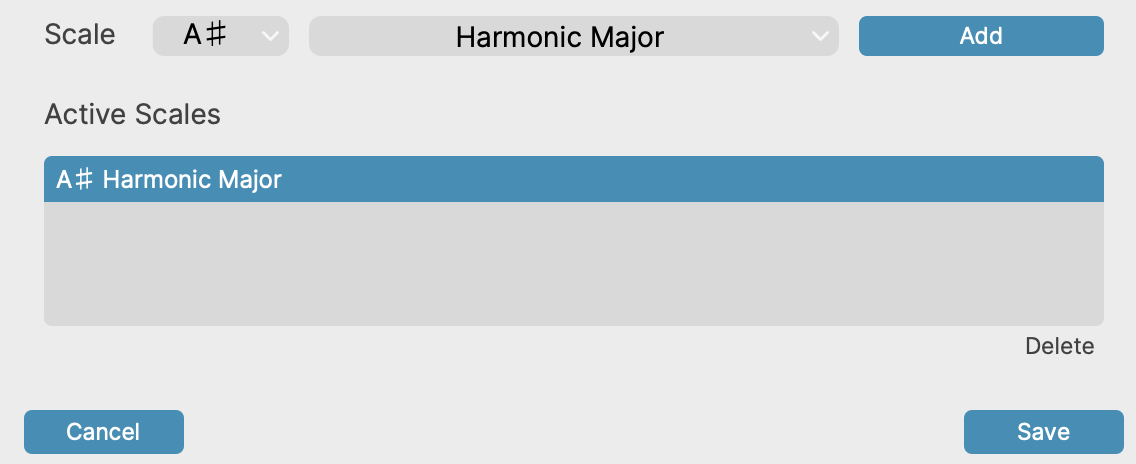
After completing the Save in the example above, the saved scale wlll be shown as the Selected Scale (A# Harmonic Major) in this example.
But if you next click on the Scale selector, in this example, you will now see these two scale options shown in the box at the right:
Clicking on "Chromatic" or any other scale name that appears in that menu, will set the Scale in the Scale Display window and show the selected scales' notes in the left border of the RePitch window.
The allowed Notes and lanes to be snapped to by the RePitch tuning system will be shown with the Snap button ON.
 | Selecting another scale DOES NOT DO ANY PROCESSING. |
Scales can be Deleted from the Active Sales list using the "Delete" button shown in the Scales window picture above. These will work across multiple regions.
Summary of Scale Operations
- in RePitch, after capturing audio, a Scale will be automatically detected and shown.
- Whether the scale is used automatically after the capture will depend on whether a Macro is selected to use it with Snapping set.
- Other Scales can be added to the Active Scale list by selecting the drop down button in the Scale Display, choosing the desired Key and Type of Scale and then pressing Add to include it in the Active Scales list.
- Press Save to make the Scale appear in in the Scale Name Window. Nothing will happen at this stage other than the allowed note names will appear.
- If the Snap switch is ON, the allowed note lanes will be shown in dark grey and un-allowed note lanes in black.
 |
If you change the Macro now, you will receive a warning message explaining that RePitch will re-analyse the captured audio, change the scale to the detected one and implement the named process again, which will remove all manual editing. Select YES to apply the new macro immediately and lose all manual editing, or NO to change the Macro without applying it to the current audio selection. |
- The Detected (Measured) scale will be kept in the Scale list along with any scales the user would like to use and save.
- All the scales listed under Active Scales can be selected for automatic tuning or just to show the Allowed and not-allowed note grids.
Using an Added Scale to Snap to
Any selected Added Scale can be used to have detected notes snapped to its allowable scale note centers.
When the Snap switch is ON: There are four commands or controls that will snap or move note blocks to the nearest Selected Scale note centers
- Double click a single note or one note in a group of selected notes
- Use the Center Notes Tool on one or more selected notes
In (3) and (4) below - you can use the Right Click Menu, which contains these commands: - Select one or more notes and use the Right Click menu to select Pitch Correct Selected Notes to 100%
- Use the Right Click menu to choose Select All Notes and Pitch Correct to 100%
If Snap switch is OFF, all of the above commands will show the scale notes, but since ALL notes are allowable, it will snap to a Chromatic scale.
Turning off the Automatic Use of Scales
If you want to edit manually and don’t want any Initial Processing done (or you want to restart your work from scratch and tune manually), select this Macro setting (with appropriate pitch range):

You can then select any scale you want and set Snap ON if you wish to use only those notes to be allowed for manual adjustment (or other auto-snapping).
Double clicking the center of a note will snap that note to the best estimate of that note’s centre (i.e. 100%) (based on human hearing).
TIP: Selecting Chromatic as the scale and setting Snap ON means any automated tuning (or double clicking note centers) will move the selected notes to their nearest semi-tone note centers.
To manually fine tune a note (or a group of selected notes) up or down, click and hold near a note box center and drag the note up or down.
 |
A Note on the Note Display resembling a Piano Keyboard If you look at the light/dark = allowable vs not allowable notes display (which we and other pitch modifying products have) you need to click the SNAP control ON to see (and use) the Allowable (light) notes. Displays that look like a piano keyboard are only exactly like a piano keyboard if you have a C Major Scale selected in RePitch. In tuning programs, that pattern moves off the C if the tonic changes, but if it is still a major scale, the pattern will look like the piano keyboard, but it obviously starts start on a different tonic. The main point of the Light/Dark pattern is showing allowable notes. So, for non-major scales (even in C) the pattern will no longer look like a piano keyboard. In RePitch, If you have "Chromatic" selected (or the SNAP control OFF), all the notes are allowable, so there will be no dark notes. |
Making editing a note easier
To edit a note in context in a phrase, you can use any of these commands as needed:
- Get the phrase inside the screen width and Set Screen Lock ON

- Double click in front of the note to start playback in RePitch and double click to stop, adjust, and repeat OR
- Make a Playback Range Manually to repeat the phase OR
- Make a selection of a range of notes and use the Zoom to Selected command [Z] key (see below)
- Use the right-click Set Playback Loop from Selected - [Y] key (or make a manual playback Loop in Repitch) OR
- Use the right-click Select from Playback Loop (if you have a Playback range to work in)
To hear the RePitch audio with the DAW audio, use the SpaceBar to play DAW with solo'd tracks and RePitched track (if solo'd).
Also, Double Clicking on a note (or group of selected notes) will center it (them) to the nearest allowed note lane.
 |
If you play from RePitch and don't hear the audio, make sure you have Solo'd the track with RePitch in your DAW. |
Tools and Quick Keys
The tools below can be selected by clicking them
All the tools below that are not the Selector tool can be turned on with a click or Quick Keys shown below.
If the Quick Key for a tool is pressed a second time, it will turn the tool OFF and turn the Selector Tool back ON.
The Main Tools and their Quick Key commands are:
| Tool |
Description |
|---|---|
 Selector Selector |
Shortcut: Q This is the main tool for selecting and manipulating the audio.
|
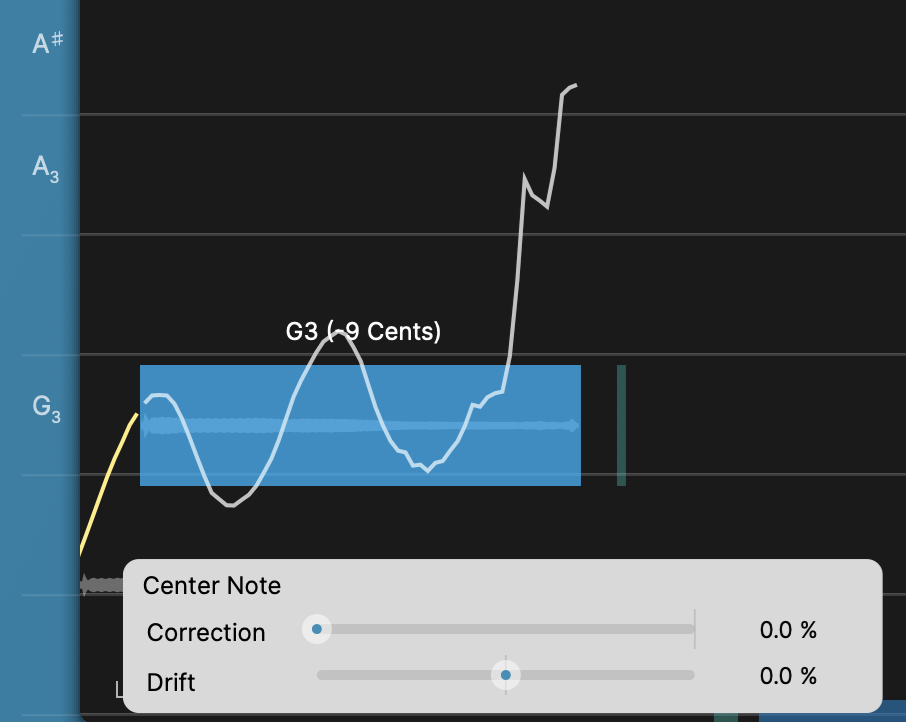
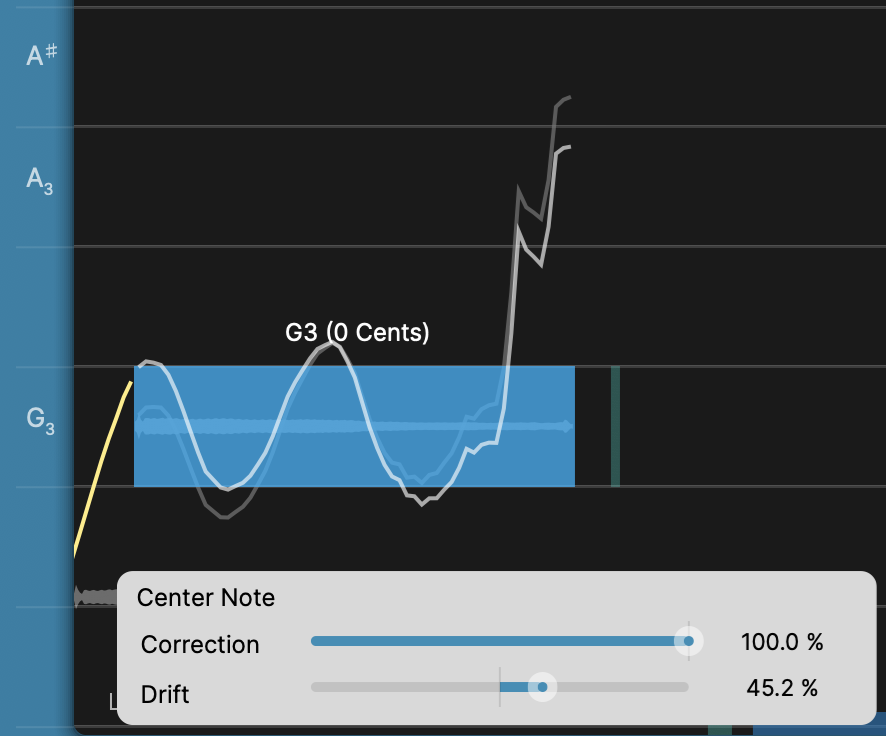
 Center Notes Center Notes | Shortcut: C If one or more Notes are selected, when this tool is clicked, the Center Note controls will appear.
Note that one control is a Drift Control as well as the "Correction" control to center the Note block. Using the Correction slider and then the Drift slider (or vice versa) the note can be centered and un-tilted as shown below. |
 Split Split | Shortcut: S This will present a red line at which note blocks will be Split (i.e. separated) when the mouse is clicked. As of 1.3 splits will carry over to the level display. |
 Warp Point Warp Point
|
Shortcuts: Shift Click to create a Warp Point. Warp points are discussed in the Time Modification Tools section of this manual. NOTE: Two warp points are needed to anchor the range start and end, and the warp point Once a Warp point is created, its position can be moved without processing by holding down |
 Pan & Zoom Pan & Zoom | Shortcut: X The display in the main window can be panned any direction and the zoomed in or out. |
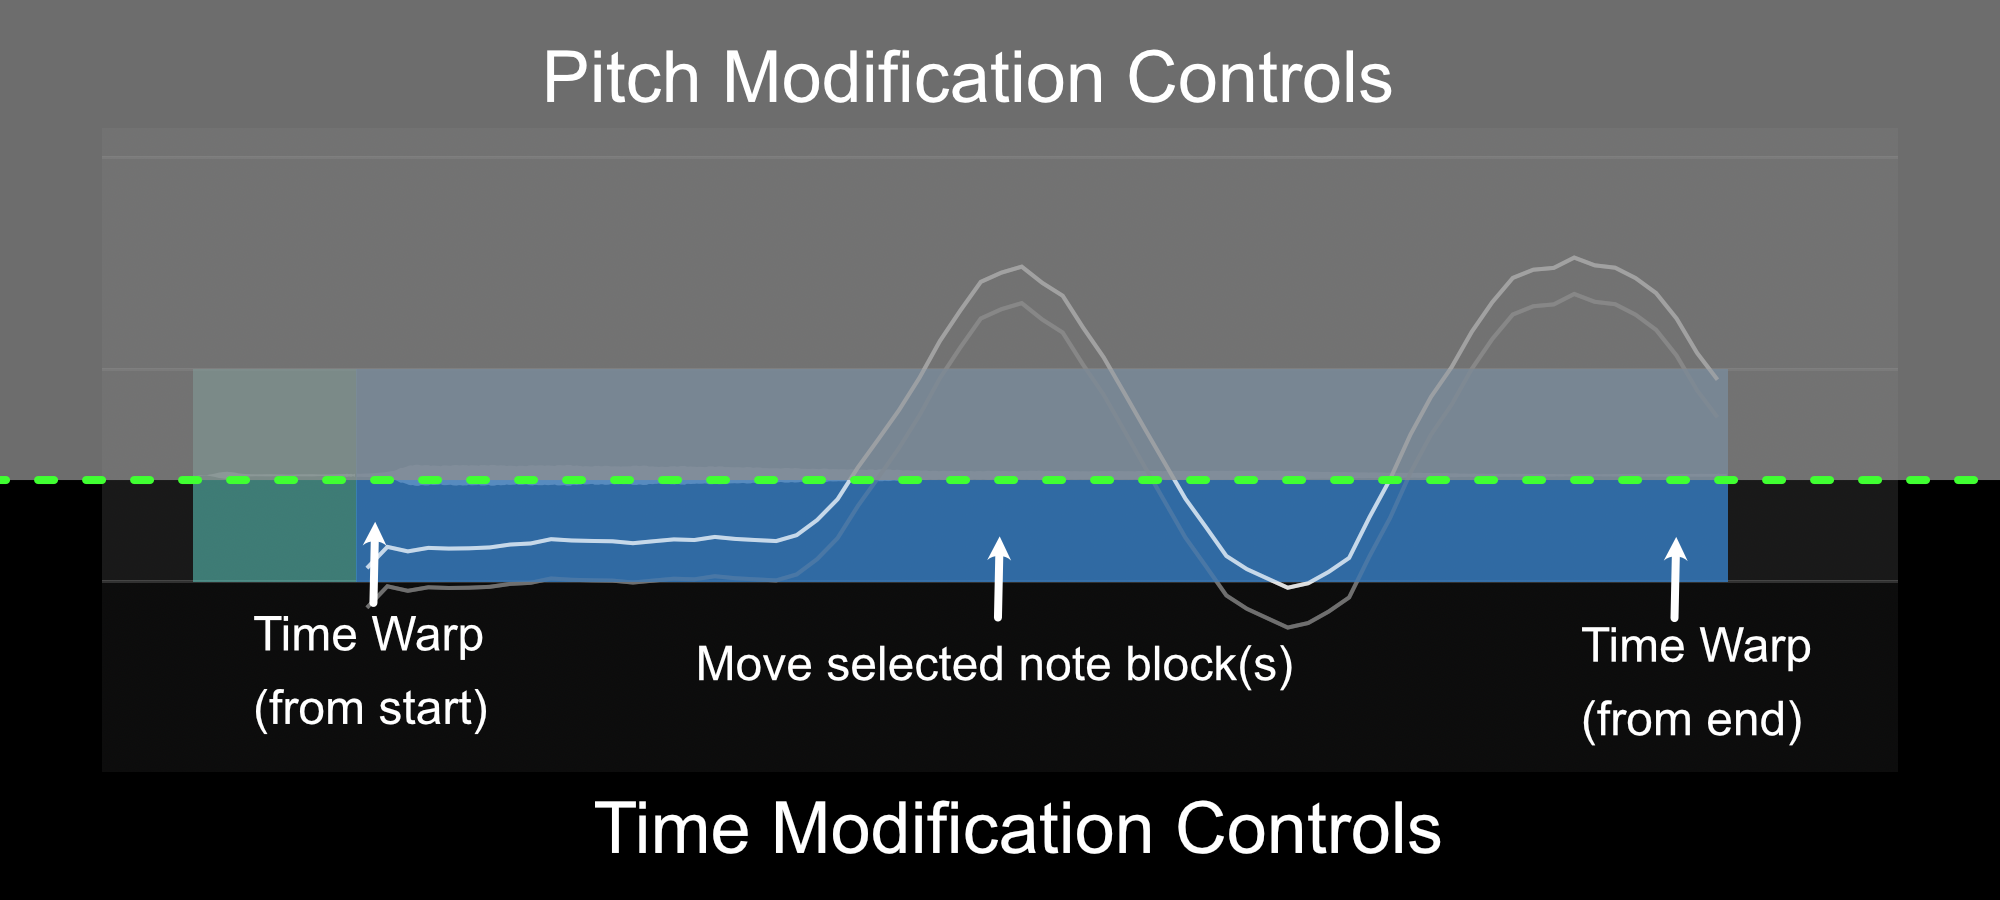
 Note Edit Mode Note Edit Mode | Shortcut: T The Note Edit Mode control will toggle between two modes, changing what controls are available when mousing over a note block. Note Block Editing is discussed in detail in the next two sections of this manual (Pitch Editing Tools and Time Modification Tools).
|
force break text
Editing Note Blocks
Note Blocks in RePitch have a number of controls available depending on the position of the cursor.
The pitch modification controls discussed below are available regardless of which mode the Note Edit Mode toggle is in. However it is important to remember that which Note Edit mode you are in:
| Note Edit Mode | Functionality |
|---|---|
 | Pitch modification tools are available in the top half of the note block. Time modification tools are available in the bottom half of the note block.
|
 | Only Pitch modification tools are available. We recommend this mode when zoomed out to avoid accidental timing changes. |
This portion of the manual discusses pitch modification controls. Time modification controls are discussed in the next topic in this manual.
Control Points
Note blocks in RePitch provide several quick controls via the Control Points which appear around a note block when moused over or selected.
| Mouse Over | Selected |
|---|---|
 | 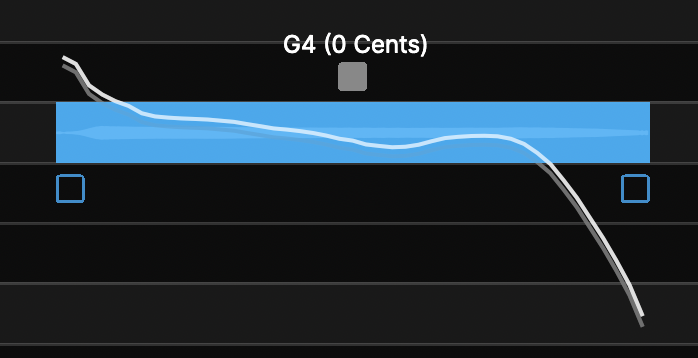 |
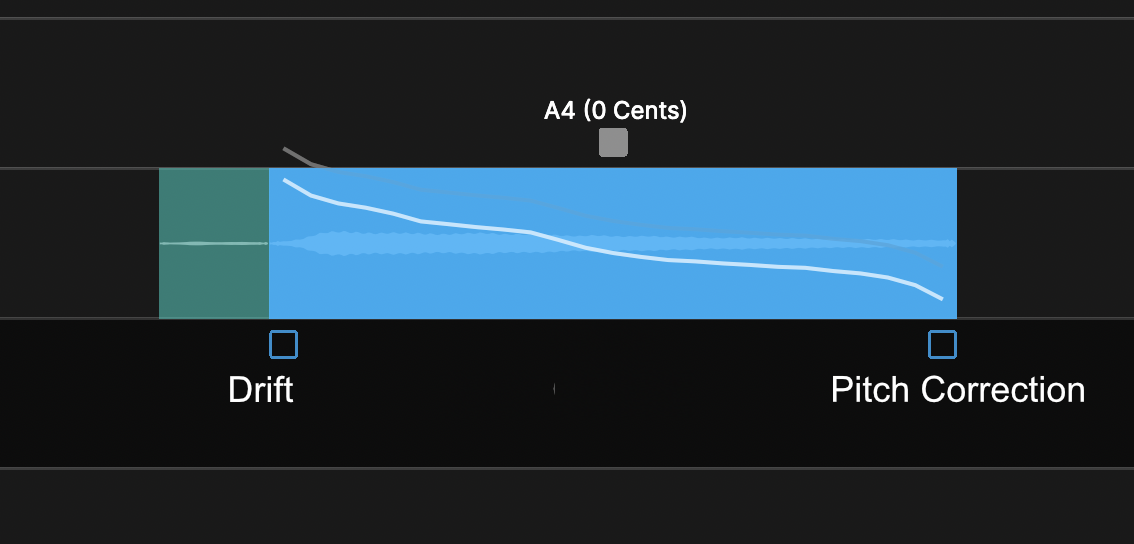
Click and hold one of the blue control points and then drag vertically to change the corresponding parameter.
- Drift on the left
- Pitch Correction on the right
| Drift |
A Drift control is inside the Center Note Tool menu as described above. Click here to go to the instructions. The Drift control point will quickly change this parameter. Click and drag vertically to increase or decrease the pitch drift. |
| Pitch Correction | Click and drag vertically to change the amount of pitch correction applied in percent, from 0% to 100%. This control modifies the Pitch Correction slider percentage in the Centre Tool described above. |
Dragging Notes Up and Down in Pitch
If the user clicks in the top half near the center of the Note Block, the up/down cursor appears. The Selected Notes can be dragged either continuously in pitch or in semi-tone steps from its origin.
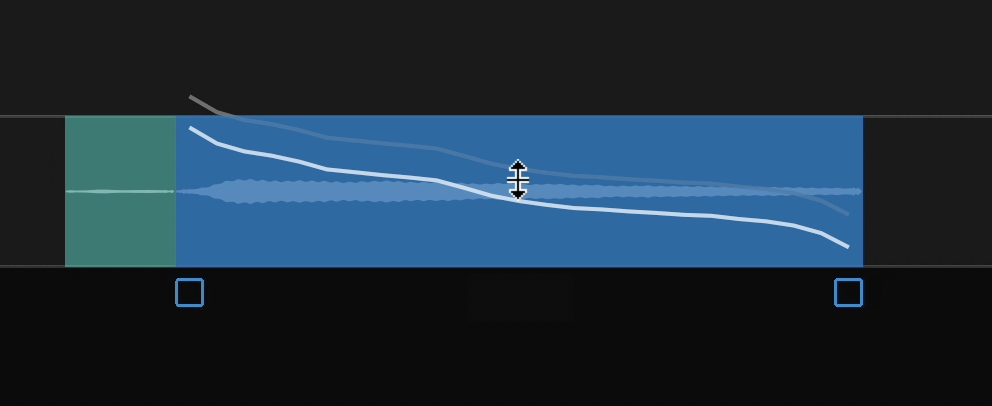
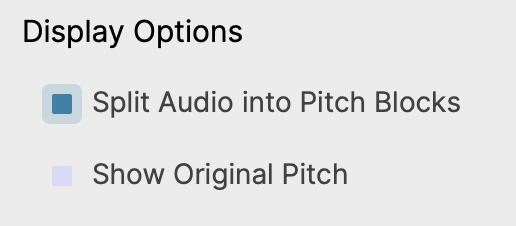
The gray pitch trace shows the original pitch before being dragged. You can disable displaying the original pitch in the 'Settings' menu by deselecting 'Show Original Pitch'.
Drag continuously or in semi-tone steps
Which of these happens depends on both the setting of the switch below and the ALT / OPTION key.
If the following switch is OFF,

- Dragging with be continuous in pitch
- Dragging will be in Semitone steps when the ALT (OPTION) key is held down.
If the following switch is ON,

- Dragging with be in Semitone steps
- Dragging will be continuous when the ALT (OPTION) key is held down.
Double clicking Notes
One or more notes can be selected and then if you double click inside the top half of the note box (as shown below with the drag control points turned OFF),
the Note Block center will be moved to:
- The nearest Selected Scale Note frequency if Snap is ON or
- To the nearest Chromatic note if Snap is OFF.
Example:
Note block below is shown not centered in any note lane.
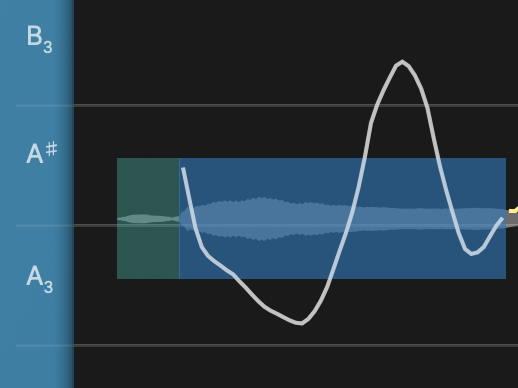
After double clicking the note block is centered to the nearest scale note, A#.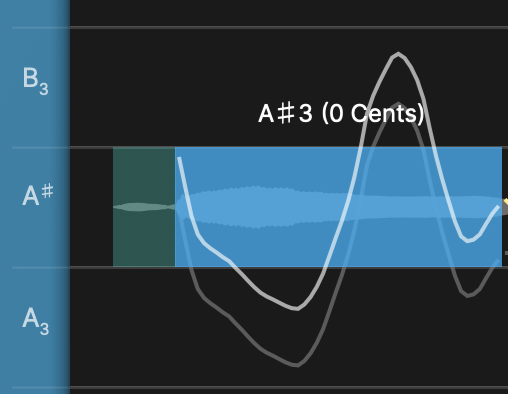
Modulation Control
This control reduces or expands the range of the note's variation.
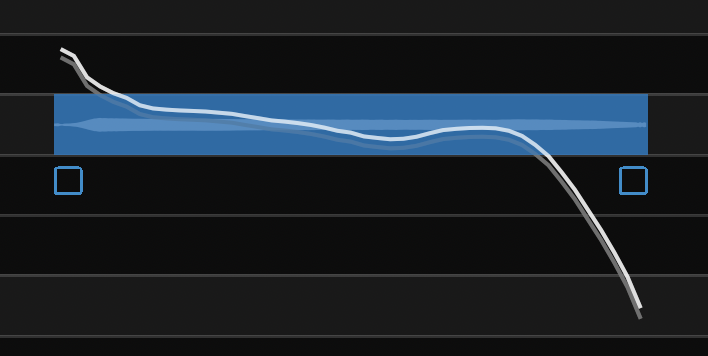
Clicking in the top centre of the Note box brings up the downward pointing arrow as shown below, which can be dragged down to reduce the modulations or upward to expand them.
![]()
In the picture below, the Modulation control point has been dragged downward, and has reduced the note's modulation range as can be seen by comparing the resulting pitch in white with the original pitch trace in gray (the less visible curve within the blue note box).
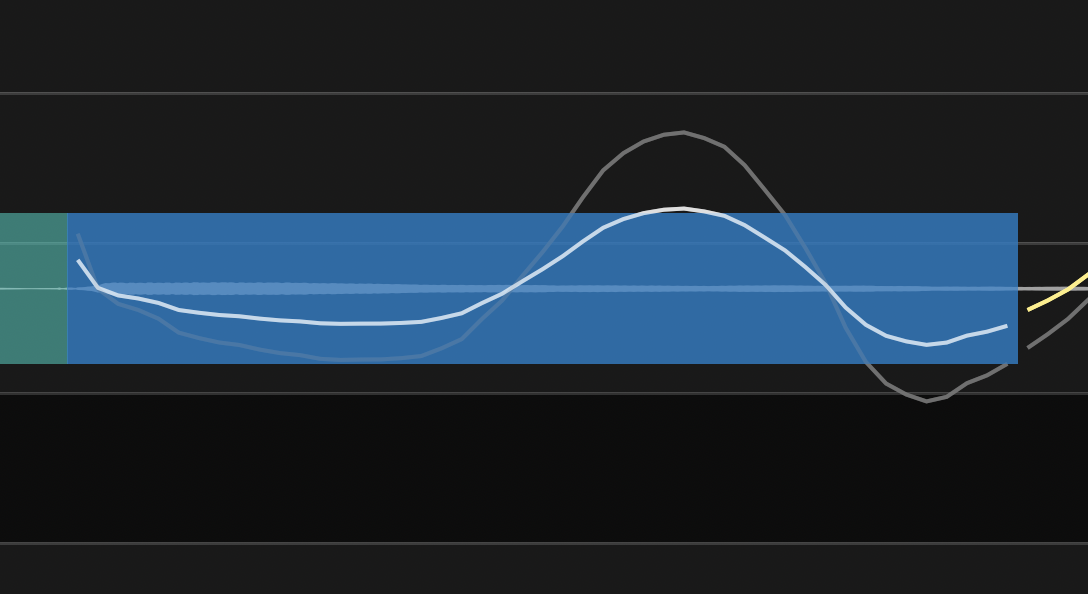
In addition to expanding the pitch modulations, the Modulation control can be used to flatten the note range (to make it monotonic) or, it can also gradually invert the pitch pattern as the control is dragged further downwards.
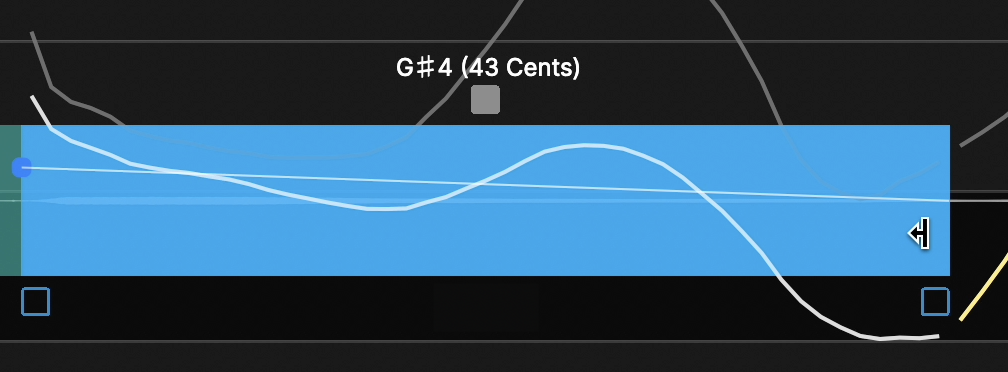
Tilt Pitch
- Place mouse cursor inside either box edge (where white boxes were shown above) to get inward pointing cursor.
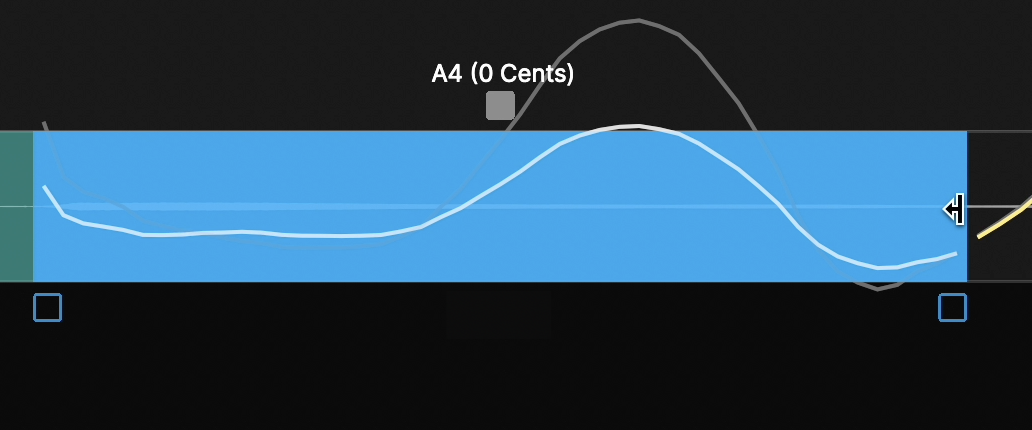
- Press and hold down the ALT/OPTION key for macOS and CTRL key for Windows.
- Left Click mouse and hold down to get a horizontal line and circular anchor at other side of box as shown in picture above.
- Drag cursor up and down to tilt Pitch trace. See result below.
Editing Transitions
Transitions from one Note Block to another are shown in yellow, as seen below
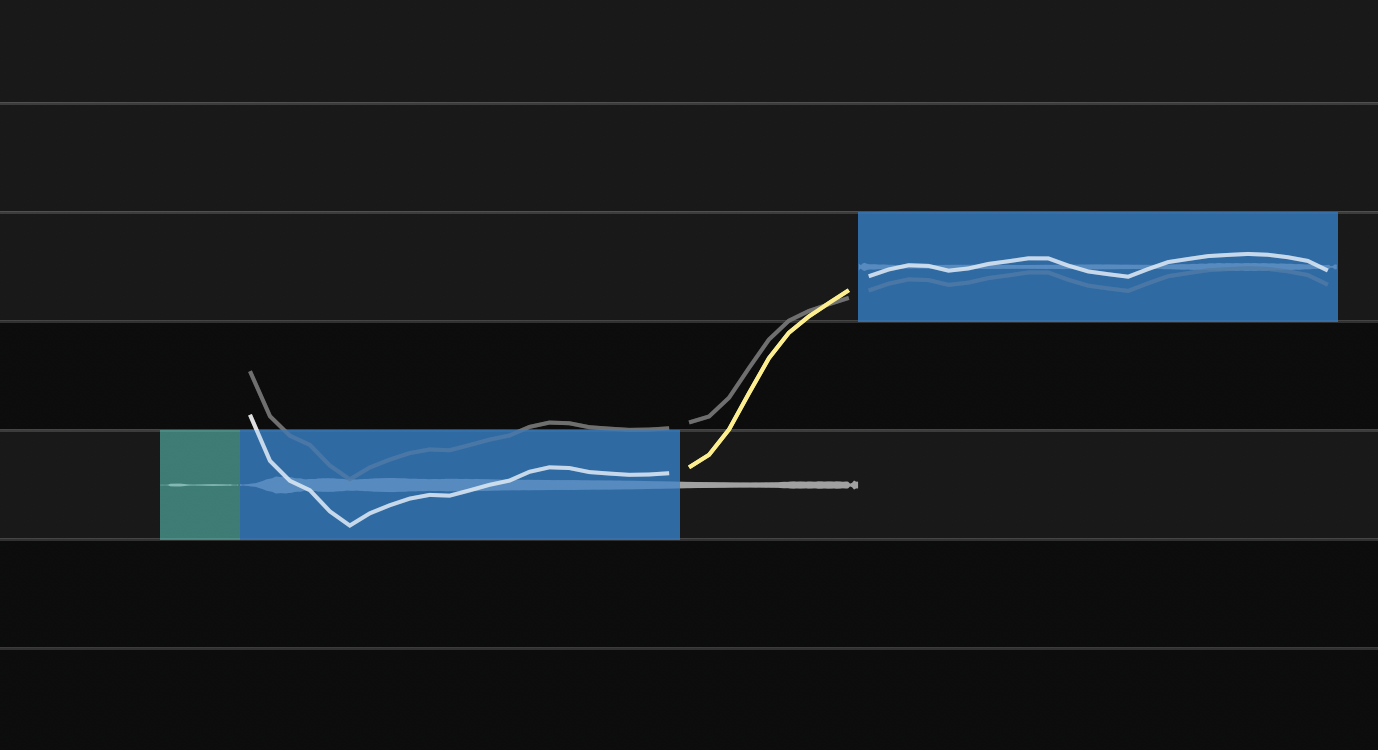
There are two ways transitions can be manipulated.
One of these uses Time Modification and is shown in the next Chapter here.
The other uses the Pitch Block control points as described below and does not modify timing.
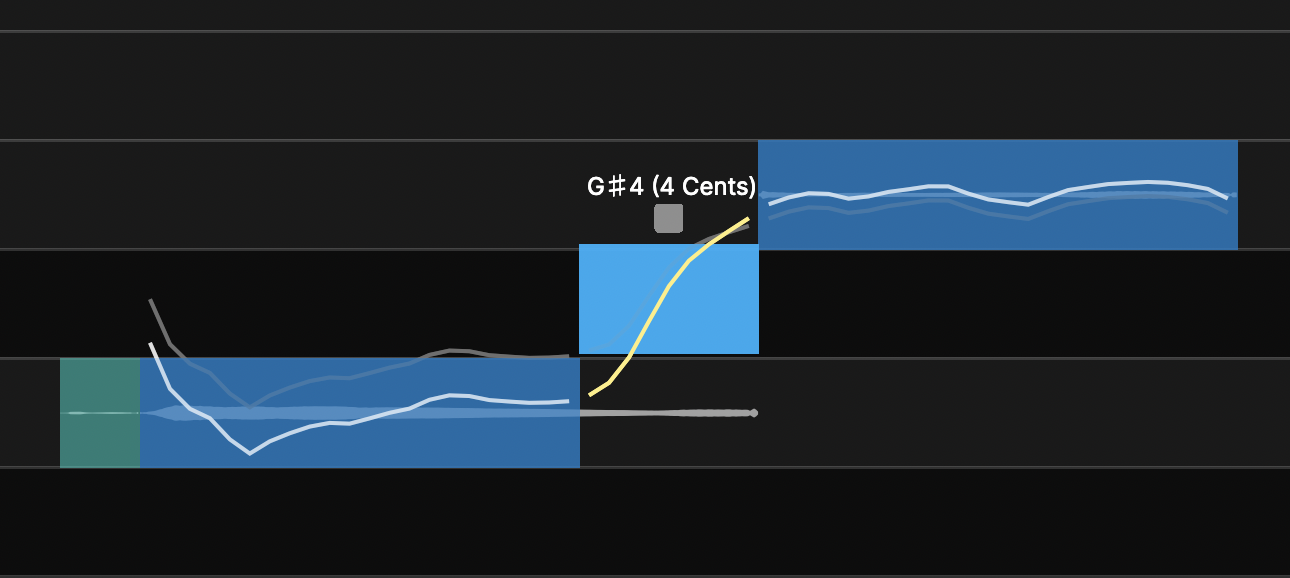
Selecting the transition will show the Level Change control point as described above, and the transition can be dragged up and down to modify it's tuning.
The drag locations will affect the transition block like a normal note, but there will be differences in results that will vary from case to case depending on the slope of the transition and how the pitch curve is shaped in the notes it connects.
Actions on a Range of Selected Notes
The following instructions provide very useful actions, some on Key Commands.
We explain first how to make a selection and then explain the available commands.
Three ways to make a selection in main window
- To select a small range of visible objects- click and drag a box around items
- To select a larger range and include all items in range - (vertically and horizontally)
- Select first item in range
- If last item is off screen, use the Overview or Navigation tools to view the last item you want in the range
- Press SHIFT key and click last item in selection.
- To select ALL- press CMD A (mac) or simply [A] (because some DAWs use CMD A)
For Windows, press [A] or CTRL A
Right Click Menu in Main Screen
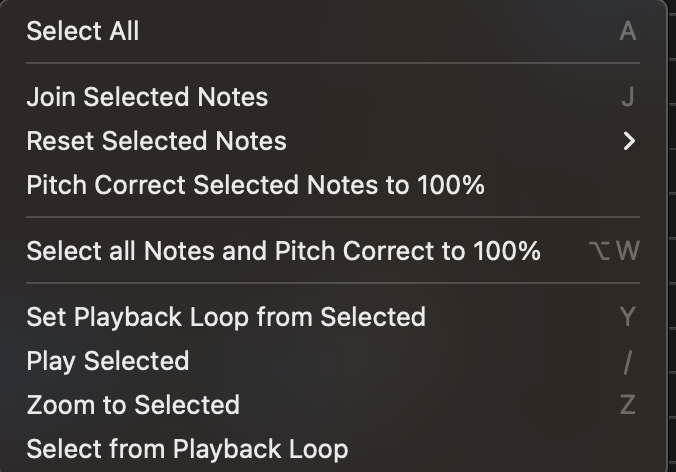
Most of the above are self-explanatory and related to Tools that are already described.
However, the following important tools not available elsewhere need a brief explanation.
| COMMAND | DESCRIPTION |
| Join Selected Notes | Notes can be joined together as long as there is no gap between them. This will affect how the pitch is determined |
| Reset Selected Notes | This will remove all processing and return the pitch samples to what they were before any modification was made. |
| Select from Playback Loop | This allows the user to make a playback loop in RePitch and select the notes in that range. In ARA plug-ins, the user can make a Playback Loop in their DAW, which will also appear in RePitch, and RePitch will select the audio range for processing that was selected in the DAW. |
| Select Audio | Use select audio to choose which region of audio to work on. This option is only available when multiple audio regions are overlapping in RePitch. |
 The entire note is used for pitch editing, and time editing by mouse-over is not possible. Select this mode when you want to avoid any accidental timing changes, particularly when zoomed out.