Capturing and Processing Audio
Workflows » How to work with your DAW » Pro Tools » ARA (Audio Random Access) in Pro Tools » Capturing and Processing Audio
This section shows you how to transfer audio from a project in Pro Tools to Revoice Pro 5 using the ARA Link plug-in.
Capturing Audio
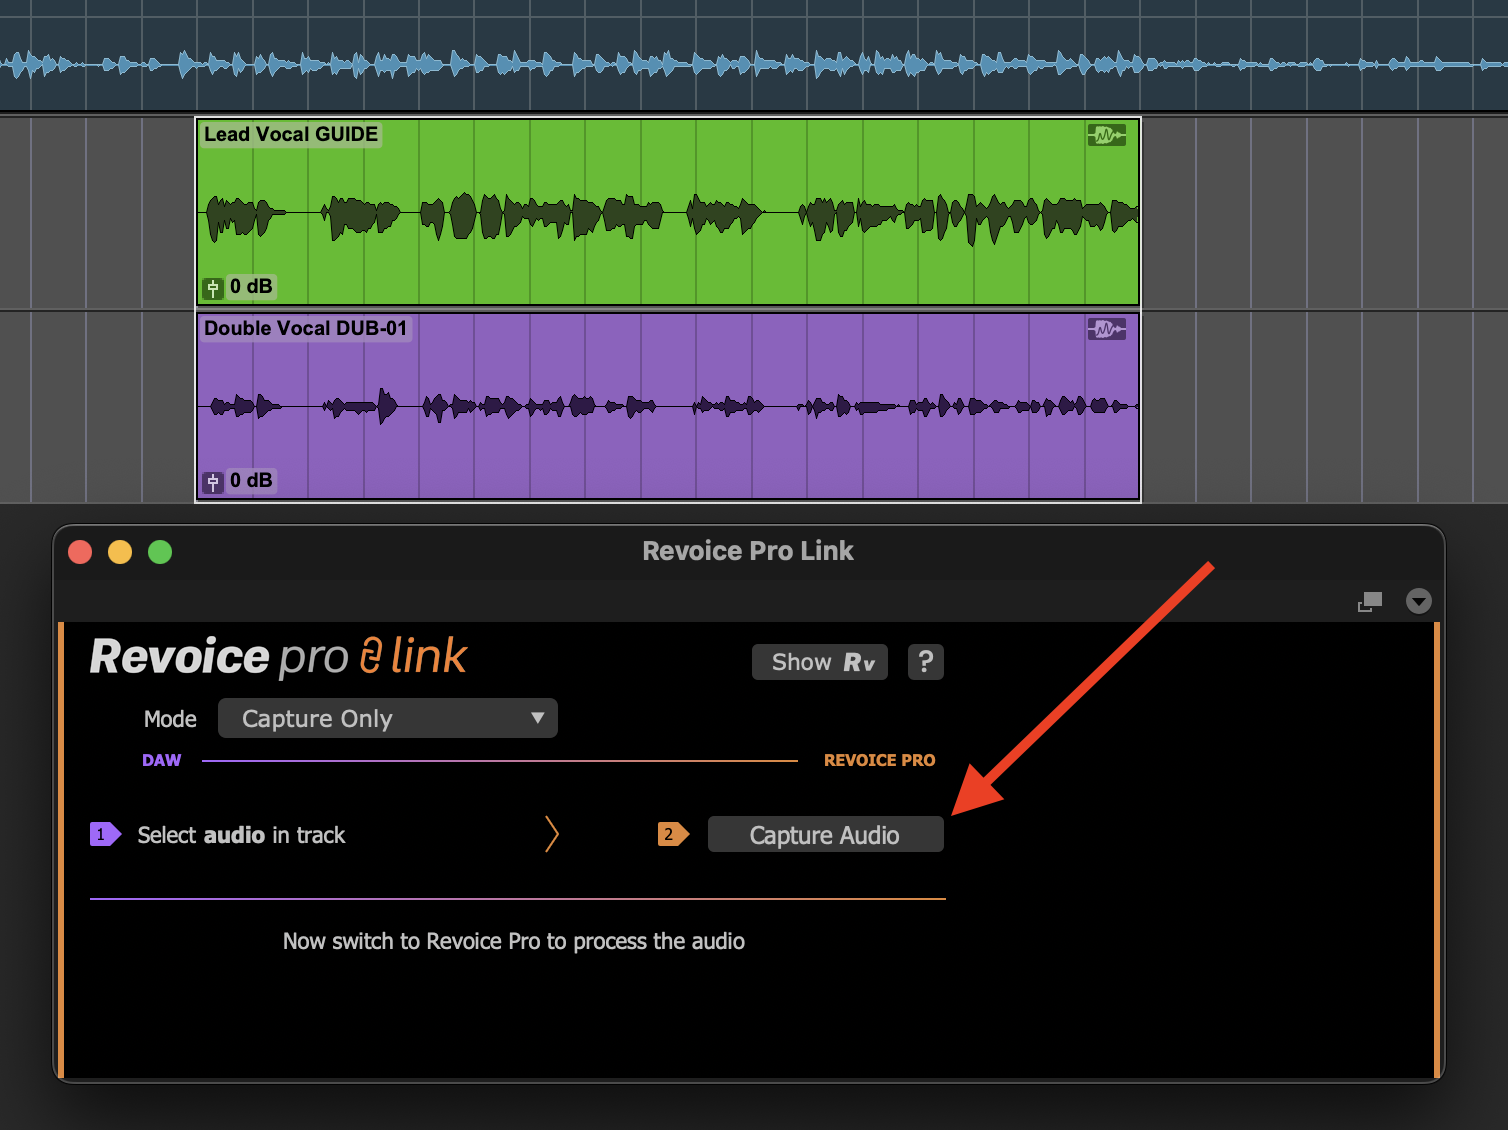
First, select the audio clips that you would like to import into Revoice Pro. In this case, we will import our two clips from the Lead Vocal track and the Double Vocal track. Once you have selected the regions, click Capture Audio in the plugin window as indicated in the below image. Remember, both clips or tracks must have Revoice instantiated as in the previous section.
If you open your Revoice Pro project window, or click the Show Rv button in the top right of the plugin window, you should see something similar to the below. Revoice has created two new tracks, one called Lead Vocal and the other called Double Vocal. The tracks are ready to be processed further within Revoice.
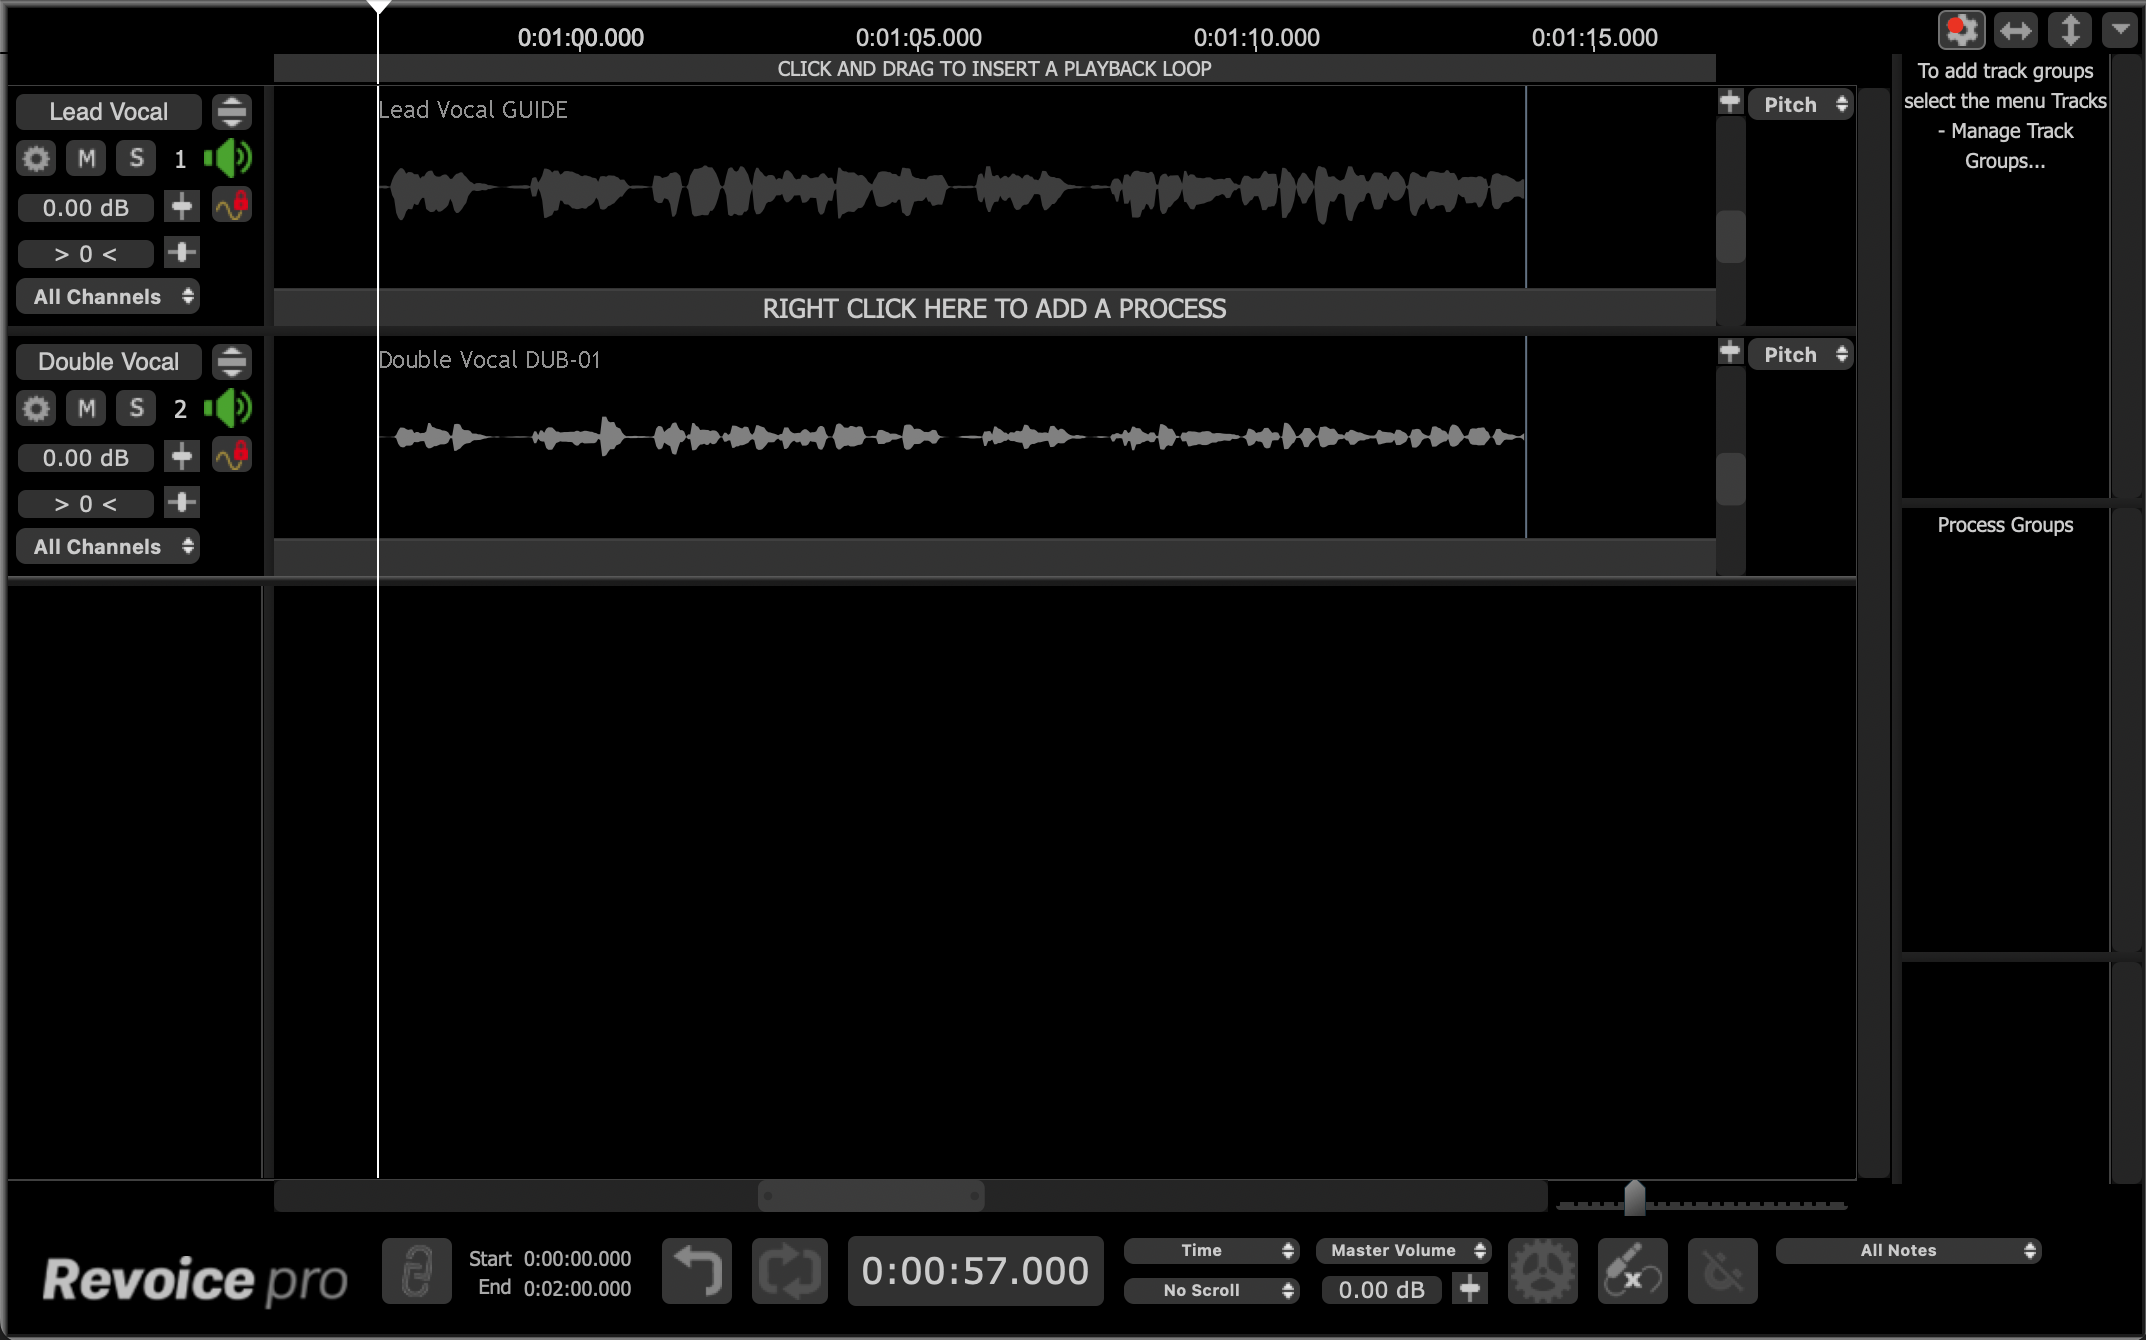
Any tracks that Pro Tools has created in Revoice Pro are automatically locked. The red padlock in the track's status area indicates this. Although you cannot edit any of the linked audio directly in Revoice Pro (as the track is locked), the ARA interface synchronizes each audio segment in Revoice Pro with its linked audio in Pro Tools.
Capture and Process Modes
As of Revoice Pro 5, the Link plugin has a Mode menu item. The Mode allows the user to both Capture audio and apply a Process immediately within Revoice, and helps to make standard workflows more efficient. Here, we will discuss how to use the Mode menu feature, and then discuss creating a process in Revoice after using Capture Only.
In the Revoice Pro Link plugin window, click the Mode dropdown menu and select Capture & Match Timing / Pitch / Level.
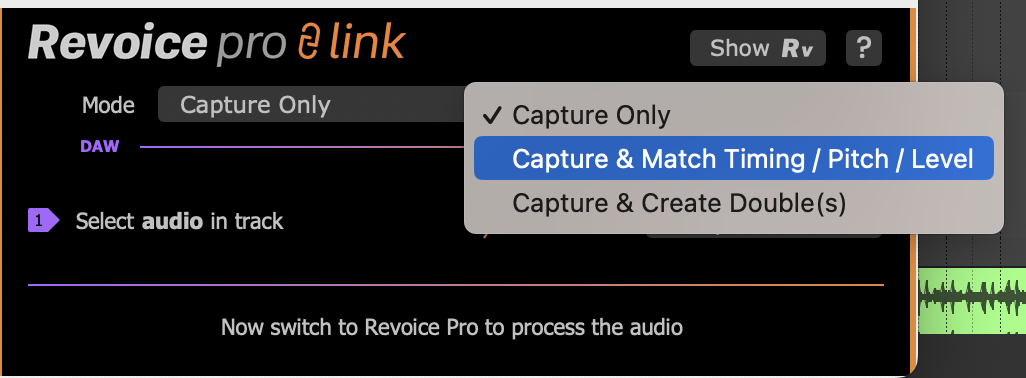
The Revoice Pro Link plugin window will change to give you some new options.
- Preset will allow us to choose any of our presets to apply to this new process.
- Select Guide and Select Dub will allow us to capture our audio regions into Revoice Pro.
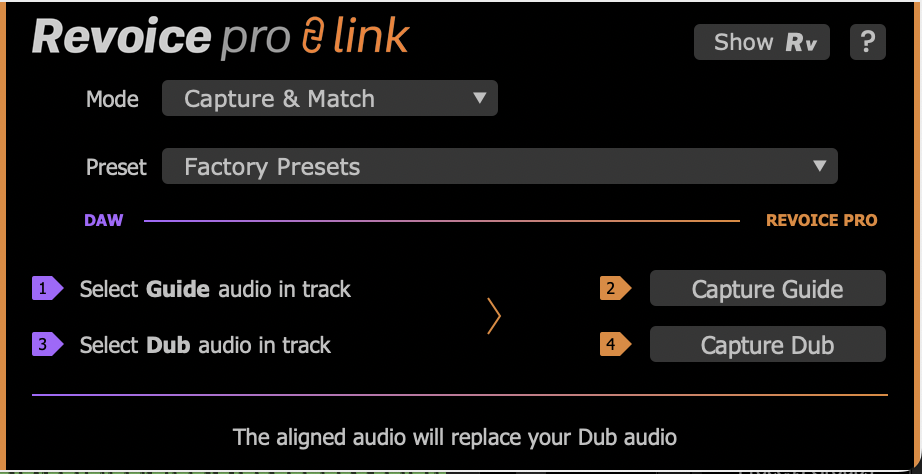
First, select your Guide audio region in Pro Tools, in this case 'Lead Vocal GUIDE' and then click Capture Guide in the Revoice Pro Link plugin window.
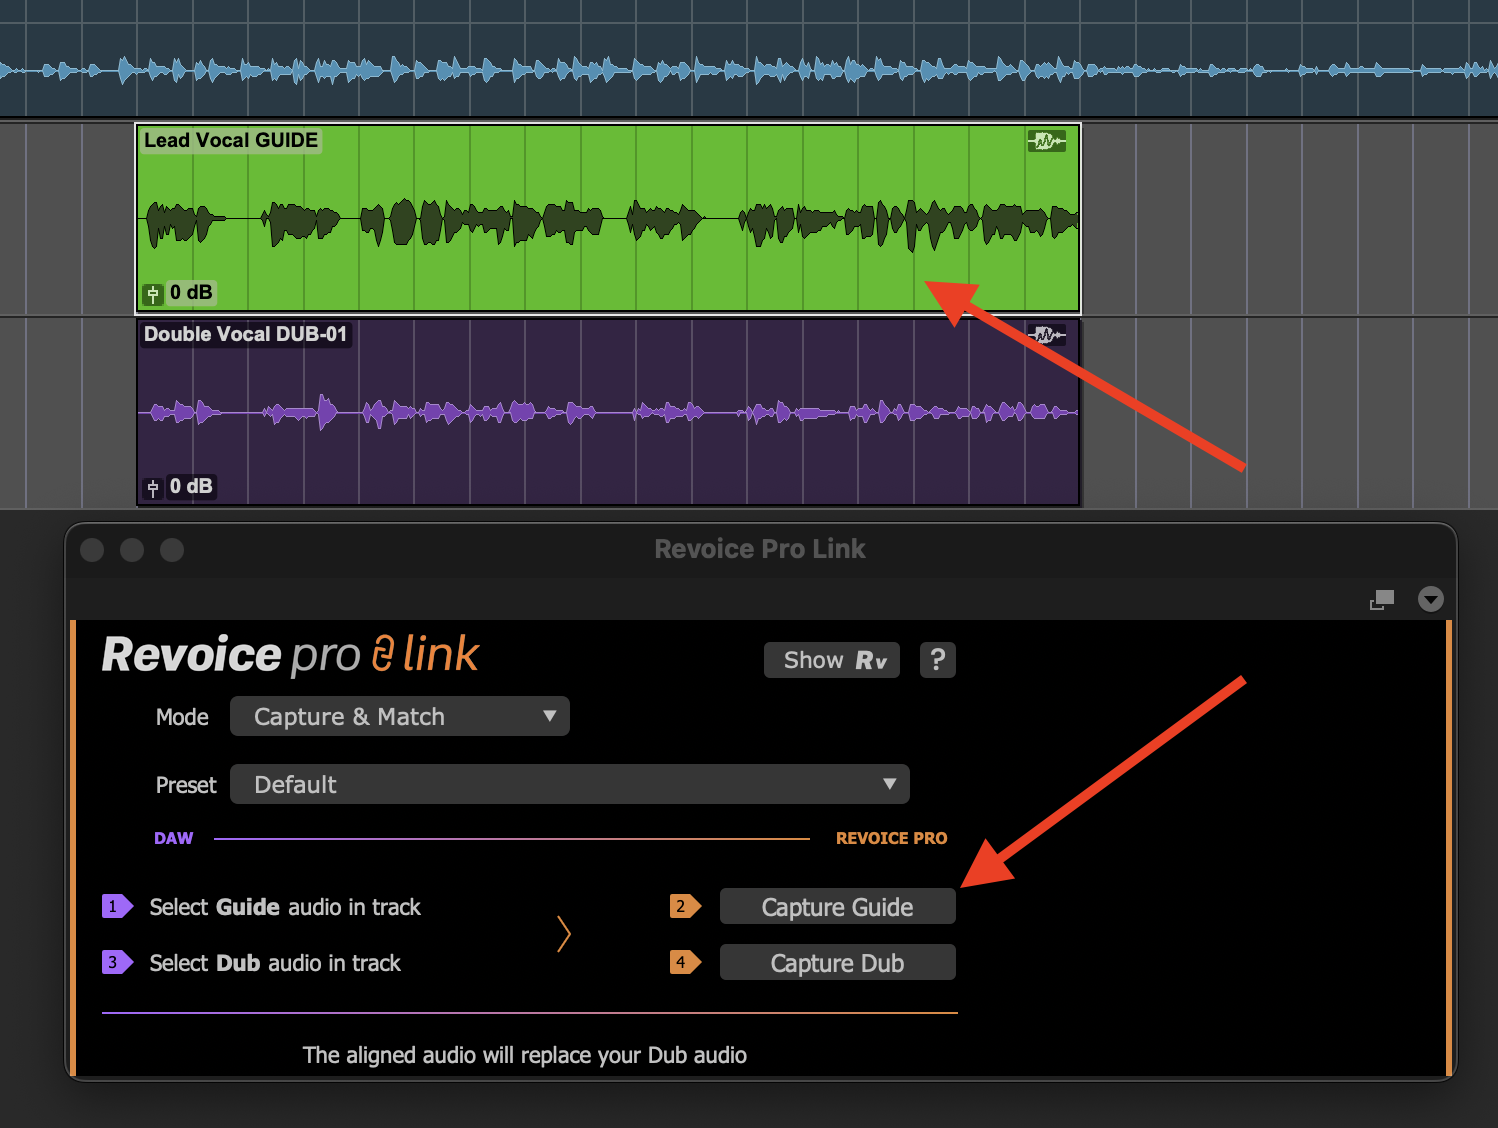
Repeat the same process but select the 'Double Vocal DUB' region in your DAW, and click Capture Dub, just below Capture Guide.
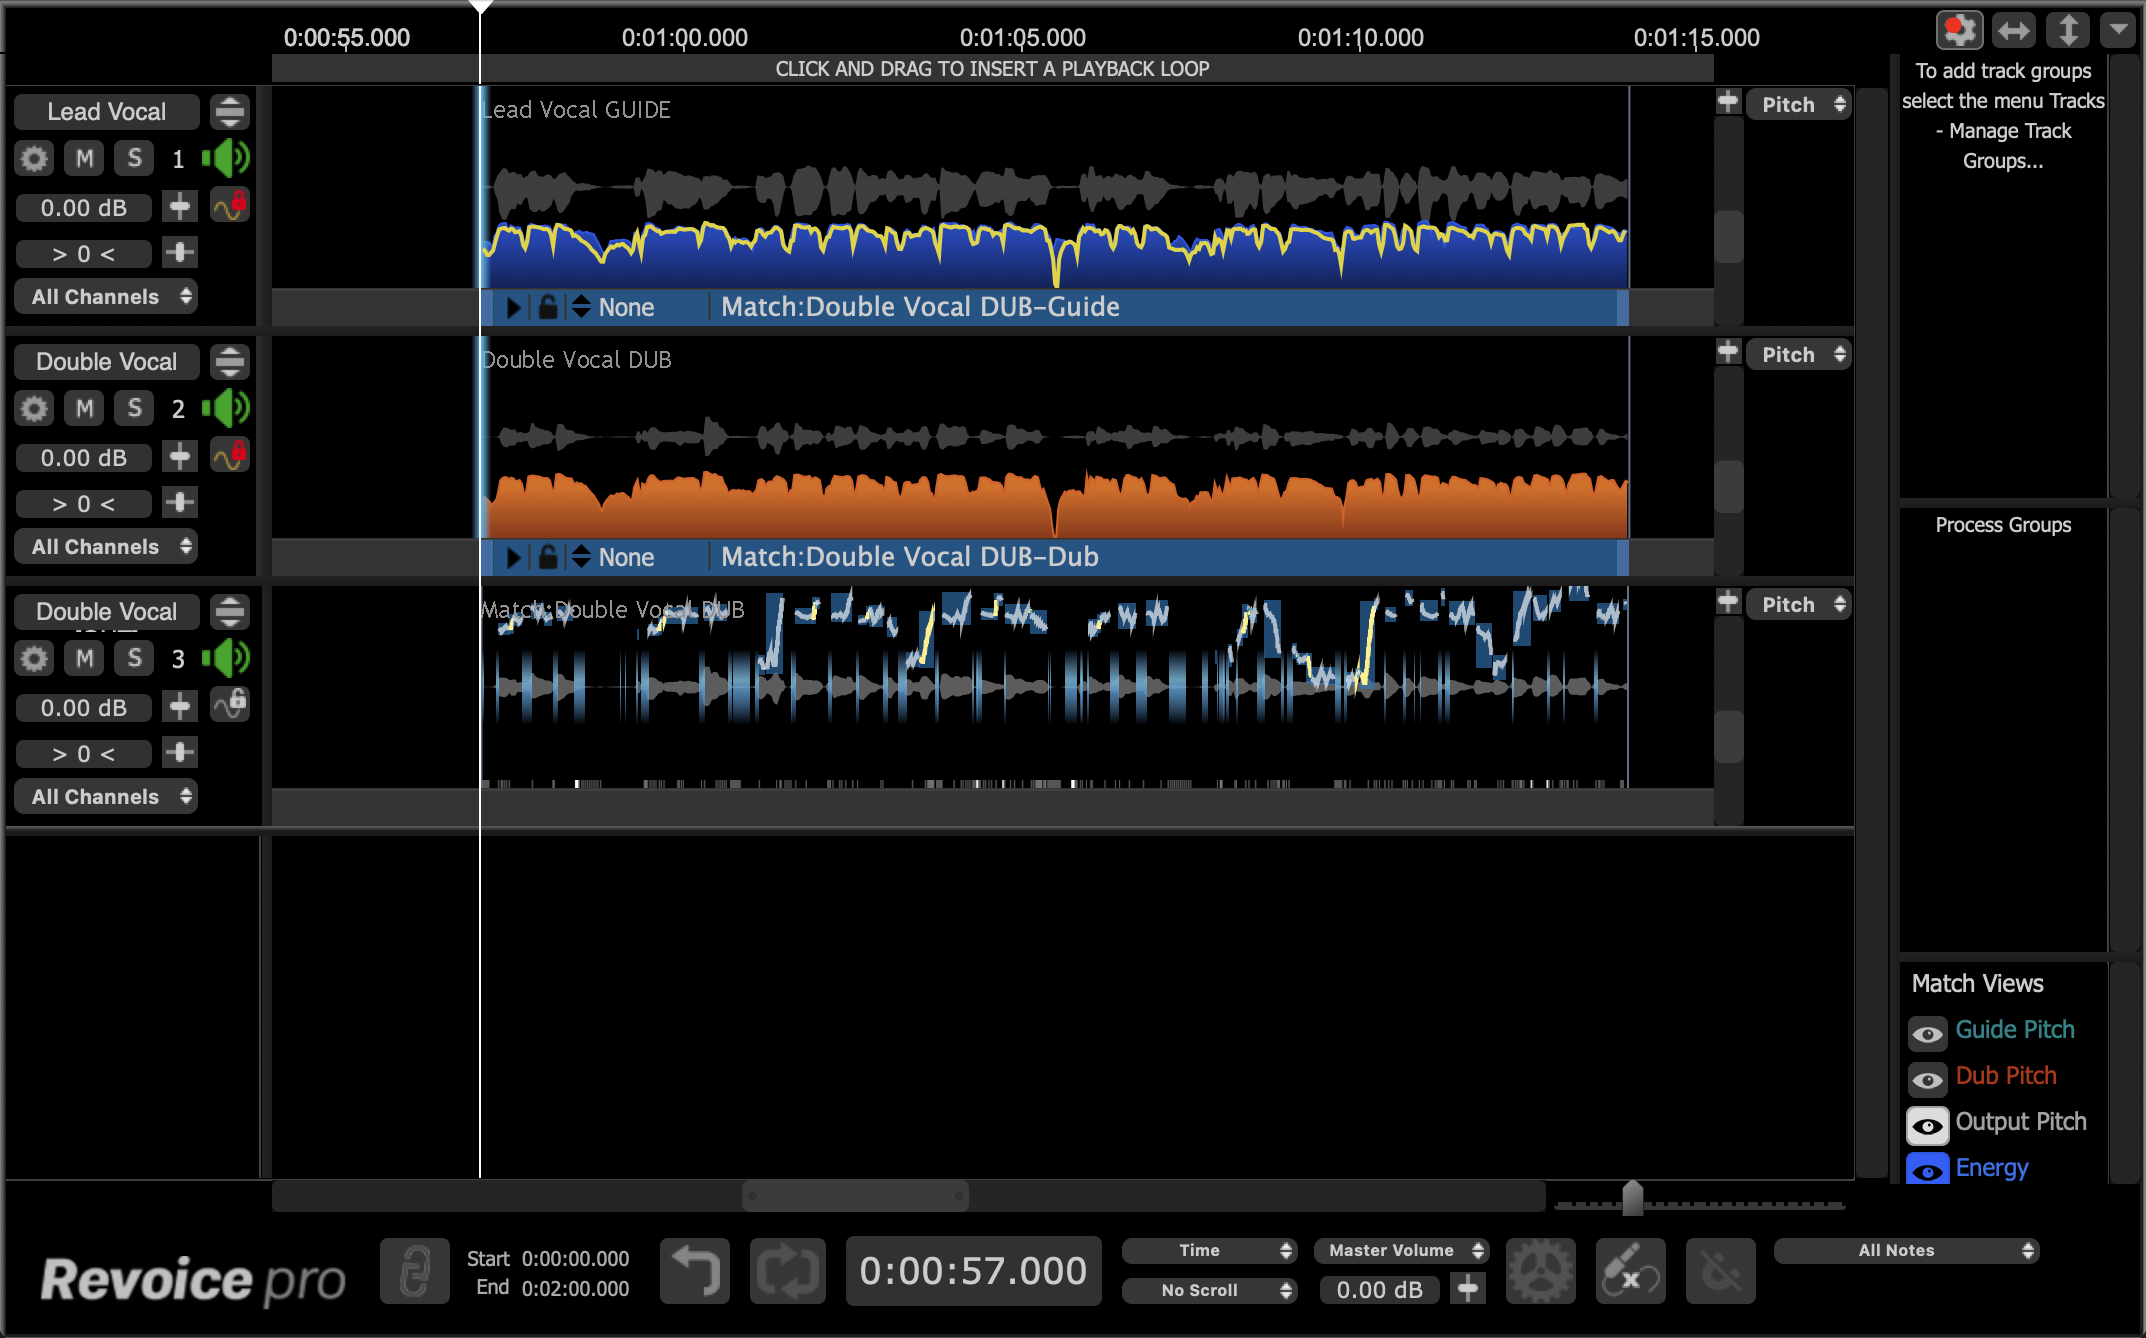
Now in your Revoice project window, you can see the process that has been created as shown below. You can listen back in Revoice or in your DAW to hear the Matched audio.
Applying a Process in Revoice Pro
If you have used the Capture only Mode, as done in the previous topic, you can continue with the following instructions to apply a process within Revoice
In this example we are going to use a Match (see Match Process for more details) to align the Dub signal 'Lead Vox High Chorus' to the Guide signal 'Lead Vocal'.
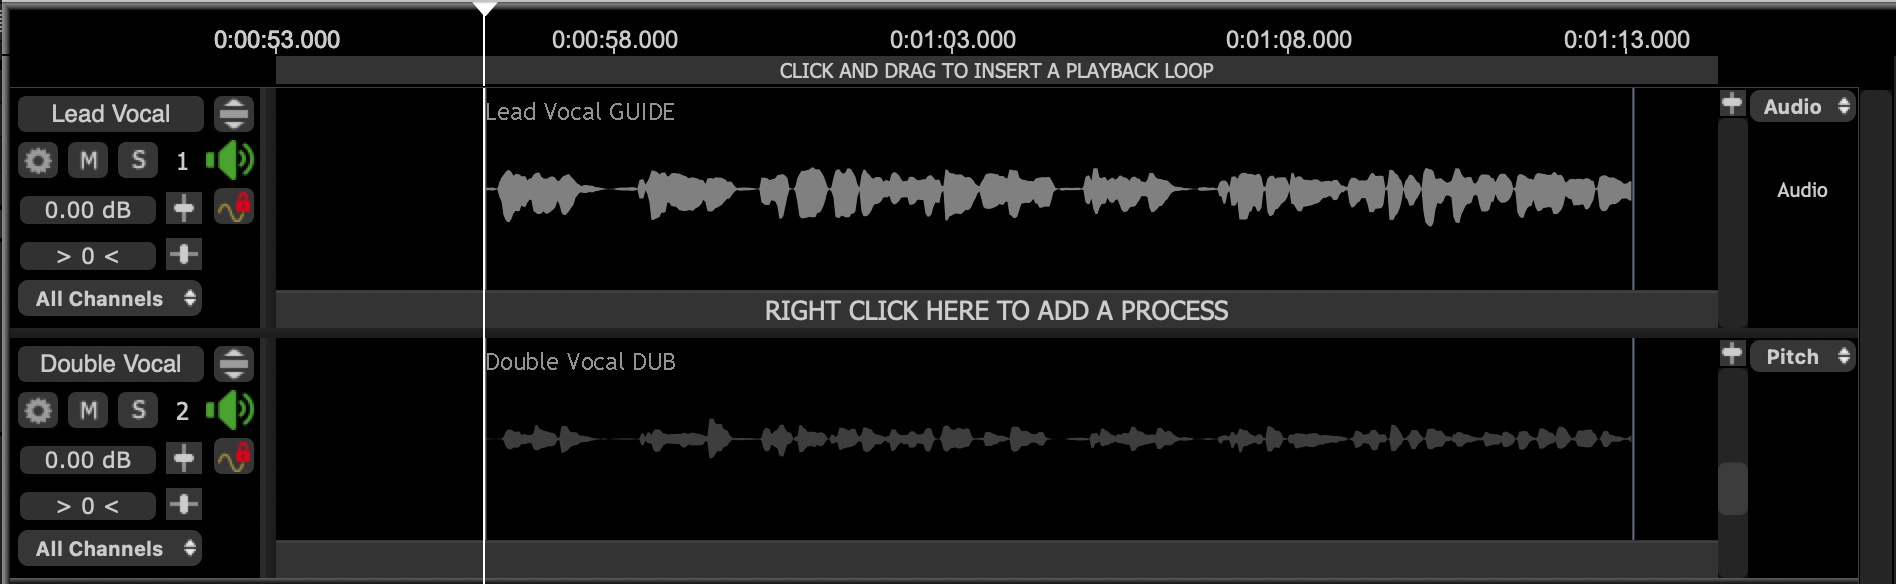
First, in Revoice Pro select the Guide signal 'Lead Vocal' in the first audio track. The audio waveform will turn light grey to indicate it is selected.
Next, right click in the Process Control track and select Match Timing / Pitch / Level. This will open the New Process Window.
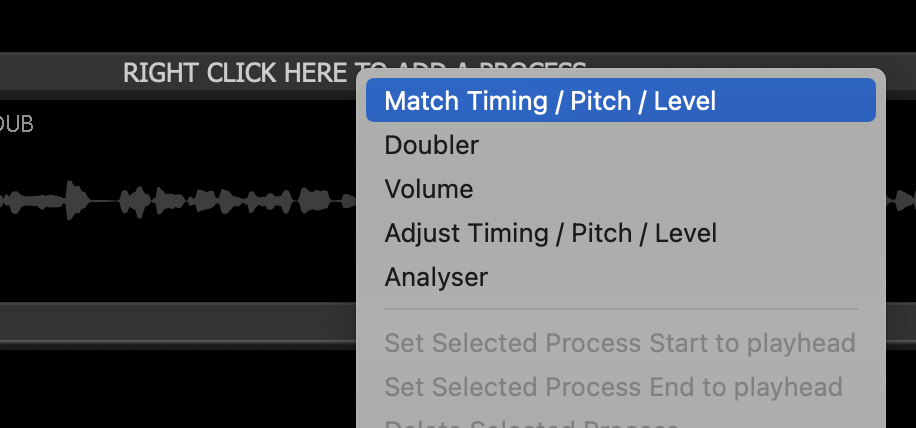
Below we can see the New Process window that opens upon selecting Match Timing / Pitch / Level.
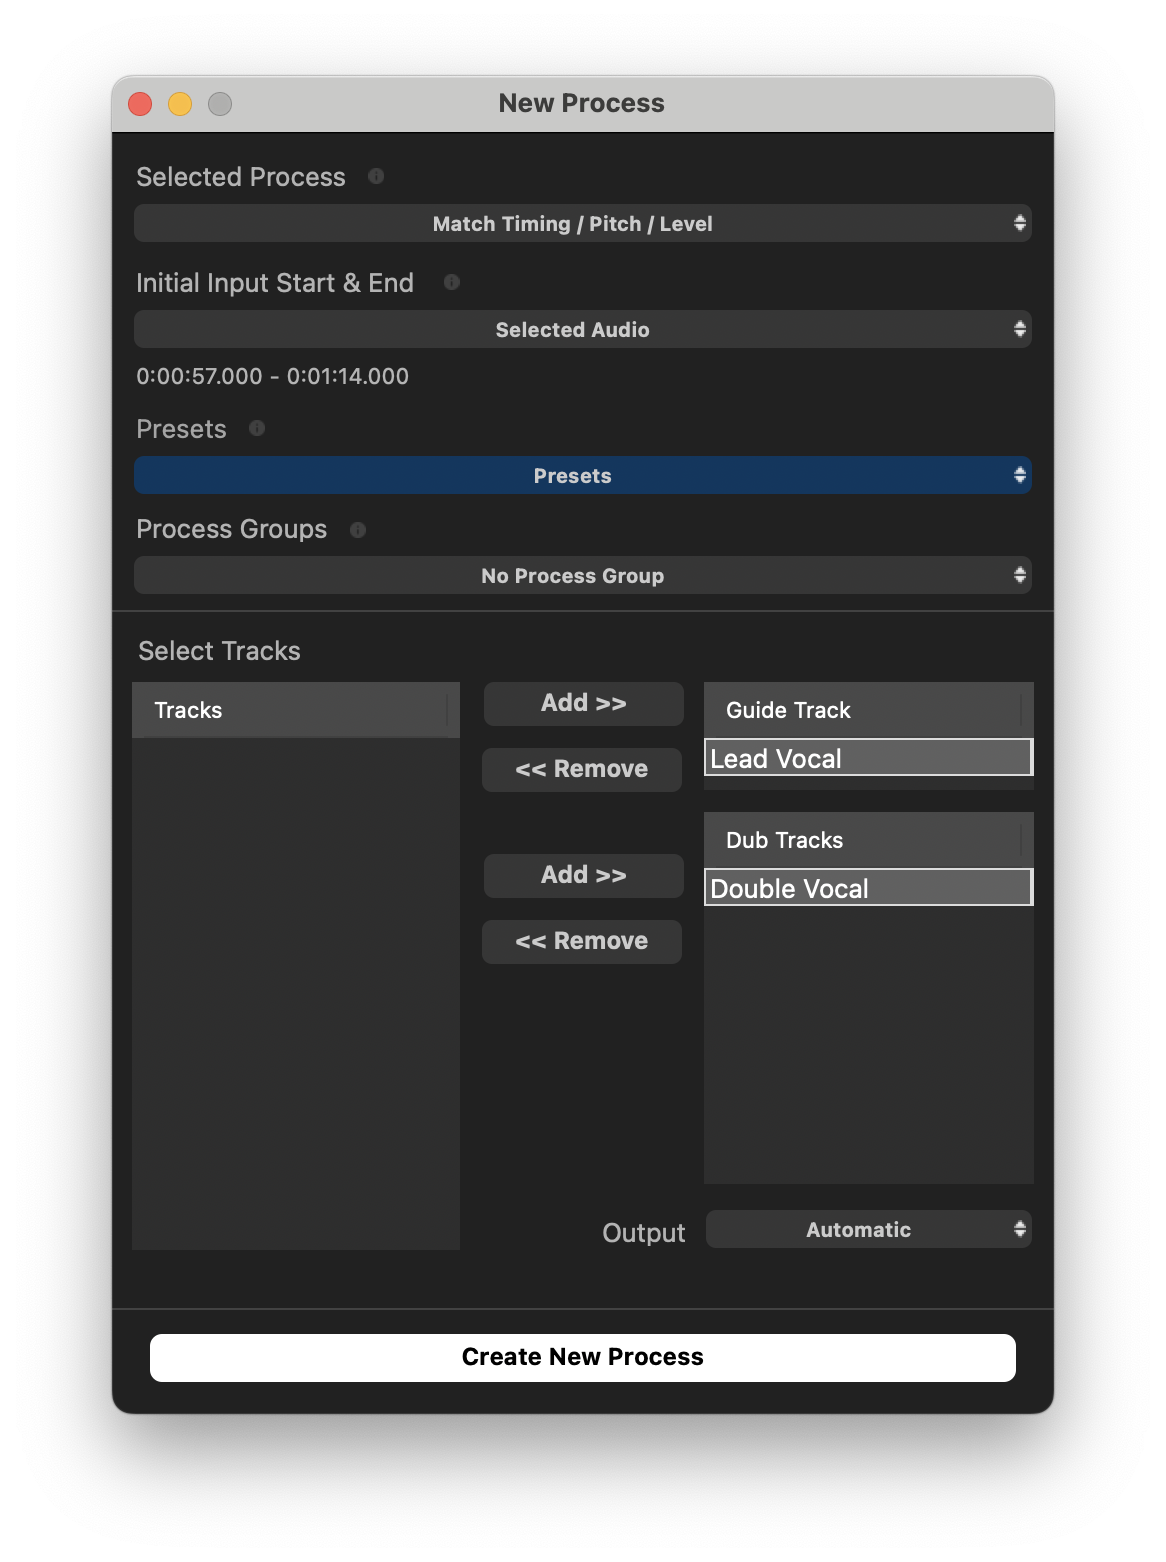
Revoice has made a few automatic choices for us, and for standard use these defaults will typically work well.
- Our Initial Input Start & End is set to Selected Audio, meaning that his process will apply to all audio within the selected region.
- Revoice has also selected 'Lead Vocal' as our Guide track, and 'Double Vocal' as our Dub track. We can use the 'Add >>' and '<< Remove' buttons to change this if needed.
- Our output is set to Automatic. With this setting, Revoice will create a new track for our output aligned audio.
Click the 'New Process' button or press the N key to add the Match...
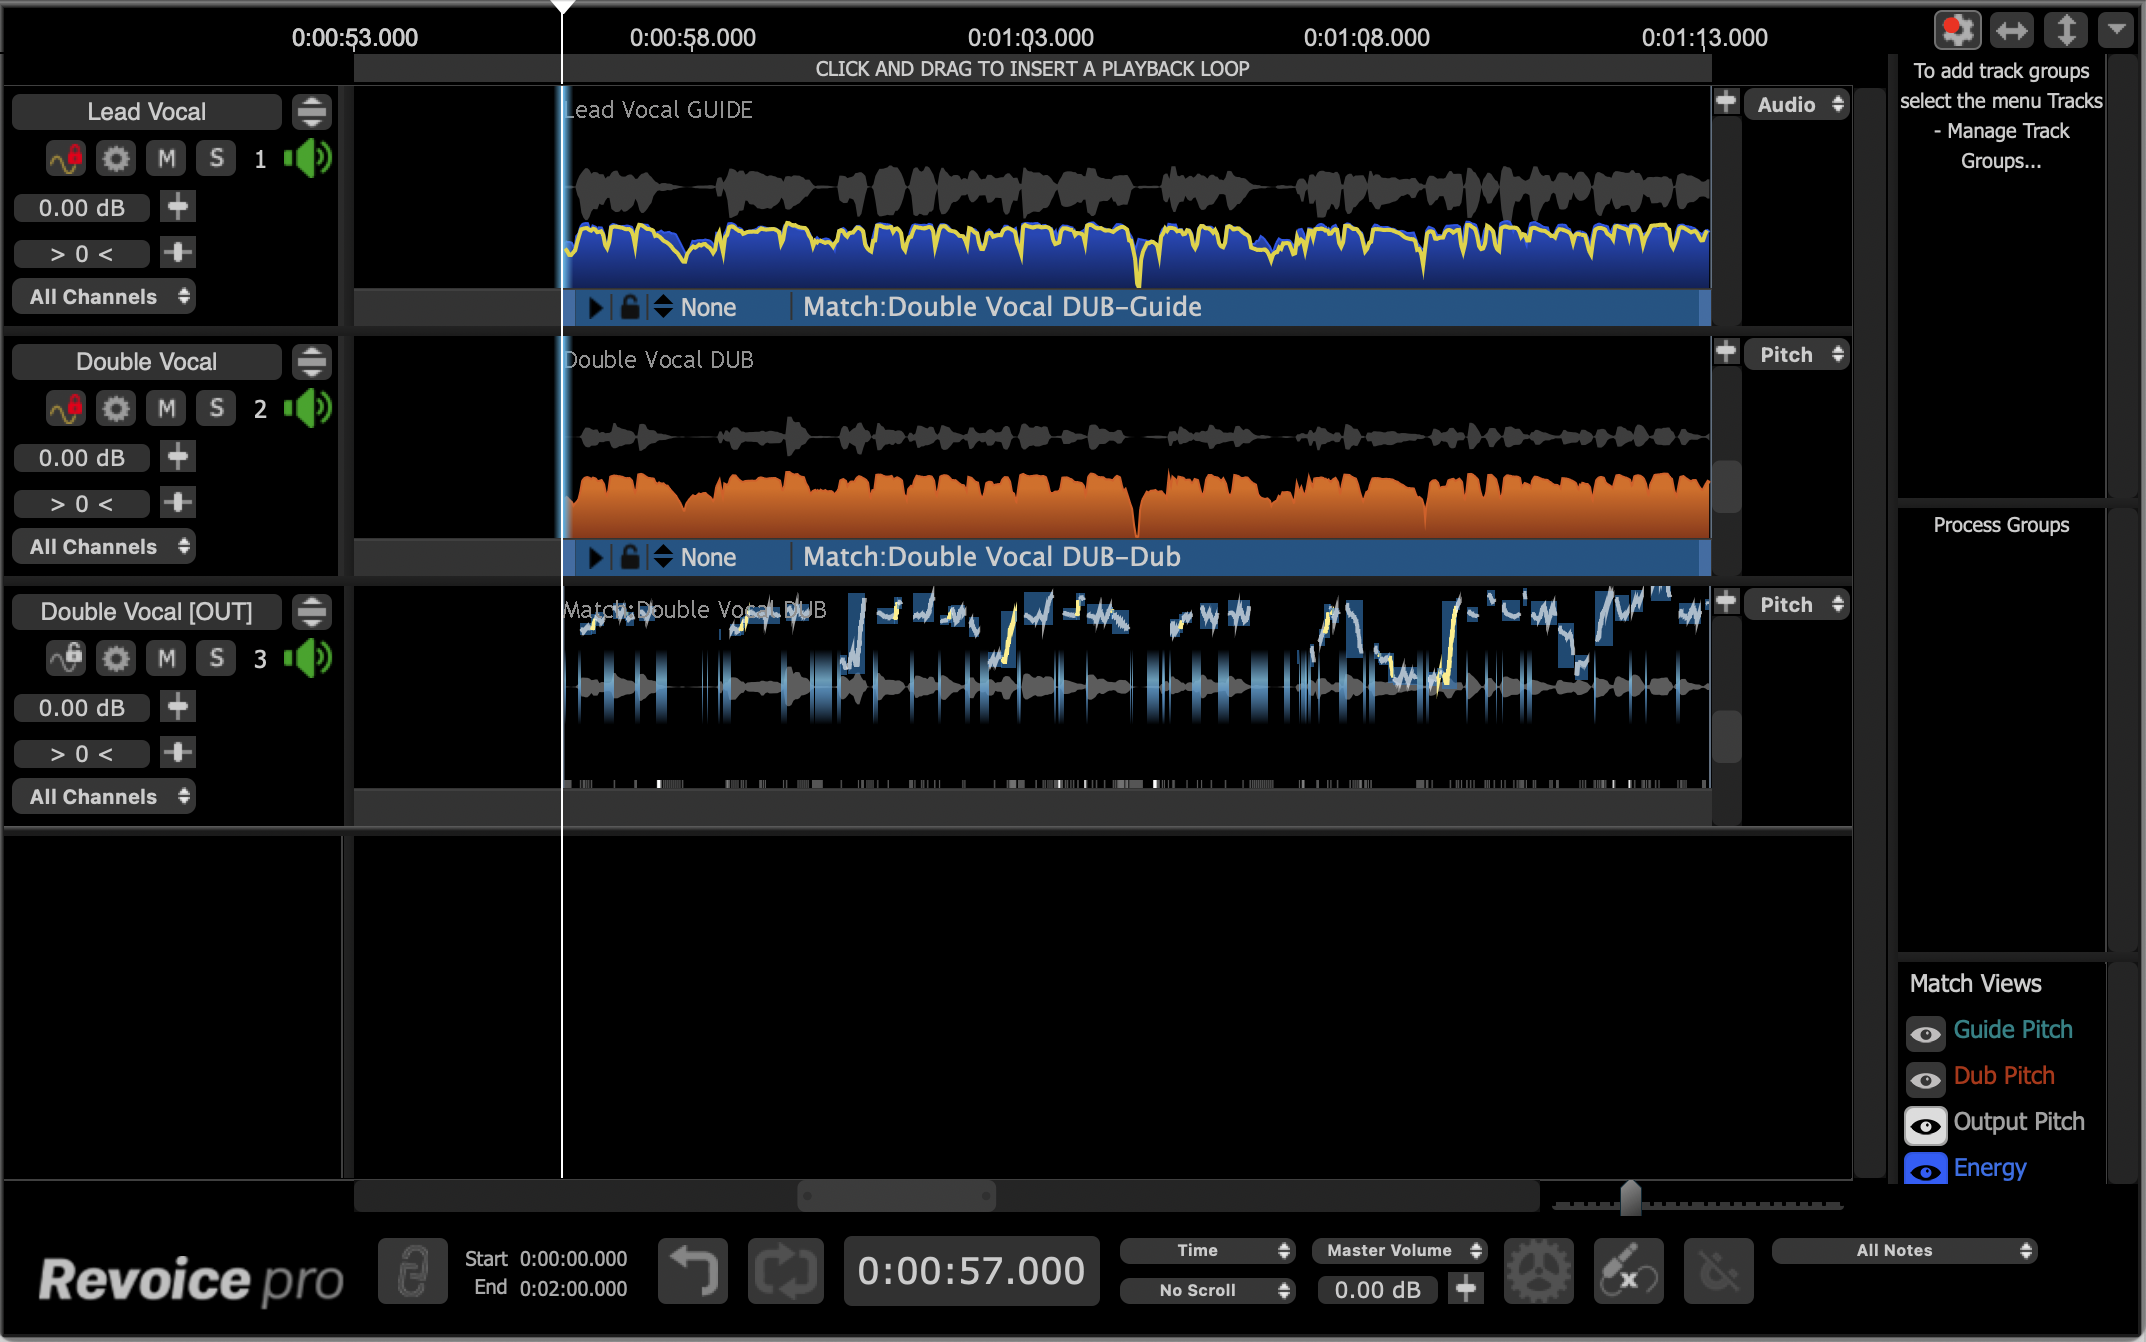
..., which generates the following output on track 'Double Vocal [OUT]'. To audition the quality of the aligned output in Revoice Pro, press the key E and press the space bar.
The ARA interface will automatically map the output of the Match process for the Dub signals back to the corresponding audio items in Pro Tools.
In Pro Tools you can listen to the quality of alignment by listening to the Lead Vocal and Lead Vox High Chorus tracks together.
Rendering Audio
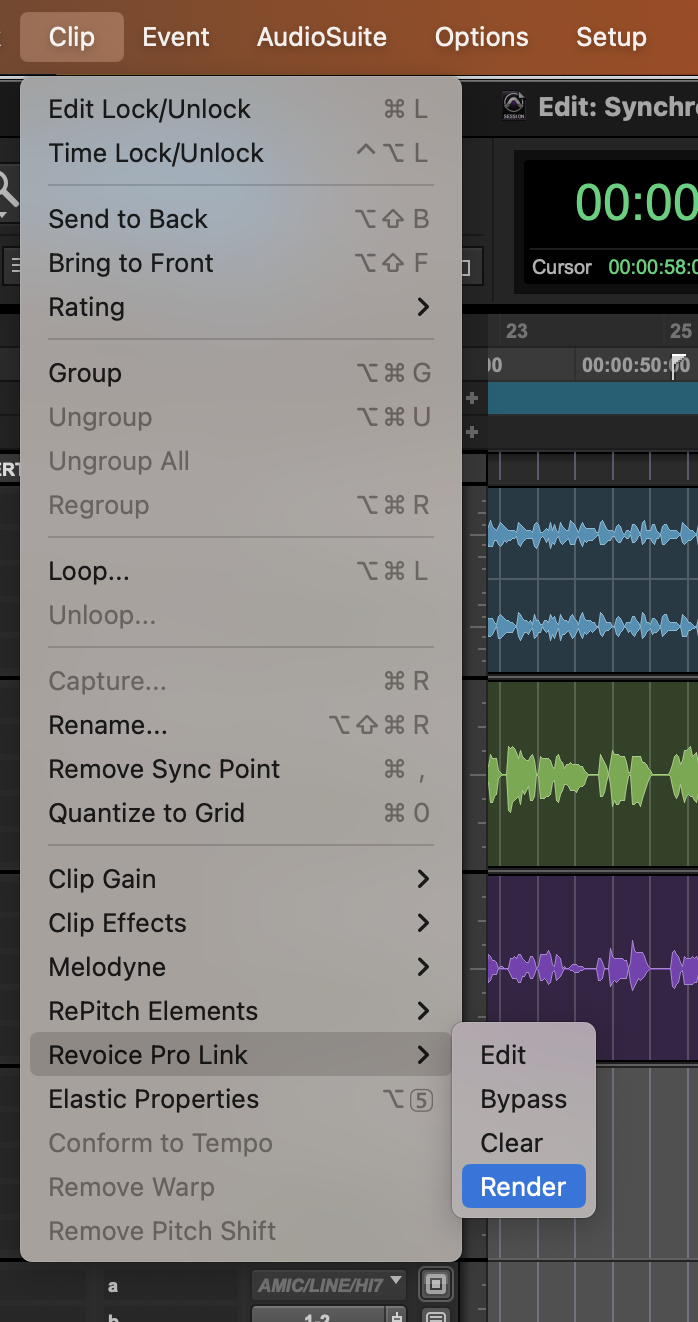
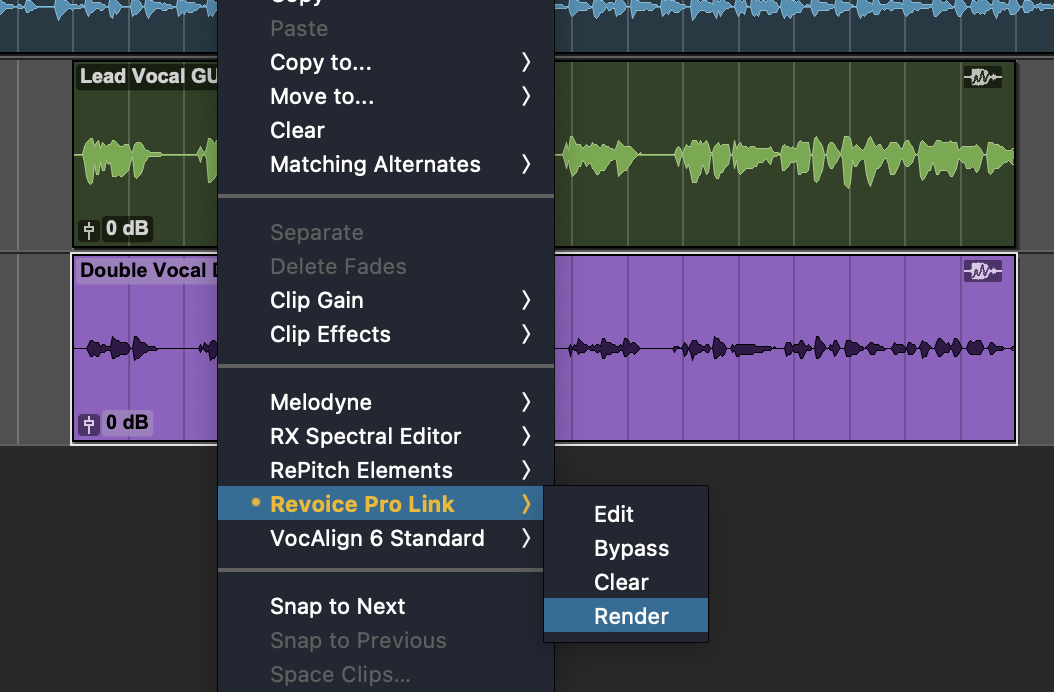
If you need to create a permanent version of the aligned signals, select the Render option in either the Clip right-click menu, or in the Clip file menu under Revoice Pro Link -> Render.
Copyright © 2023 by Synchro Arts Ltd All Rights Reserved.