Setting a Process Control Block
New Process Control Block
We first describe how to set the time range of any processing.
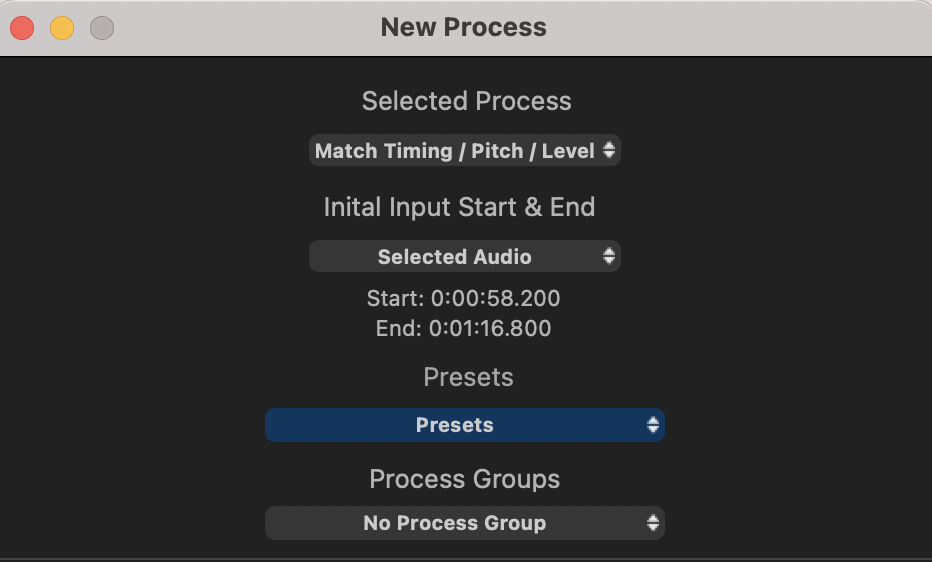
There are three options available to set the initial time ranges used when creating a New Process, thereby creating Process Control Blocks that cover the selected range.
- Use the range of Selected Audio (light grey) to set both the start and end
- Use the range of a Playback Range to set the start and end
- Or use the Mouse Cursor position to set the starting point of a short range which can be adjusted later
Which of the above methods are displayed in the drop down menu under Initial Input Start & End (in the New Process window) changes dynamically, and depends on what is already selected, or is available for use. If the New Process window is open, the automatically range option selected will depend on whether an Audio waveform, or a Playback Range was the last item selected.
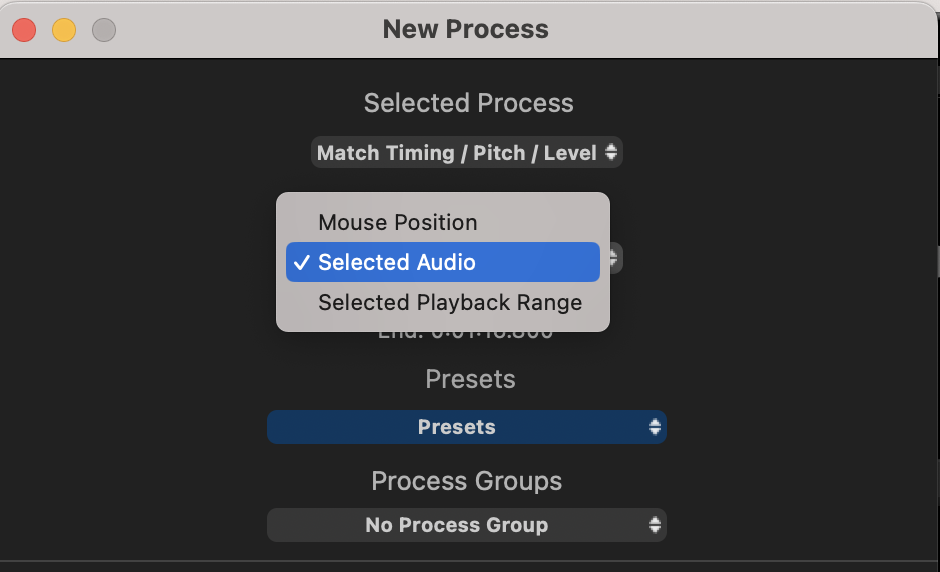
Selected Audio: this will only appear if some audio is selected. If the desired waveform isn't shown selected, left click the waveform and it should turn light grey. In some cases, you will need first to RIGHT CLICK on it to bring up the menu showing Edit Audio and select that option first and then make sure the audio is selected.
Selected Playback Range: see Playback Range for information about how to set these. If no Playback Range has been created, then this option will not appear.
Mouse Position: RIGHT CLICK in a Guide or Dub Process Control Track where you want the Process Control Blocks to start, and follow the New Process procedure. You can then adjust the end and possibly the start of the Process Control Blocks as required.
Adjusting Process Control Blocks
Most of the following applies mainly to Match, but you can also adjust the blocks in the other Processes.
The most common reasons for adjusting are to:
- Set the process start closer to just before the actual start of the audio signal (for example to exclude digital silence)
- Avoid extraneous audio just before or just after the end of the audio you want to process.
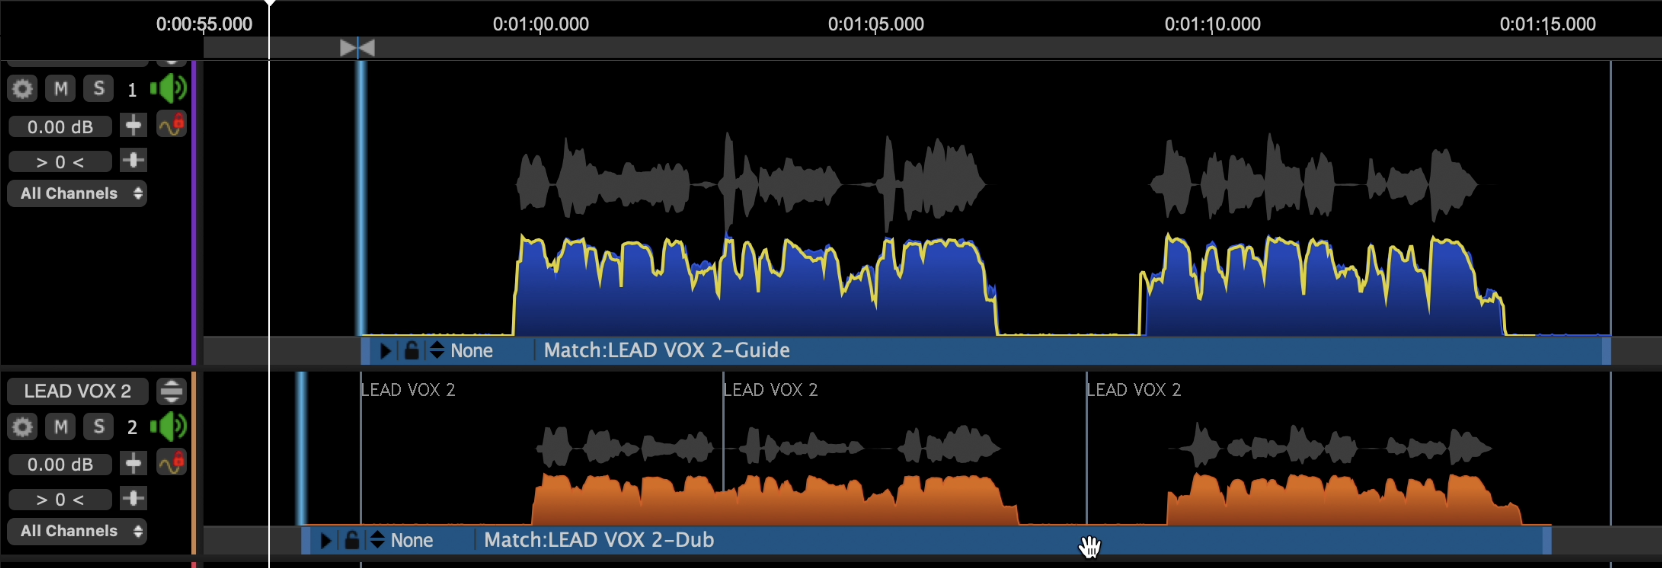
Sometimes the audio referenced by Process Control Blocks does NOT start or end exactly at the same point of the timeline. This is allowed and expected, which is why the two blocks are independently adjustable.
The Match process, for example, measures the noise floors of signals, so it is usually ideal to try to have around 0.25 seconds of background audio before the actual signal of interest starts. But the processing will generally work even if this isn't the case.
It is also critically important to make sure the range of the Dub Process Control Blocks in Match extends through the full extent of the Dub audio signal. This is because it provides the audio that is modified to become the Output.
In contrast, the Guide Process Control Block can stop before the end of the Guide audio. This can sometimes help avoid including the effect of unwanted audio effects such as reverberation or noises at the end of the Guide signal. When a Guide stops before the Dub does, the selected Guide parameters will be used to modify the Dub until the Guide has run out, and then the remaining unmodified Dub will be attached to the end of the modified audio.
There are three simple ways to adjust the input Process Control Blocks. Before adjusting a Process Control Block, it must be selected (green) which can be done with a left click inside either of the the Input Process Control Blocks.
In each method below, the Guide and Dub blocks can be independently adjusted. However, if you hold down the SHIFT key, both Guide and Dub blocks (Match) will be adjusted at the same time.
The three methods are:
If you position the cursor at the start (or end) of a Process Control Block , the cursor will change to the Forward- (or Back-) pointing cursor. This cursor indicate that the selected start (or end) can be dragged left or right with a left click held down. If the SHIFT key is pressed before LEFT CLICKing, then both the Guide and Dub Process Control Blocks' selected ends will move together.
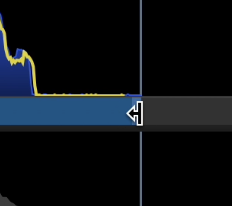
If you position the cursor inside a Process Control Block (away from the start and end), the cursor will change to the hand cursor as shown in yellow circle below, indicating that the Block (or Blocks) can be dragged with a left click held down.
In the image below, the Dub Process Control Block has been dragged to the left.
If the SHIFT key is pressed before left clicking, then both the Guide and Dub Process Control Blocks will move together.
Moving Process start to playhead
Position the playhead where you want a Process Control Block to start or stop, and then RIGHT CLICK either Input Process Control Block and use the pop-up menu shown below to set the start (or end) of the selected process to the playhead position. In the example below, the Guide Process Control Block was clicked.
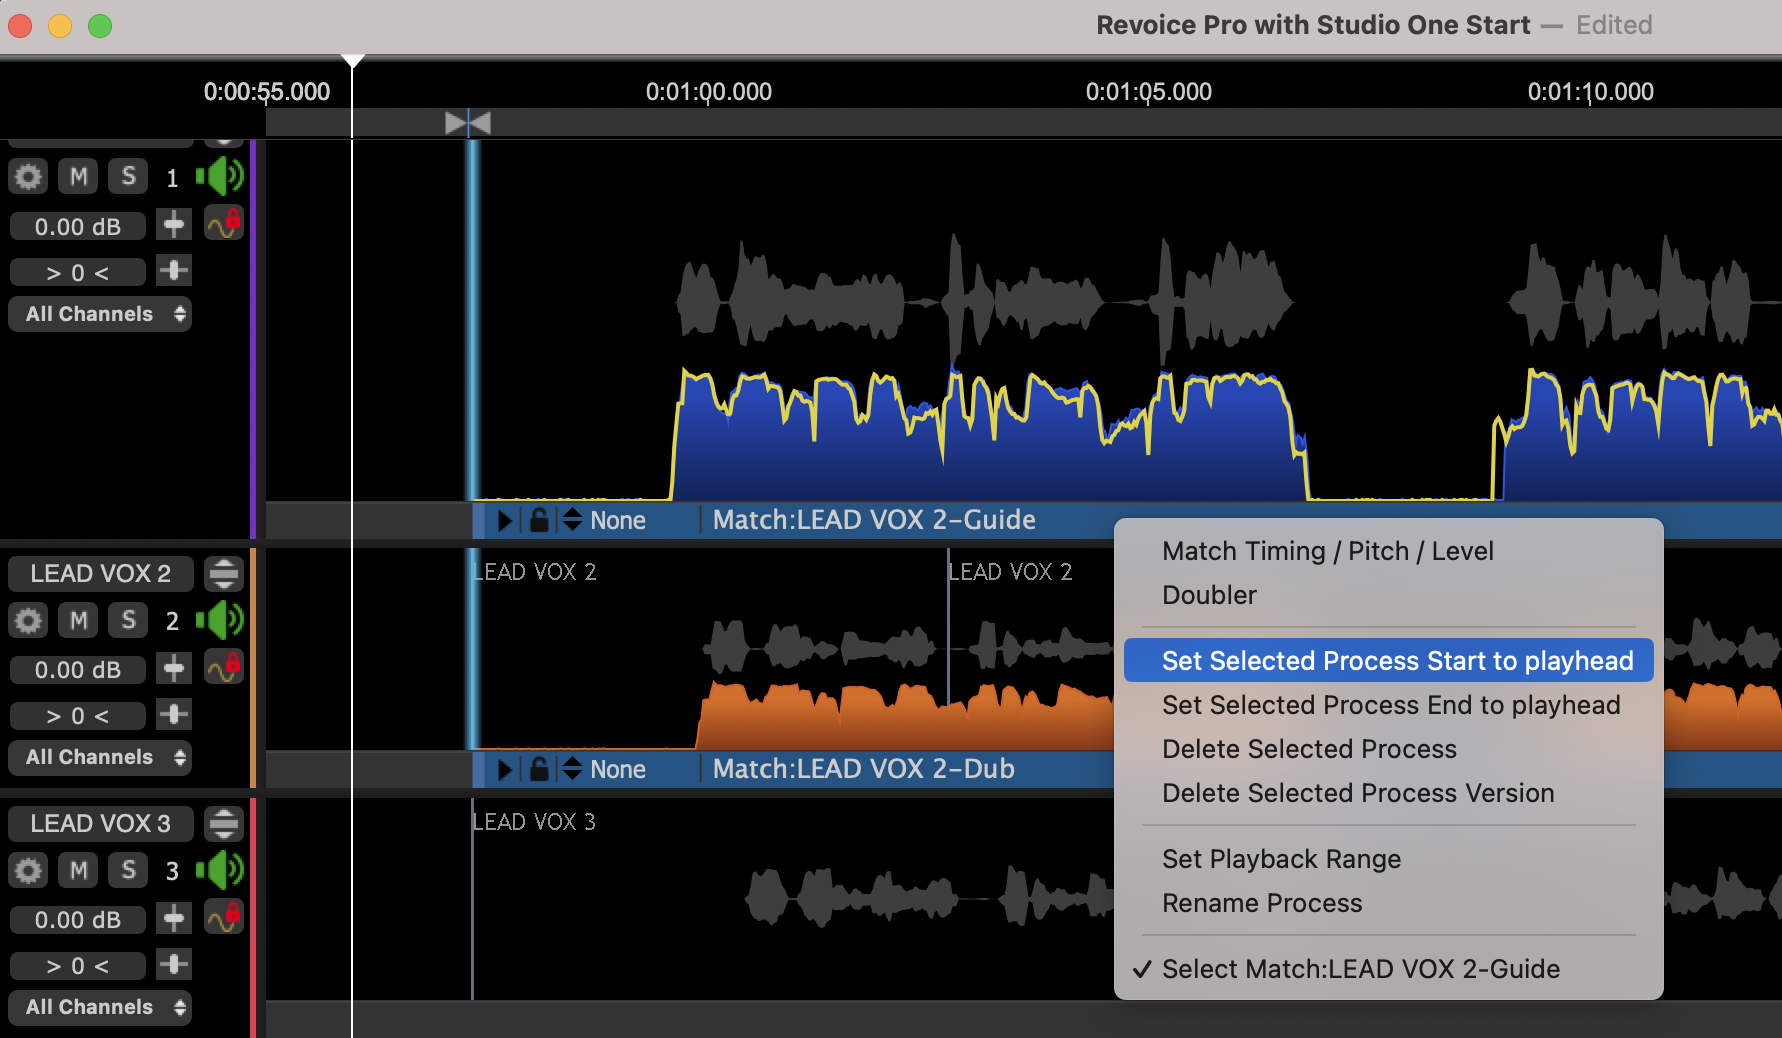
After clicking, the Guide Process Control Block start will move to the Playhead as shown below for this example.
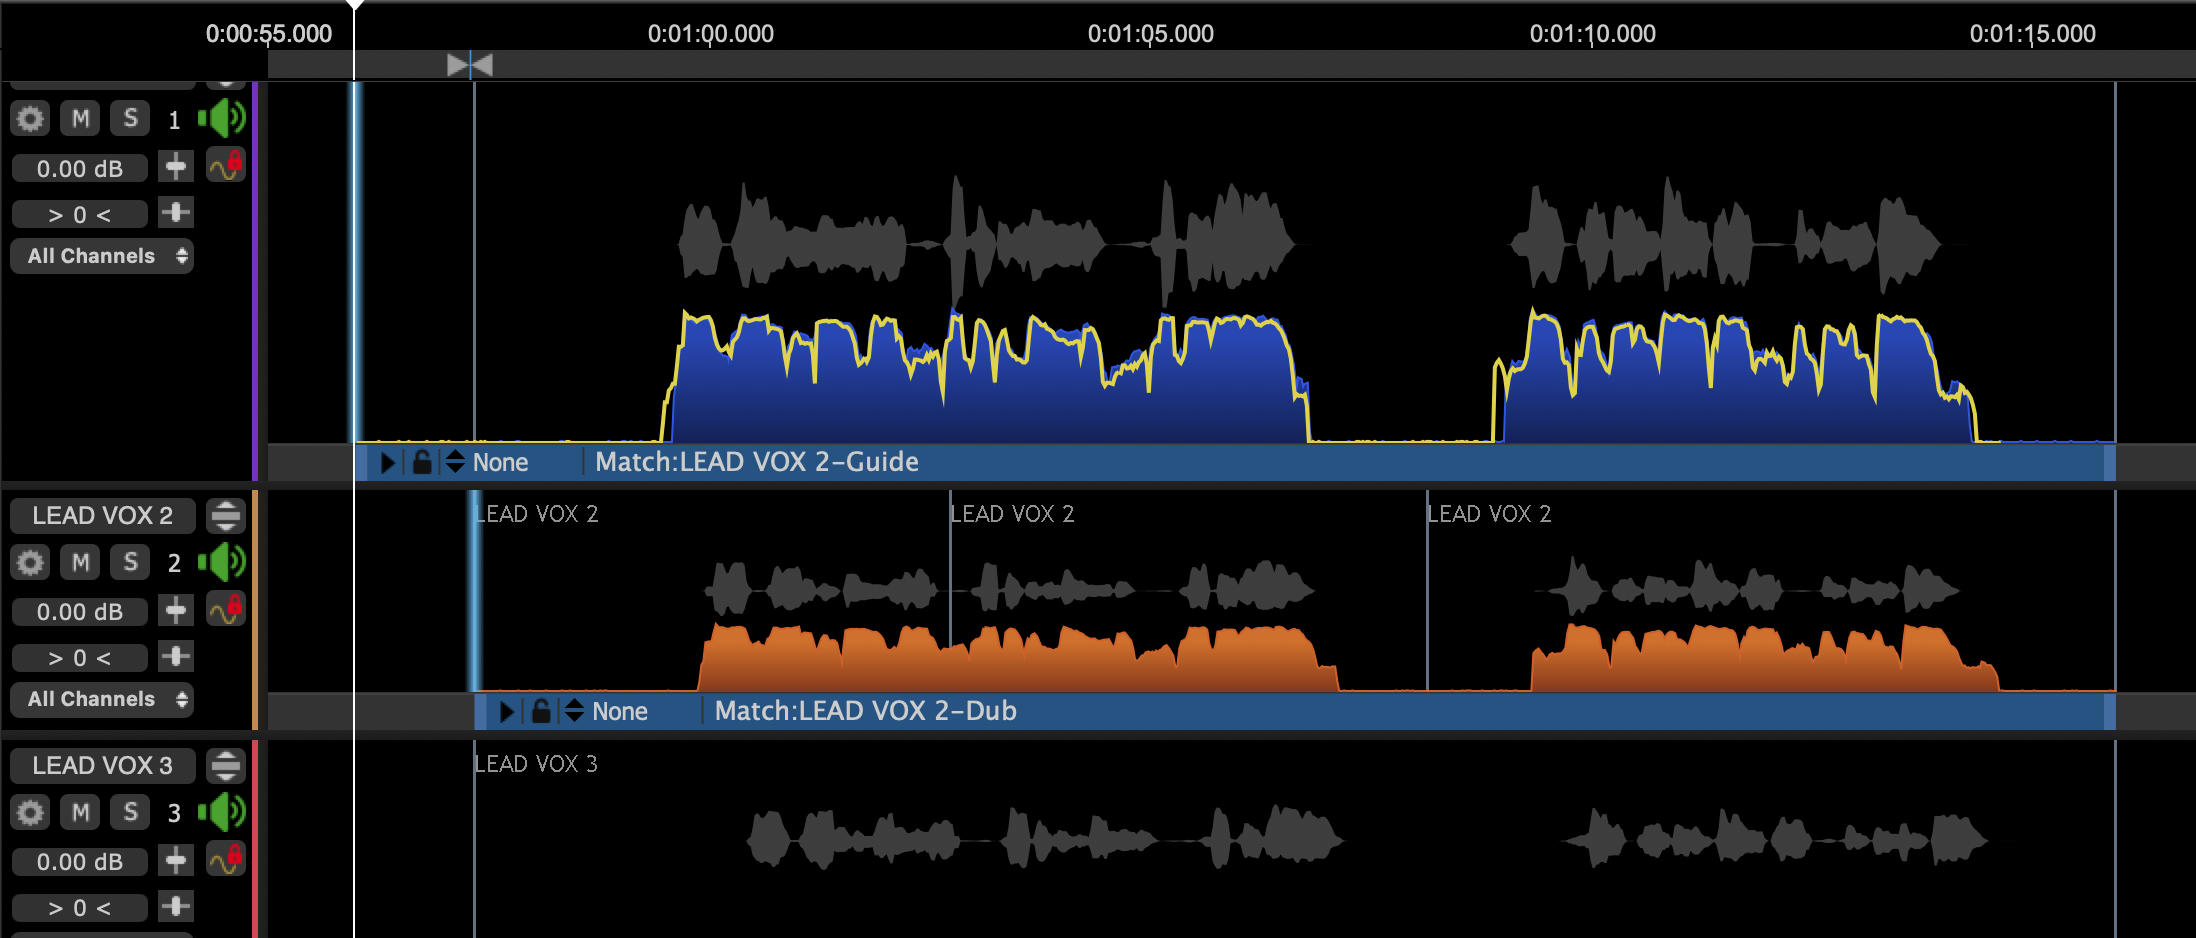
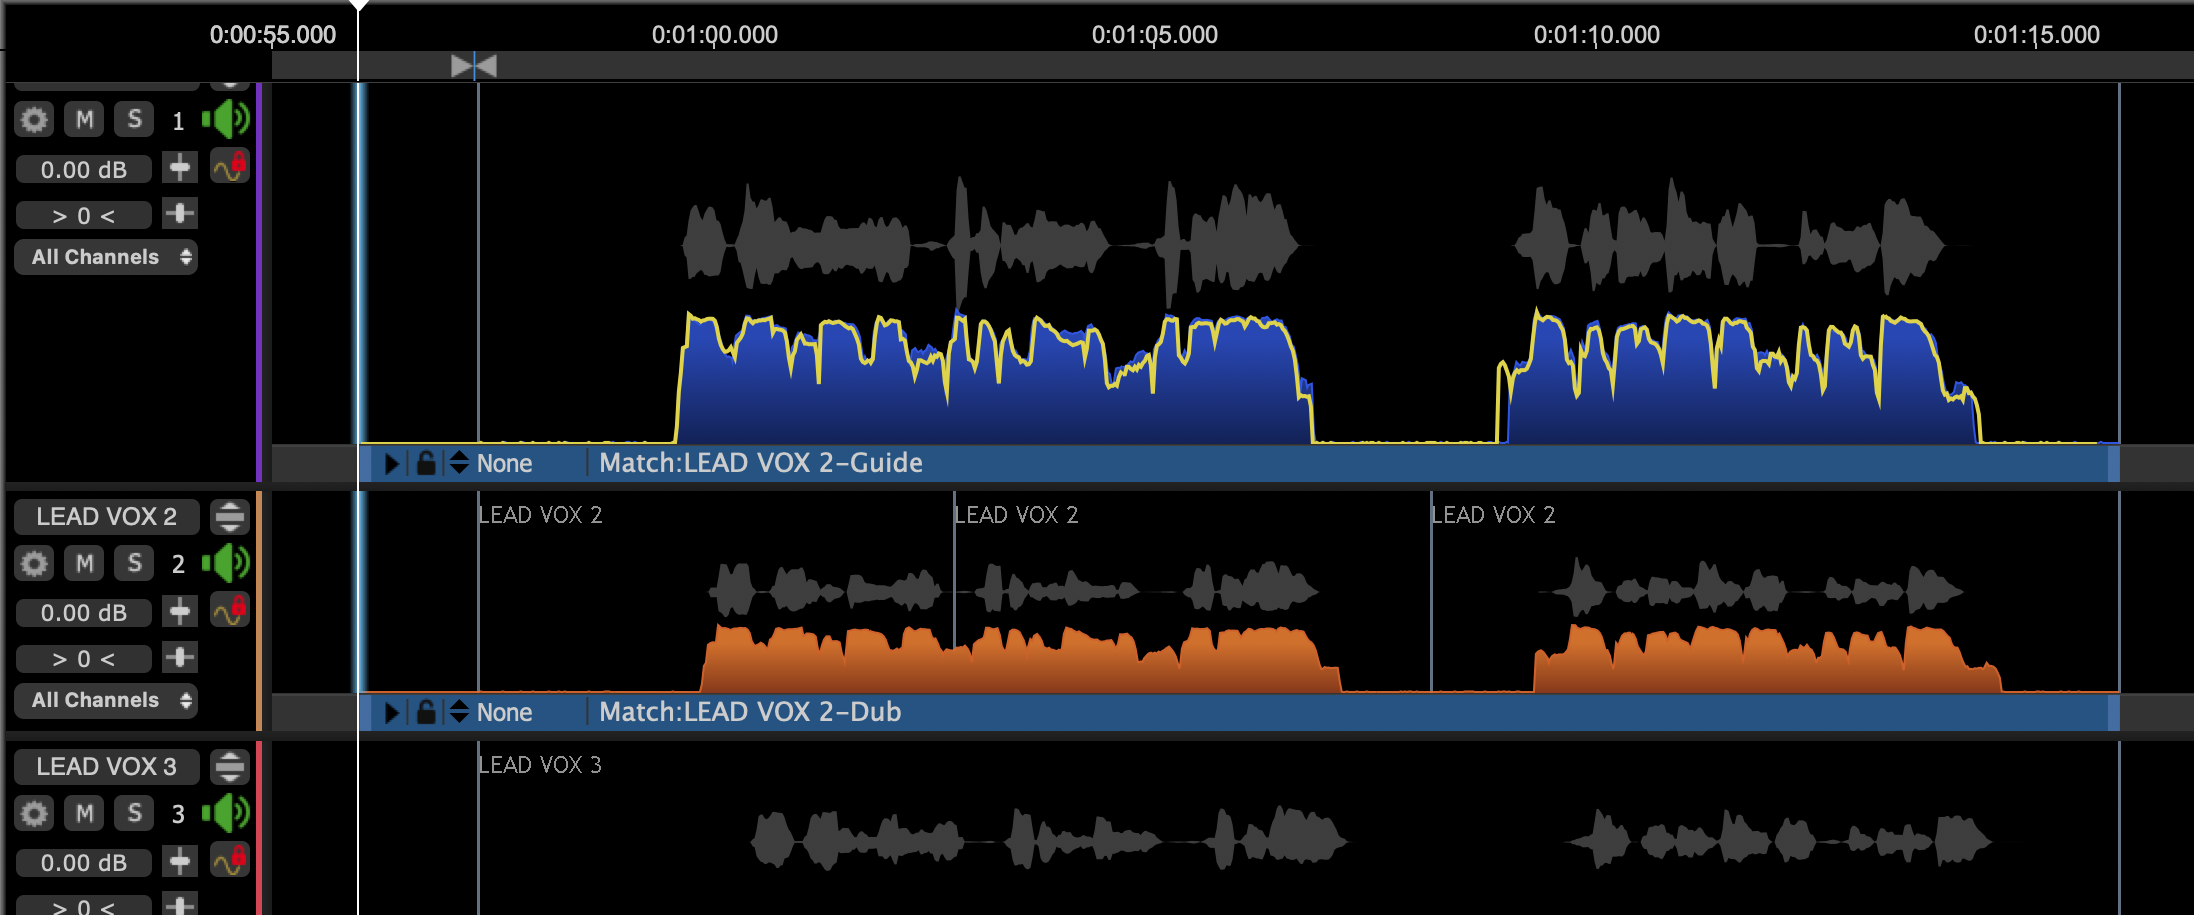
To make both the Guide and Dub blocks move together, hold down the SHIFT key before RIGHT CLICKing on the Guide or Dub Process Control Block and after selecting Set Selected Process Start to Playhead both Guide and Dub blocks will move as shown below for this example.
The same procedure of positioning the Playhead at the end of a section, RIGHT CLICKing on a Match input and selecting Set Selected Process End to playhead while holding the shift key will set the end of the process inputs.
Unless background processing is turned on, remember to Run the process after making any of these changes, which is most easily done automatically by pressing the Space Bar.