Manual Editing of Time, Pitch & Level with the APT process
Overview
Although the APT function was designed to provide automatic adjustments of a Dub audio signal based on features of the Guide audio signal, there are still many applications when manually editing the pitch, timing and/or loudness of an signal is an essential editing requirement.
Revoice Pro V2 introduced a powerful yet intuitive set of tools for manually editing the pitch, timing and level of audio signals output from an APT process. In addition, the Revoice Pro editing algorithms provide outstandingly high-quality results.
Manual Time and Pitch editing tools give you the option to not transfer audio out to other external time and pitch editing programs and, instead, do these adjustments comfortably and quickly within Revoice Pro.
Some of the main uses for manually editing signal features (pitch, timing and level) are quite common and include:
- Improving or altering the features, (usually the pitch) of a track that will be used as a Guide track in the APT process.
- Correcting or altering the pitch of a harmony track before using it as a Dub input to an APT process that will have only its timing aligned to the Guide.
The output of this APT process, however, can then be used as a harmony Guide track for correcting further harmony double tracks. - Manually adjusting the pitch and time of a solo vocal or any voice recording that is not being used with any other vocal track.
- Lastly, if required, making minor adjustments to the features in the output of an APT process.
TIP: If processing times seem slow, try making the APT Process Control blocks shorter (i.e. process sections of audio under, say, a minute in length).
Back to Index
Instructions for Manual Editing of Features
In the present version of Revoice Pro, only the output of an APT process can have its features (pitch, timing, level) adjusted manually.
That is simple to understand if one wishes to adjust the Output features (as in Item 4 above) of an APT process with both a Guide and Dub signals.
However, for the applications 1 to 3 listed above, a simple "trick" is currently required to edit a single signal's features manually as an APT Output.
The basic, simple idea behind this "trick" is that the same signal is used as both the Guide and the Dub inputs to the APT process. In upcoming versions of Revoice Pro, this will be simplified.
The steps to create a modifiable APT Output from one input signal are:
- Select the single waveform whose time and/or pitch features you want to adjust and press B on the keyboard to open the New Process window as shown below.
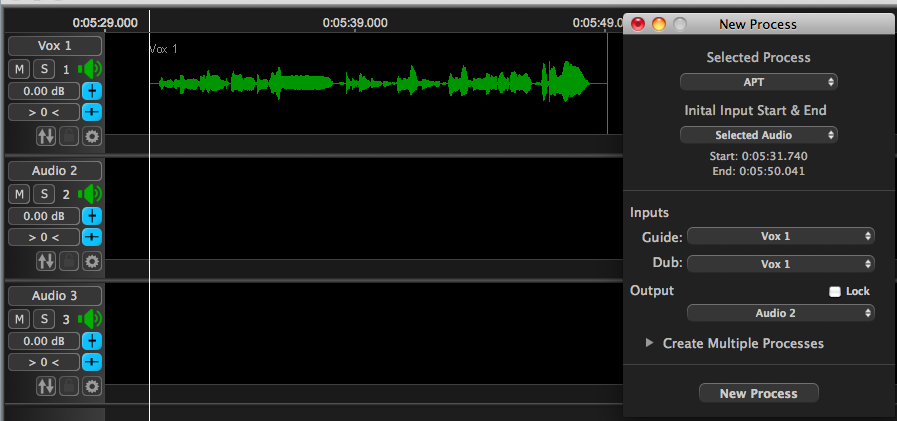
- Set both the Guide and Dub Inputs, to be the same track that contains the waveform requiring adjustment, which is "Vox 1" in the example New Process window above. Then, set the Output track. ("Audio 2" is selected in the example above).
- If not already set, open the APT Control Panel and either load the Factory Preset "Vocal - Tightest Time and Pitch" as show in image directly below, or simply set the APT Tolerance controls for Time, Pitch (and Level) to 0 in the as in the image after next.

- Process the audio by pressing Space Bar or [using CMD R (Mac) / Alt R (Windows)] or the Render button. The Output audio will appear in the designated Output track (e.g. Audio 2 as in this example shown below). This audio will initially sound exacty like the Guide / Dub signals.
- The difference is that you can now edit the Pitch and Time features shown in Audio Track 2 (and also the Level traces, if enabled).
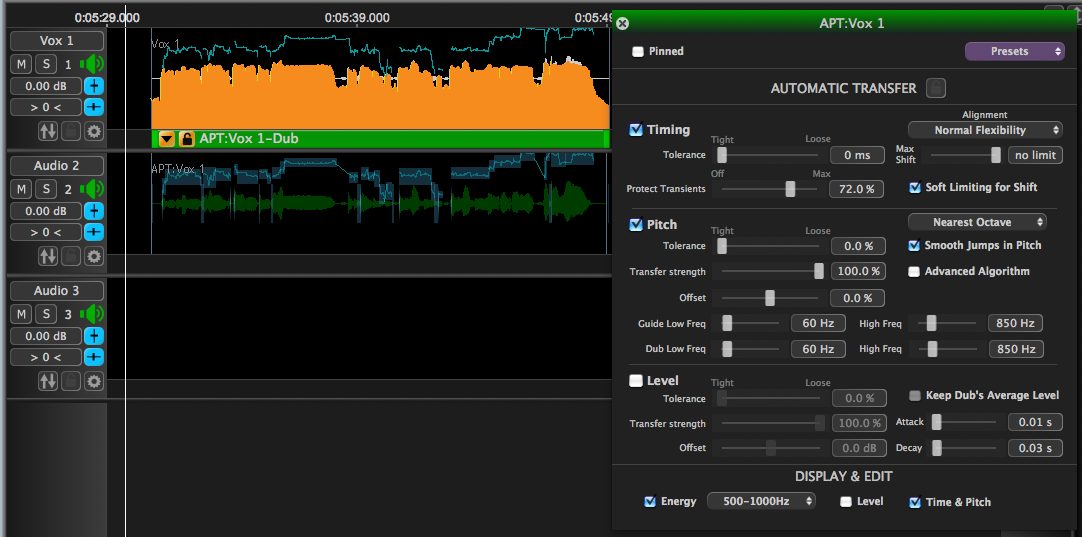
If you want to prevent the APT's automatic editing from running automatically and removing any manual changes you make, it is recommended that you set the APT "AUTOMATIC TRANSFER" lock to ON (red) as shown right.
Back to Index
Main Elements of Time and Pitch Editing Window
In the image below, we show the main elements that appear in the APT Output track. In the picture below, we show the Revoice Pro window as it would look after the "Show/Hide Full Height" button (at left) has been LEFT CLICKed in the multitrack display. This gives extra room for adjustments.
To return to the multi-track display, where most of the features will be visible, but much more compact in height, LEFT CLICK the same "Show/Hide Full Height" button.
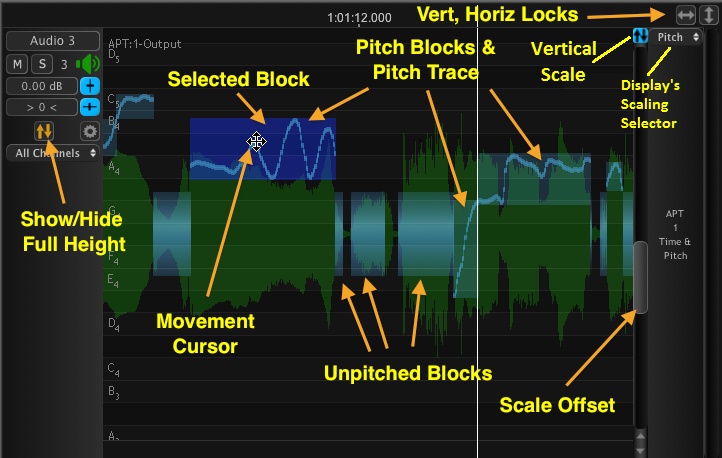
In this example, to keep the discussion more simple, in the Display & Edit section of this processes' APT Control Panel (not shown here), only the Time & Pitch selector has been turned ON, and Level is OFF.
Where the audio signal has a measurable Pitch, (as shown above) the pitch measurement traces are automatically Grouped inside Pitch Blocks, which are generally like single "notes" around an average pitch for a duration determined using the pitch group's trajectory.
One or more Blocks can be selected, as shown by the Block colour change, and if the mouse cursor is placed within a selected Block, the cursor shape will indicate the available movements, as will be explained in detail below here.
 Changing the display of pitch
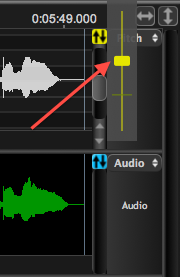
If the drop down Display's Scaling Selector at the top right of the Track window is showing the label "Pitch" (as above), then the display (but not the values) of pitch measurement traces can be "zoomed" (expanded or contracted) in height using the pop-up Vertical Scale control shown by red arrow at right.
In addition, the gray Scale Offset slider can move the pitch blocks and grid together up or down (without altering the notes) to bring the pitch blocks into the visible part of the display.
The measured groups of unpitched signal content (such as breaths and other noises) are shown as "Unpitched blocks", which are placed along the waveform's zero line. These blocks cannot be altered up or down (in Pitch).
Both Pitched and Unpitched Blocks can usually be stretched or compressed in time and sometimes be moved along the time axis depending on adjacent blocks.
Restricting movements of Pitched and Unpitched Blocks
![]() As long as the Horizontal (time) and Vertical (pitch) locks in the upper right hand corner are unlocked (as shown right), then
As long as the Horizontal (time) and Vertical (pitch) locks in the upper right hand corner are unlocked (as shown right), then
- Pitch Blocks can have both Vertical movements, i.e. up and down in pitch, and Horizontal movements, i.e. forward or backward in time as well as shortening or lengthening blocks (and the corresponding part of the output waveform) in time.
- Unpitched Blocks can generally only have Horizontal (i.e. right and left in time or modification of duration) movements, since they have no pitch.
![]() Turning one or both Locks ON (red) as shown right, will prohibit the Horizontal (i.e. time) and/or Vertical (i.e. pitch) motion editing respectively along the whole track.
Turning one or both Locks ON (red) as shown right, will prohibit the Horizontal (i.e. time) and/or Vertical (i.e. pitch) motion editing respectively along the whole track.
These Locks can also be toggled using the Keyboard Quick-keys:
H key for Horizontal and V key for Vertical.
Back to Index
Manually Editing APT Output Time and Pitch
Before editing time and/or pitch, use the Vertical scale (zoom) and Offset sliders to move the pitch trace and blocks into view in the track, and expanded enough to manipulate with the mouse. The result should look generally similar to those below with pitch contours visible.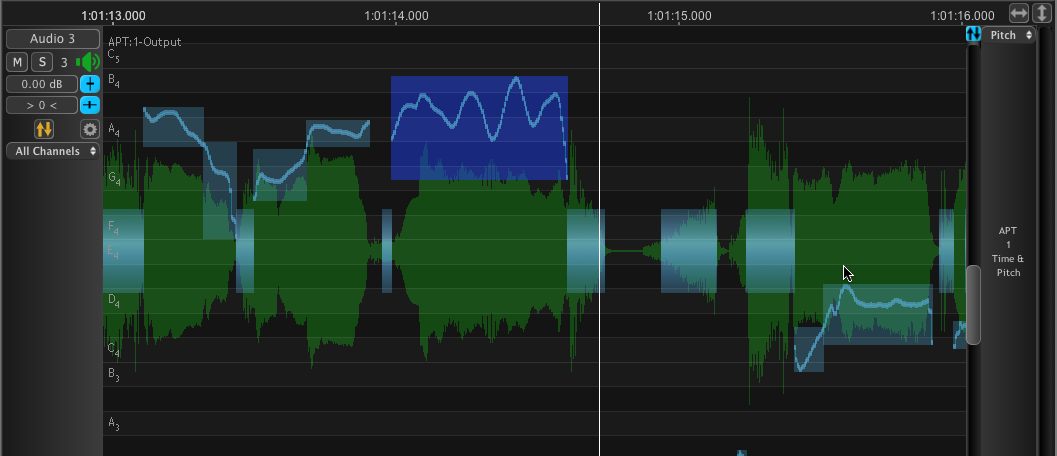
Dividing, Un-grouping and Grouping measurements in Blocks
Although most editing will be based on moving the automatically-created grouped blocks of measurements, these blocks can also be combined or split using commands in the menu shown below which appears when RIGHT CLICKing in the APT outupt track Pitch display.
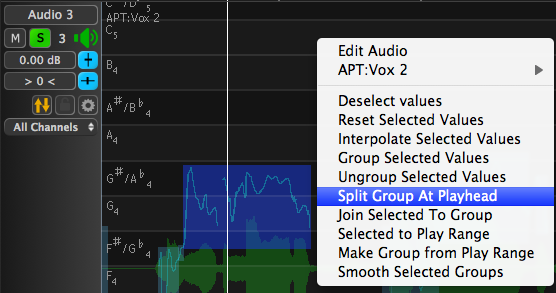
If the Playhead is placed at the point of required split, then RIGHT CLICKing the track and selecting Split Group at Playhead from the pop-up menu will divide the pitch block at the Playhead into two blocks.
In addition, the command Un-group Selected Values can be used to revert to the individual measurements in order to adjust them individually. Or individual un-grouped measurements can be "Regrouped" in one of two ways:
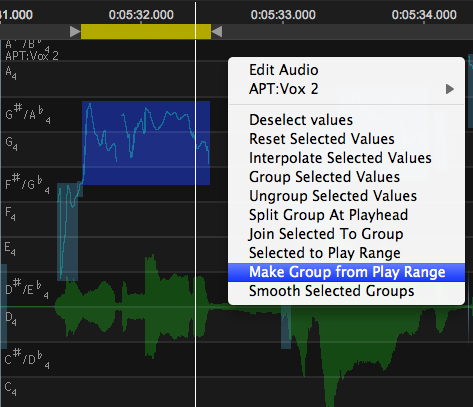 As shown right, create a Playback range (yellow bar at the top) that is the length of the signal section where you want to group the pitch measurements together. Then RIGHT CLICK in the output track and select Make Group from Play Range.
- Select one pitch value with the mouse cursor, holding SHIFT key down, moving the cursor going to last measurement to put in new group, RIGHT CLICK and select Group Selected Values.
In the rest of this section, we will only discuss modifying Blocks of grouped measurements.
Pitch Block Cursor shapes and operations
The pitch blocks (shown in blue) behave like a position dependant tool selection menu. In other words, as you move the mouse cursor around or in the block, the cursor will change shape to show you what "tool" can be used to modify the signal and in which directions the block can be manipulated.
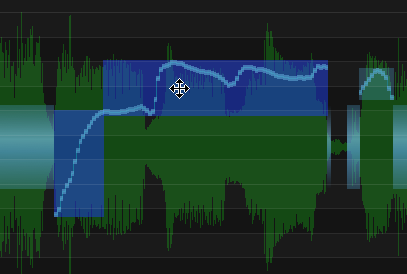 In many cases, neighboring blocks can stop sideways movement unless they become included in a Group of Blocks. These can be made by LEFT CLICKing a first Block as an anchor point, and then holding down the SHIFT key and LEFT CLICKing on the "last" Block to include in the new Group of Blocks. This operation can be done repeatedly down the timeline. The example right shows a Group has been made of two Pitch Blocks.
The different Cursor Shapes and associated movements are relatively self-explanatory, but will be described for completeness. In images below of blocks with a white dot opposite the cursor, the dot is an anchor point for the movement.
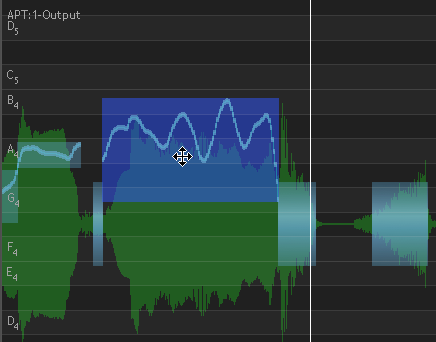
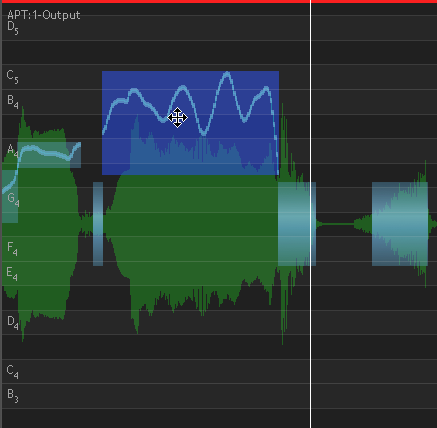
Below, move block up and down in pitch and sideways in time (shown later).
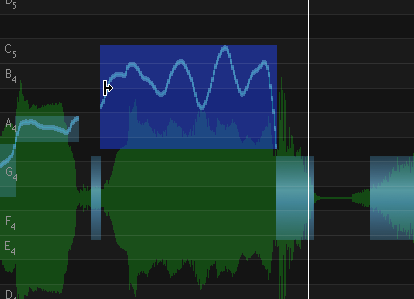
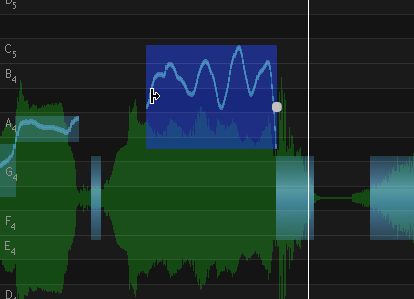
Below, move Left Edge of Block right or left and time expand or compress the signal.
Below, right Edge has been moved left to compress the duration.
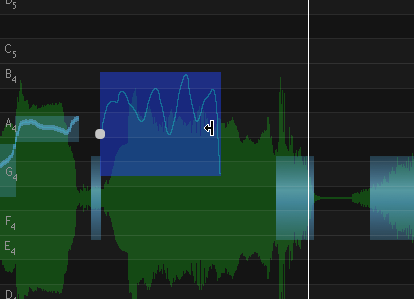
Below, bottom Edge has moved upward.
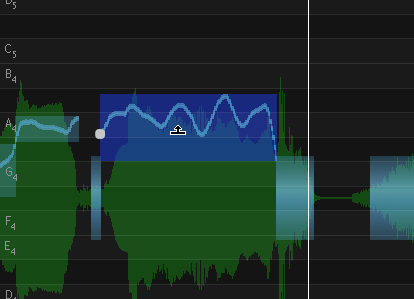
Below, top edge has moved down
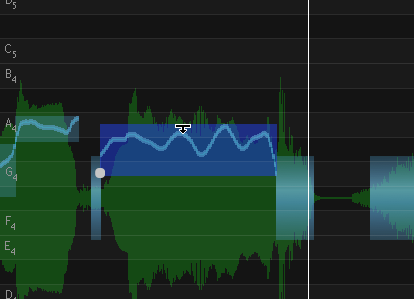
Below, edge joining two blocks has been dragged left, making left Pitched block narrower and right Unpitched block longer.
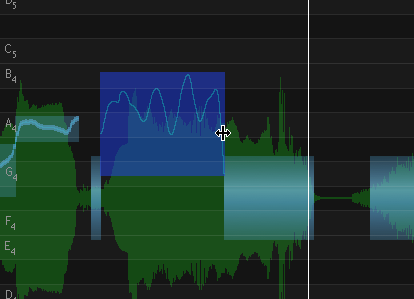
Below, the upper corner can be dragged both up and down and left and right.
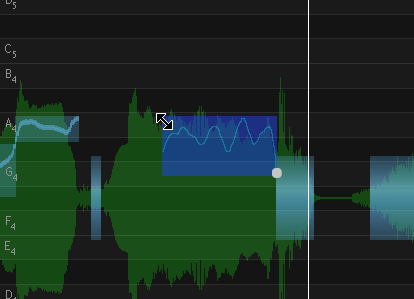
Unpitched block below can be moved right or left (not up or down).

If the Horizontal Lock is on, the pitch block can only be moved up or down as shown by the cursor.

Back to Index
Tilting and Un-tilting Pitch Groups
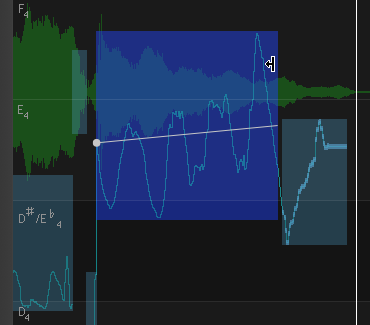
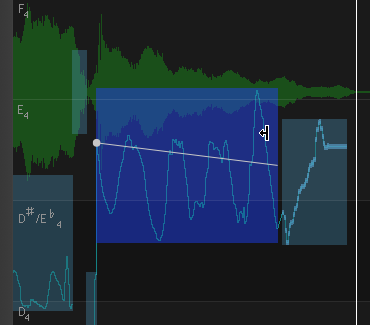
If the ALT (Mac) / Ctrl (Windows) key is held down when selecting an edge of a pitch group and the H lock is not ON, then when LEFT CLICKing, a white line will appear attached to the anchor point. This line will show the tilting that takes place as the mouse is dragged up or down.
In the example below, the mouse is dragged down in the second picture, which levels out the rising pitch contour in the block.
Smoothing Unnaturally Fast Pitch Changes
Sometimes a fast pitch change is created between blocks of pitch groups (for example by moving a block up or down). A smoothing function can quickly fix this.
In the image below, the selected pitch block is about to be moved downward a few semi tones.
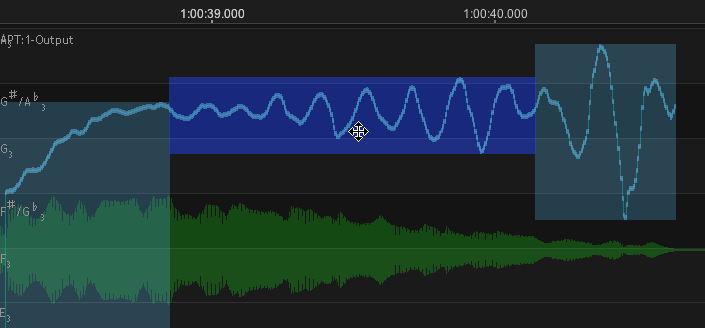
In the next image the centre pitch block has been dragged down two semi tones. This leaves a sharp drop at both the right and left side of the moved block, which is likely to sound unnatural.
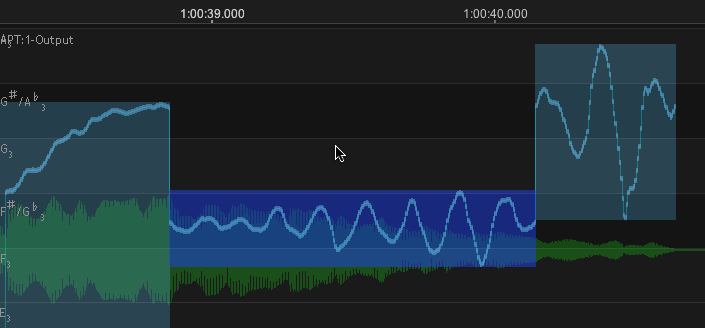
To smooth these edges at the same time, LEFT CLICK the pitch block at the left of the screen, hold SHIFT key down and LEFT CLICK the right hand pitch block, to select all three as shown in the image below.
Then RIGHT CLICK in the track to get the pop-up menu shown, and select Smooth Selected Groups.
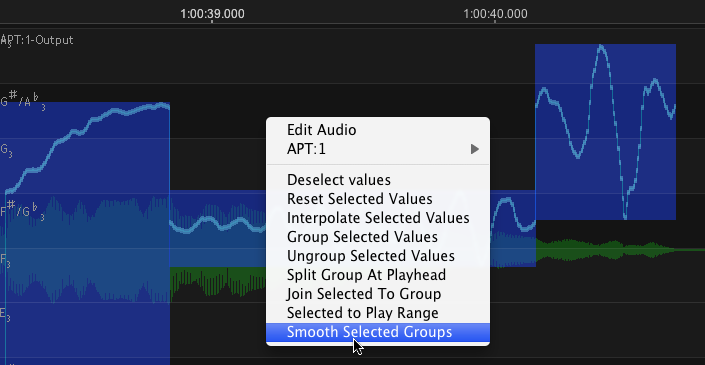
A smoothing function will be applied to the two transitions between the centre and the adjacent blocks, resulting in the two transitions being smoothed as shown below.
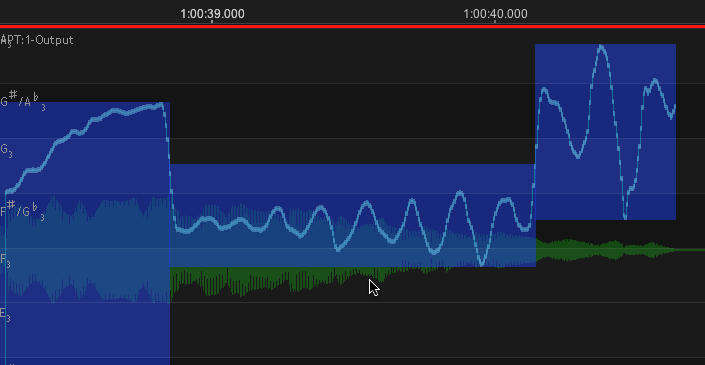
NOTES: if only two blocks had been selected, then only the one transition between the two selected blocks would have be created.
Resetting Edited Blocks and Groups after movement
 The last individual Edit can be undone one at a time with the CMD Z (Mac) / Ctrl Z (Windows) keys.
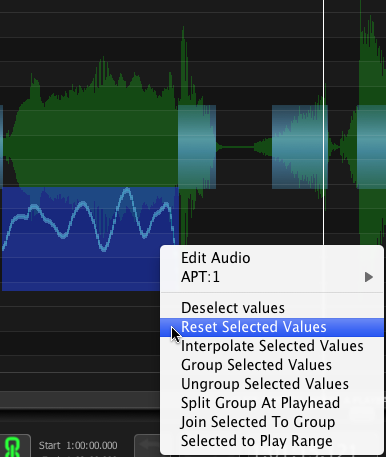
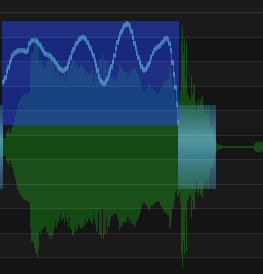
To go back immediately to the pitch and time values before editing started, LEFT CLICK a Block you wish to return to its original values to select it. Then, RIGHT CLICK it to bring up the menu shown below and select "Reset Selected Values"
The values will snap back to their Original measurements and positions as shown below.
Copying Groups of Pitch Values
An interesting feature of Revoice Pro is that Groups or values of pitch can be copied [using CMD C (Mac) / Ctrl C (Windows)] for example from one Pitch Block to another Pitch Block [using CMD V (Mac) / Ctrl V (Windows)].
The copied values will be distributed linearly in the destination group if there is a difference in duration of the source and destination.
Back to Index
Extending the Pitch Detection Range
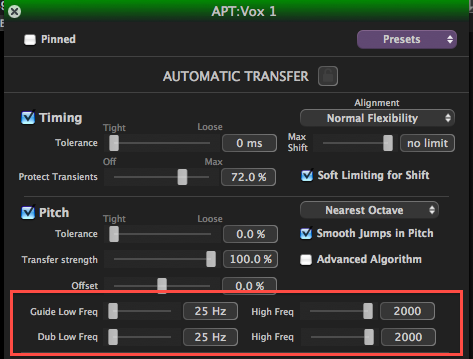 A new feature in Revoice Pro 2.5 is the ability to raise or lower the pitch detection range of both the lowest and highest pitches being processed in the APT and manual pitch editing functions.
This can make it possible to manually adjust or process the pitch of notes of voices and very low-pitched instruments (such as Bass guitars) or very high-pitched instruments such as flutes with extremely high quality.
As shown inside the red highlight in the image above, for both the Guide and Dub signals, the lowest frequency the pitch detectors can be set to is 25 Hz and the highest frequency is 2000 Hz. Normally, only the low or high limits would be adjusted for a particular signal's range. For the manual pitch adjusting "trick", set both the Guide and Dub to the same limits.
If the user wishes to visually set the low or high frequency limits, a graphical approach is described here.
NOTE: Extending the pitch processing range from the defauls of 60Hz to 850Hz does increase the processing time as well as (in some cases) the chance for pitch measurement errors.
Editing Level Manually
Level measurements and Blocks of Level measurements can also be manually edited.
To set this up, the following steps must be taken.
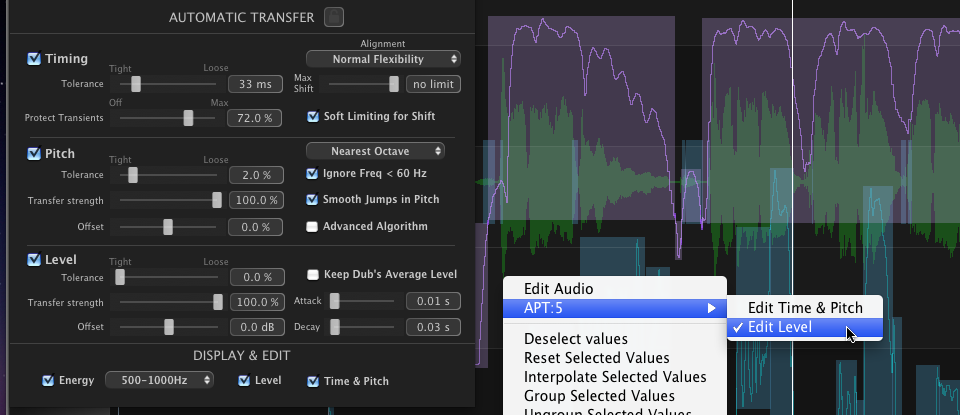
In the APT Control Panel, in the Display & Edit section at the bottom, Level must be selected ON.
In the Automatic Transfer section, Level should also be selected.
Also, RIGHT CLICK in the track to bring up the menu shown below, and use the mouse to LEFT CLICK the option Edit Level.
Once this is done, the Level Measurements will be initially automatically put in groups in Blocks, and the contours displayed as shown by the upper Level Trace in the image below. These Blocks can be edited in much the same way as Pitch blocks, mainly by manipulating the upper and lower edges of the Blocks.
Also, groups of Level values can be copied and pasted from one block to another.
Back to Index

